BACK | SECTION 3 |
|
|
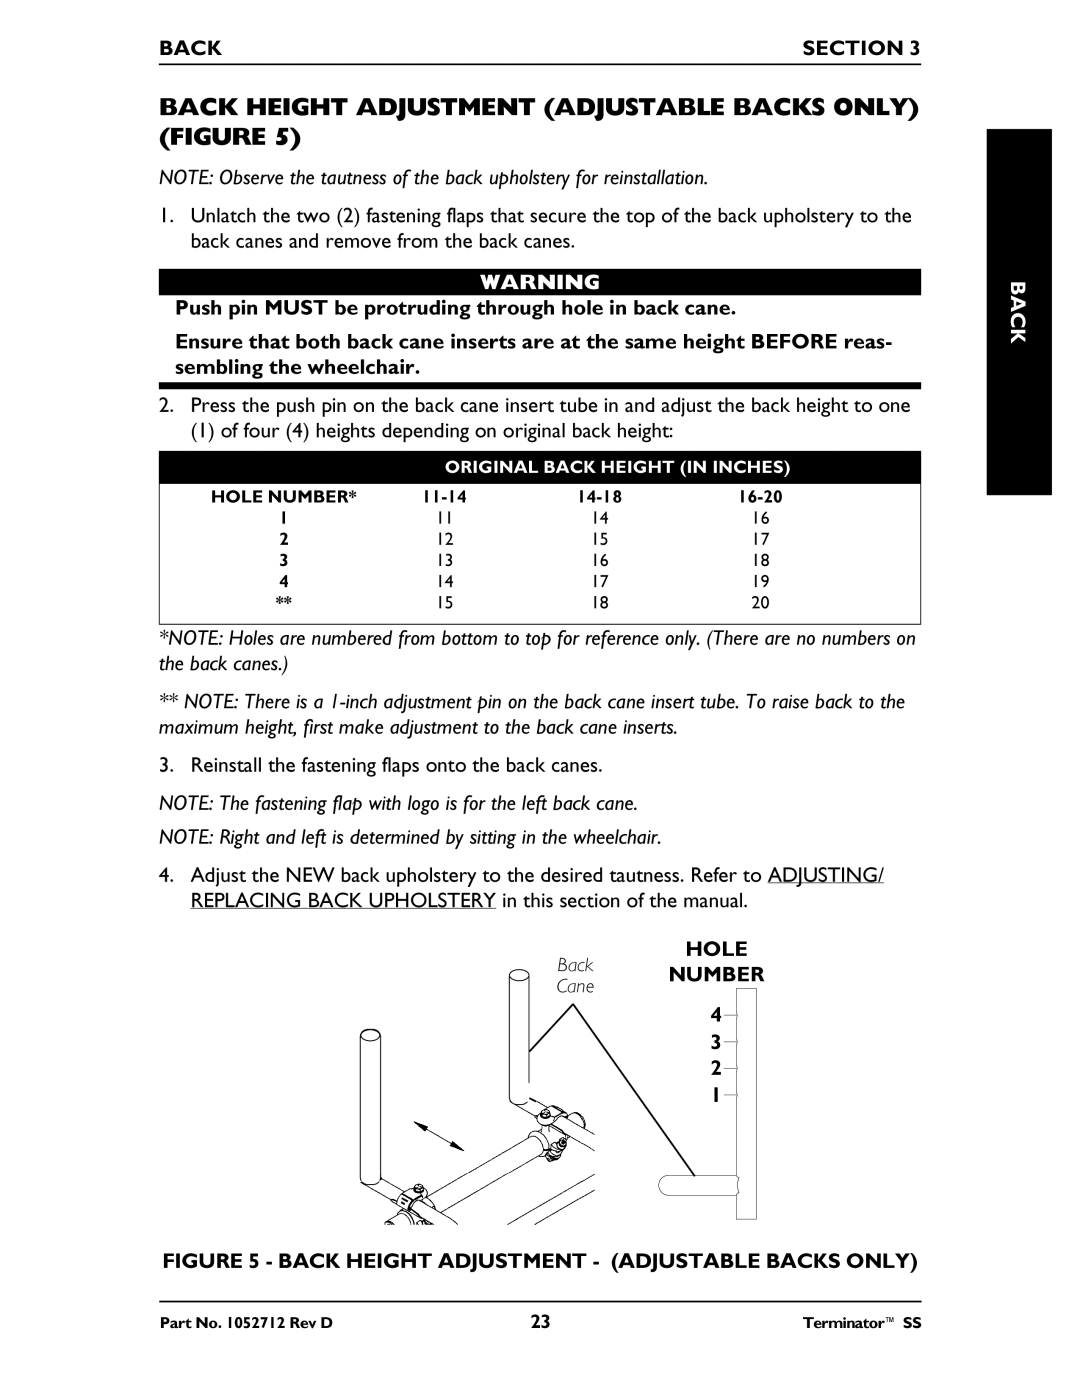
BACK HEIGHT ADJUSTMENT (ADJUSTABLE BACKS ONLY) (FIGURE 5)
NOTE: Observe the tautness of the back upholstery for reinstallation.
1.Unlatch the two (2) fastening flaps that secure the top of the back upholstery to the back canes and remove from the back canes.
WARNING
Push pin MUST be protruding through hole in back cane.
Ensure that both back cane inserts are at the same height BEFORE reas- sembling the wheelchair.
2.Press the push pin on the back cane insert tube in and adjust the back height to one
(1) of four (4) heights depending on original back height:
ORIGINAL BACK HEIGHT (IN INCHES)
HOLE NUMBER* | |||
1 | 11 | 14 | 16 |
2 | 12 | 15 | 17 |
3 | 13 | 16 | 18 |
4 | 14 | 17 | 19 |
** | 15 | 18 | 20 |
*NOTE: Holes are numbered from bottom to top for reference only. (There are no numbers on the back canes.)
**NOTE: There is a
3. Reinstall the fastening flaps onto the back canes.
NOTE: The fastening flap with logo is for the left back cane.
NOTE: Right and left is determined by sitting in the wheelchair.
4.Adjust the NEW back upholstery to the desired tautness. Refer to ADJUSTING/ REPLACING BACK UPHOLSTERY in this section of the manual.
HOLE
Back NUMBER
Cane
4
3
2
1
FIGURE 5 - BACK HEIGHT ADJUSTMENT - (ADJUSTABLE BACKS ONLY)
BACK
Part No. 1052712 Rev D | 23 | Terminator™ SS |
