SEAT
PROCEDURE 4 | SEAT |
|
|
This Procedure includes the following:
Seat Upholstery Replacement
Rear Seat Height Adjustment
Front Seat Height Adjustment
WARNING
After ANY adjustments, repair or service and BEFORE use, make sure all attaching hardware is tightened securely - otherwise injury or damage may result.
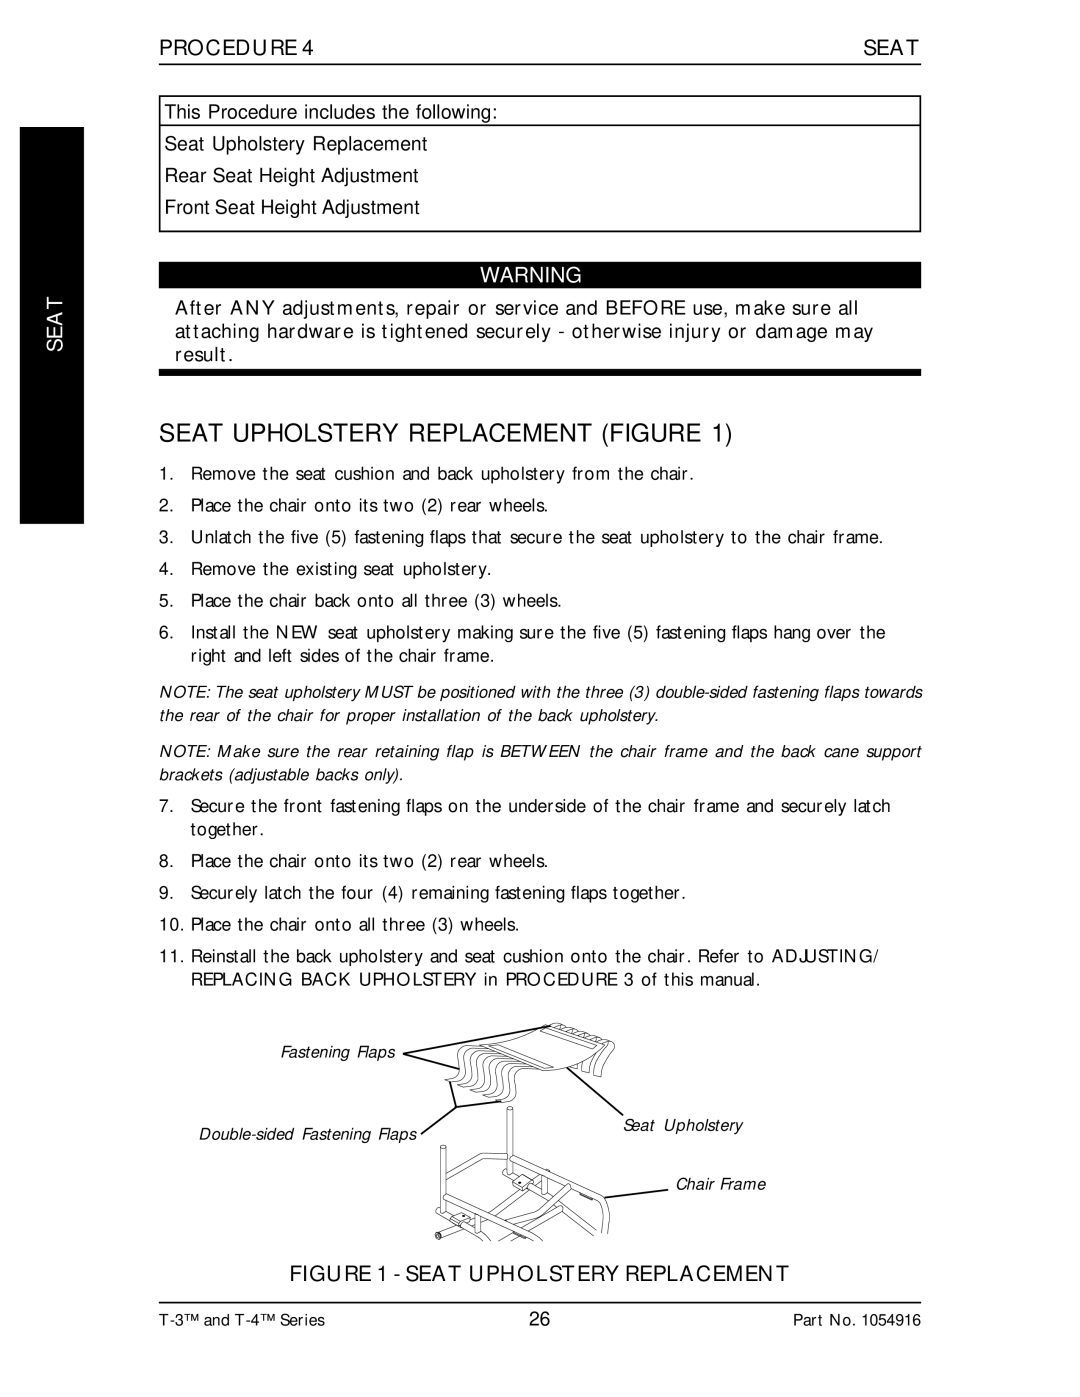
SEAT UPHOLSTERY REPLACEMENT (FIGURE 1)
1.Remove the seat cushion and back upholstery from the chair.
2.Place the chair onto its two (2) rear wheels.
3.Unlatch the five (5) fastening flaps that secure the seat upholstery to the chair frame.
4.Remove the existing seat upholstery.
5.Place the chair back onto all three (3) wheels.
6.Install the NEW seat upholstery making sure the five (5) fastening flaps hang over the right and left sides of the chair frame.
NOTE: The seat upholstery MUST be positioned with the three (3)
NOTE: Make sure the rear retaining flap is BETWEEN the chair frame and the back cane support brackets (adjustable backs only).
7.Secure the front fastening flaps on the underside of the chair frame and securely latch together.
8.Place the chair onto its two (2) rear wheels.
9.Securely latch the four (4) remaining fastening flaps together.
10.Place the chair onto all three (3) wheels.
11.Reinstall the back upholstery and seat cushion onto the chair. Refer to ADJUSTING/ REPLACING BACK UPHOLSTERY in PROCEDURE 3 of this manual.
Fastening Flaps |
|
Seat Upholstery | |
| |
| Chair Frame |
FIGURE 1 - SEAT UPHOLSTERY REPLACEMENT
26 | Part No. 1054916 |