BACK
BACK | PROCEDURE 3 |
|
|
BACK HEIGHT ADJUSTMENT (FIGURE 3)
NOTE: This procedure is for adjustable back chairs only.
NOTE: Note tautness of back upholstery for reinstallation.
1.Unlatch the two (2) fastening flaps that secure the top of the back upholstery to the back canes and remove from the back canes.
WARNING
Push pin MUST be protruding through hole in back cane.
Ensure that both back cane inserts are at the same height BEFORE reassembling chair.
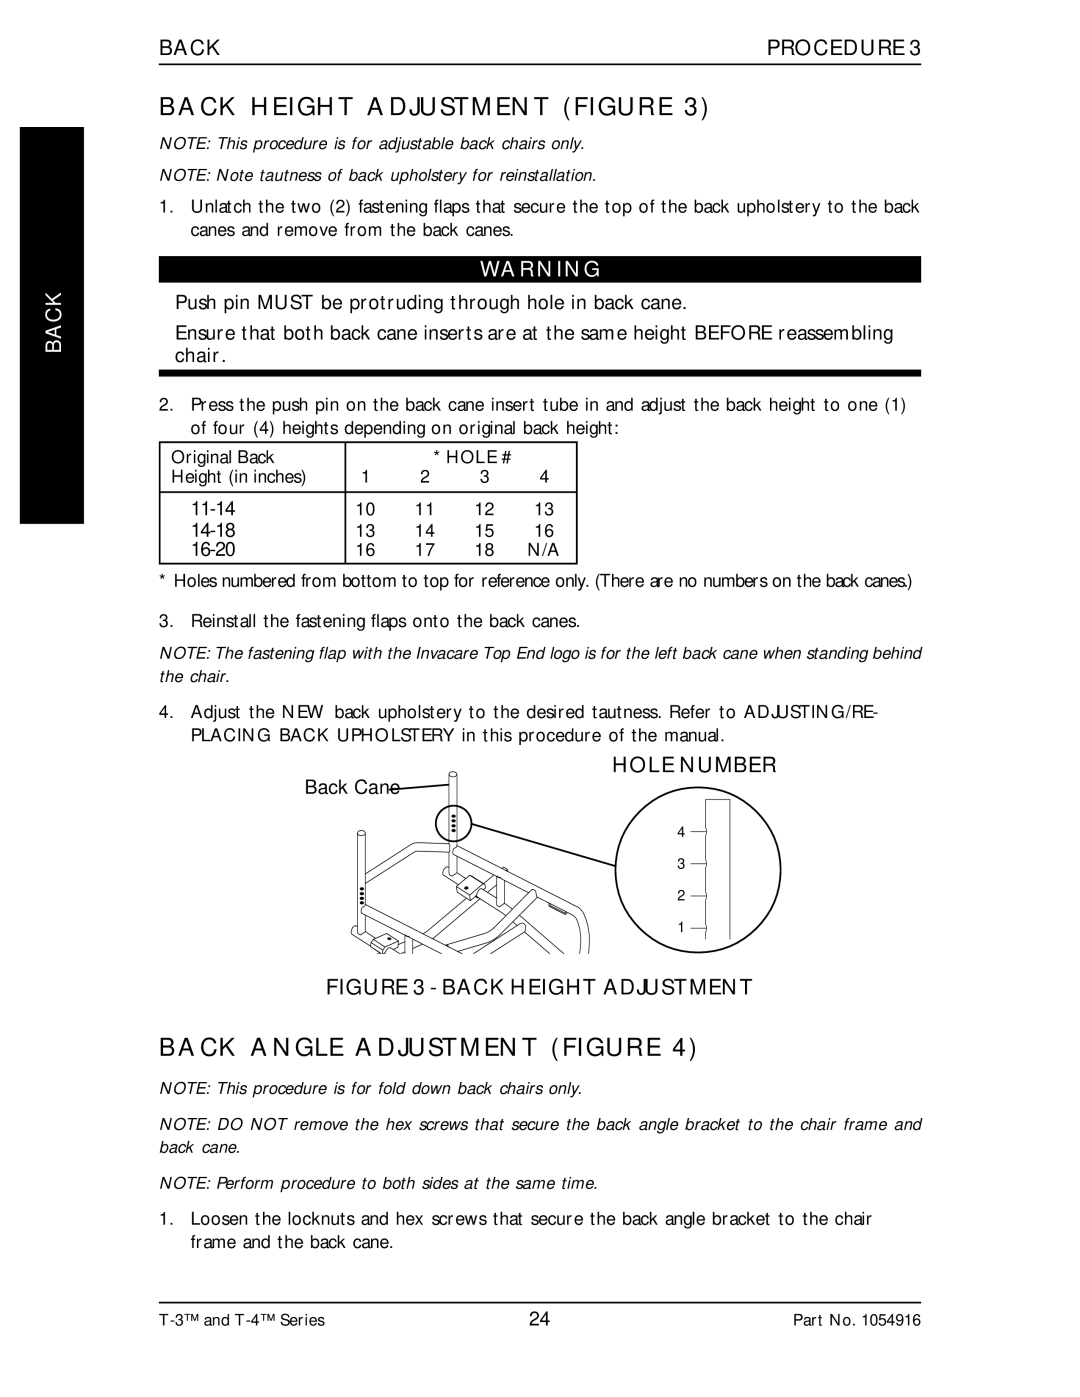
2.Press the push pin on the back cane insert tube in and adjust the back height to one (1) of four (4) heights depending on original back height:
Original Back |
| * HOLE # |
| |
Height (in inches) | 1 | 2 | 3 | 4 |
|
|
|
|
|
| 10 | 11 | 12 | 13 |
| 13 | 14 | 15 | 16 |
| 16 | 17 | 18 | N/A |
*Holes numbered from bottom to top for reference only. (There are no numbers on the back canes.)
3. Reinstall the fastening flaps onto the back canes.
NOTE: The fastening flap with the Invacare Top End logo is for the left back cane when standing behind the chair.
4.Adjust the NEW back upholstery to the desired tautness. Refer to ADJUSTING/RE- PLACING BACK UPHOLSTERY in this procedure of the manual.
HOLE NUMBER
Back Cane ![]()
4
3
2
1
FIGURE 3 - BACK HEIGHT ADJUSTMENT
BACK ANGLE ADJUSTMENT (FIGURE 4)
NOTE: This procedure is for fold down back chairs only.
NOTE: DO NOT remove the hex screws that secure the back angle bracket to the chair frame and back cane.
NOTE: Perform procedure to both sides at the same time.
1.Loosen the locknuts and hex screws that secure the back angle bracket to the chair frame and the back cane.
24 | Part No. 1054916 |