OPTIONAL | PROCEDURE 8 |
|
|
This Procedure includes the following:
Replacing/Adjusting Fixed
Installing/Adjusting Removable
WARNING
After ANY adjustments, repair or service and BEFORE use, make sure all attaching hardware is tightened securely - otherwise injury or damage may result.
REPLACING/ADJUSTING FIXED ANTI-TIPPER SWIVEL CASTER
T-3 ELITE AND T-4 ELITE WITH FIXED CAMBER TUBE (FIGURE 1)
Replacement.
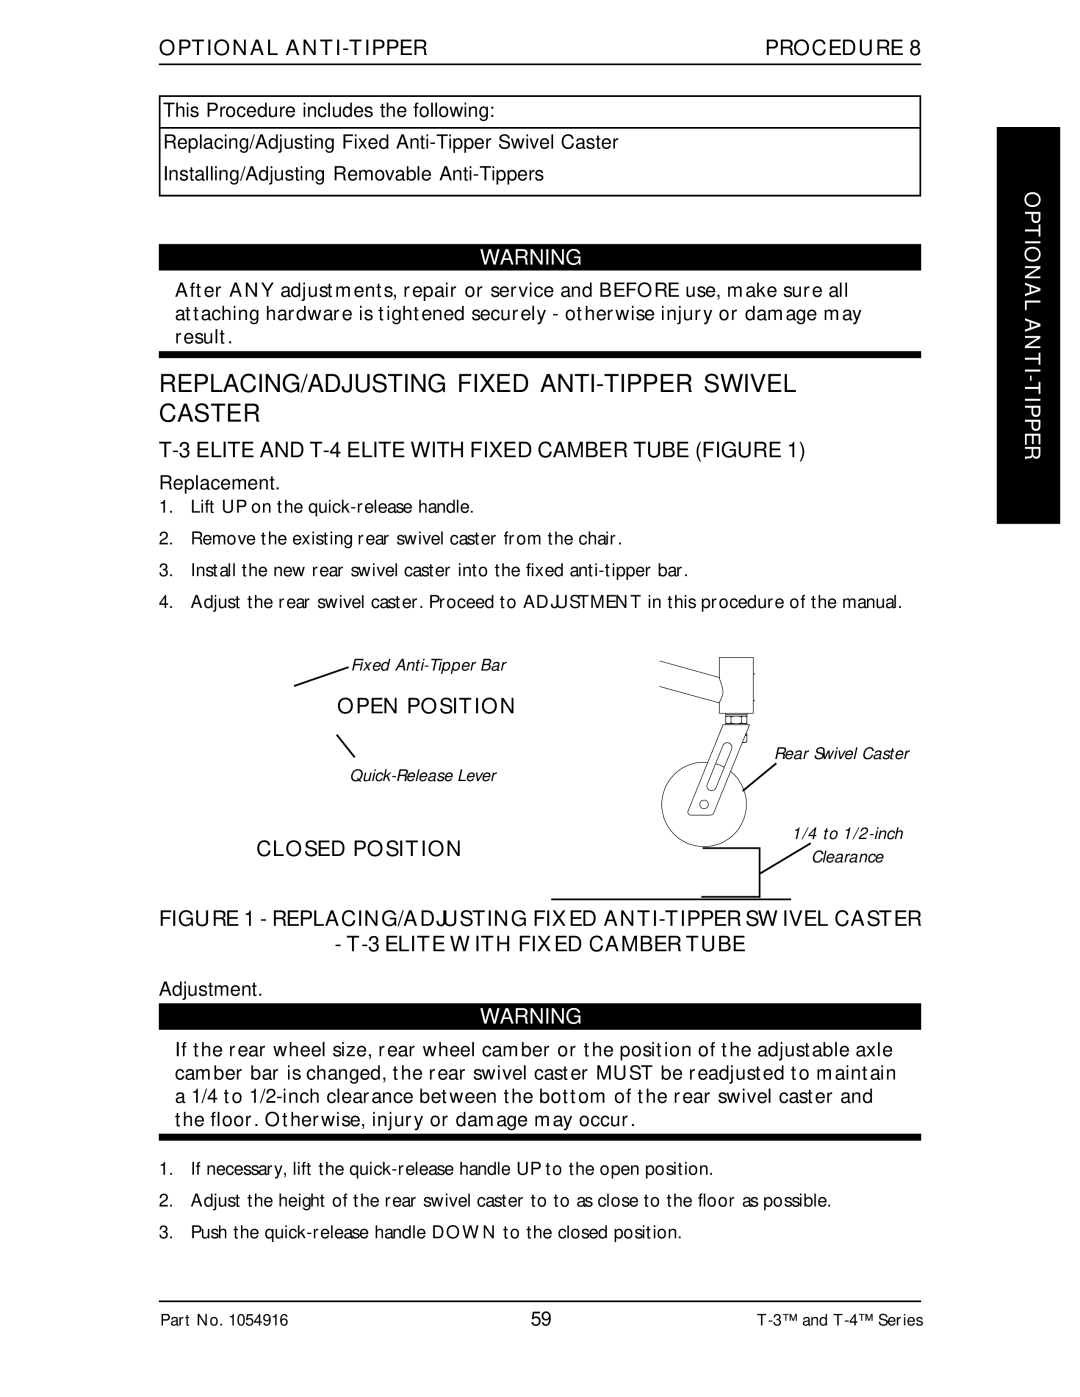
1.Lift UP on the
2.Remove the existing rear swivel caster from the chair.
3.Install the new rear swivel caster into the fixed
4.Adjust the rear swivel caster. Proceed to ADJUSTMENT in this procedure of the manual.
Fixed
OPEN POSITION
![]() Rear Swivel Caster
Rear Swivel Caster
CLOSED POSITION | 1/4 to | |
Clearance | ||
|
FIGURE 1 - REPLACING/ADJUSTING FIXED ANTI-TIPPER SWIVEL CASTER
- T-3 ELITE WITH FIXED CAMBER TUBE
Adjustment.
WARNING
If the rear wheel size, rear wheel camber or the position of the adjustable axle camber bar is changed, the rear swivel caster MUST be readjusted to maintain a 1/4 to
1.If necessary, lift the
2.Adjust the height of the rear swivel caster to to as close to the floor as possible.
3.Push the
OPTIONAL ANTI-TIPPER
Part No. 1054916 | 59 |
