Self-diagnostic indication
When something abnormal occurs with the monitor, this function informs you of the condition of the monitor with the
If the trouble still persists, follow the procedure below:
1 Check which lamps are lit or flashing. |
On the |
corresponding lamp or lamps. |
• Only one lamp may light or flash, or all three lamps may do so. |
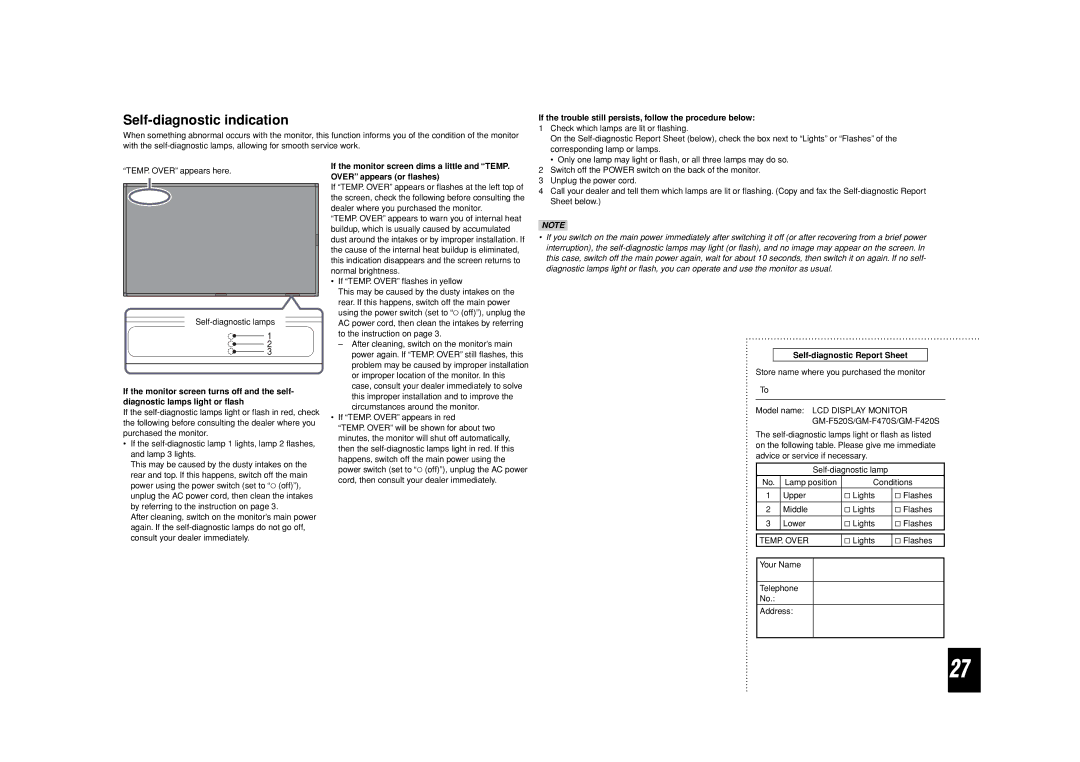
“TEMP. OVER” appears here.
If the monitor screen turns off and the self- diagnostic lamps light or flash
If the
•If the
This may be caused by the dusty intakes on the rear and top. If this happens, switch off the main power using the power switch (set to “‡ (off)”), unplug the AC power cord, then clean the intakes by referring to the instruction on page 3.
After cleaning, switch on the monitor’s main power again. If the
If the monitor screen dims a little and “TEMP. OVER” appears (or flashes)
If “TEMP. OVER” appears or flashes at the left top of the screen, check the following before consulting the dealer where you purchased the monitor.
“TEMP. OVER” appears to warn you of internal heat buildup, which is usually caused by accumulated dust around the intakes or by improper installation. If the cause of the internal heat buildup is eliminated, this indication disappears and the screen returns to normal brightness.
•If “TEMP. OVER” flashes in yellow
This may be caused by the dusty intakes on the rear. If this happens, switch off the main power using the power switch (set to “‡ (off)”), unplug the AC power cord, then clean the intakes by referring to the instruction on page 3.
–After cleaning, switch on the monitor’s main power again. If “TEMP. OVER” still flashes, this problem may be caused by improper installation or improper location of the monitor. In this case, consult your dealer immediately to solve this improper installation and to improve the circumstances around the monitor.
•If “TEMP. OVER” appears in red
“TEMP. OVER” will be shown for about two minutes, the monitor will shut off automatically, then the
2 | Switch off the POWER switch on the back of the monitor. |
3 | Unplug the power cord. |
4 | Call your dealer and tell them which lamps are lit or flashing. (Copy and fax the |
| Sheet below.) |
NOTE
•If you switch on the main power immediately after switching it off (or after recovering from a brief power interruption), the
Self-diagnostic Report Sheet
Store name where you purchased the monitor
To
Model name: LCD DISPLAY MONITOR
The
No. | Lamp position | Conditions | ||
1 | Upper | & Lights | & Flashes | |
|
|
|
|
|
2 | Middle | & Lights | & Flashes | |
|
|
|
|
|
3 | Lower | & Lights | & Flashes | |
|
|
|
|
|
TEMP. OVER | & Lights | & Flashes | ||
|
|
|
| |
Your Name |
|
|
| |
|
|
|
| |
Telephone |
|
|
| |
No.: |
|
|
|
|
Address: |
|
|
| |
|
|
|
|
|
27