![](/images/new-backgrounds/1140888/14088819x1.webp)
10EN
![](/images/new-backgrounds/1140888/14088819xi14.webp)
![](/images/new-backgrounds/1140888/14088819xi15.webp)
![](/images/new-backgrounds/1140888/14088819xi16.webp)
![](/images/new-backgrounds/1140888/14088819xi17.webp)
![](/images/new-backgrounds/1140888/14088819xi18.webp)
![](/images/new-backgrounds/1140888/14088819xi19.webp)
![](/images/new-backgrounds/1140888/14088819xi20.webp)
![](/images/new-backgrounds/1140888/14088819xi21.webp)
![](/images/new-backgrounds/1140888/14088819xi22.webp)
![](/images/new-backgrounds/1140888/14088819xi23.webp)
![](/images/new-backgrounds/1140888/14088819xi24.webp)
![](/images/new-backgrounds/1140888/14088819xi25.webp)
![](/images/new-backgrounds/1140888/14088819xi26.webp)
![](/images/new-backgrounds/1140888/14088819xi27.webp)
![](/images/new-backgrounds/1140888/14088819xi28.webp)
![](/images/new-backgrounds/1140888/14088819xi29.webp)
![](/images/new-backgrounds/1140888/14088819xi30.webp)
![](/images/new-backgrounds/1140888/14088819xi31.webp)
![](/images/new-backgrounds/1140888/14088819xi32.webp)
![](/images/new-backgrounds/1140888/14088819xi33.webp)
![](/images/new-backgrounds/1140888/14088819xi34.webp)
![](/images/new-backgrounds/1140888/14088819xi35.webp)
![](/images/new-backgrounds/1140888/14088819xi36.webp)
![](/images/new-backgrounds/1140888/14088819xi37.webp)
![](/images/new-backgrounds/1140888/14088819xi38.webp)
![](/images/new-backgrounds/1140888/14088819xi39.webp)
![](/images/new-backgrounds/1140888/14088819xi40.webp)
![](/images/new-backgrounds/1140888/14088819xi41.webp)
![](/images/new-backgrounds/1140888/14088819xi42.webp)
GETTING
STARTED
(cont.)![](/images/new-backgrounds/1140888/14088819xi46.webp)
A
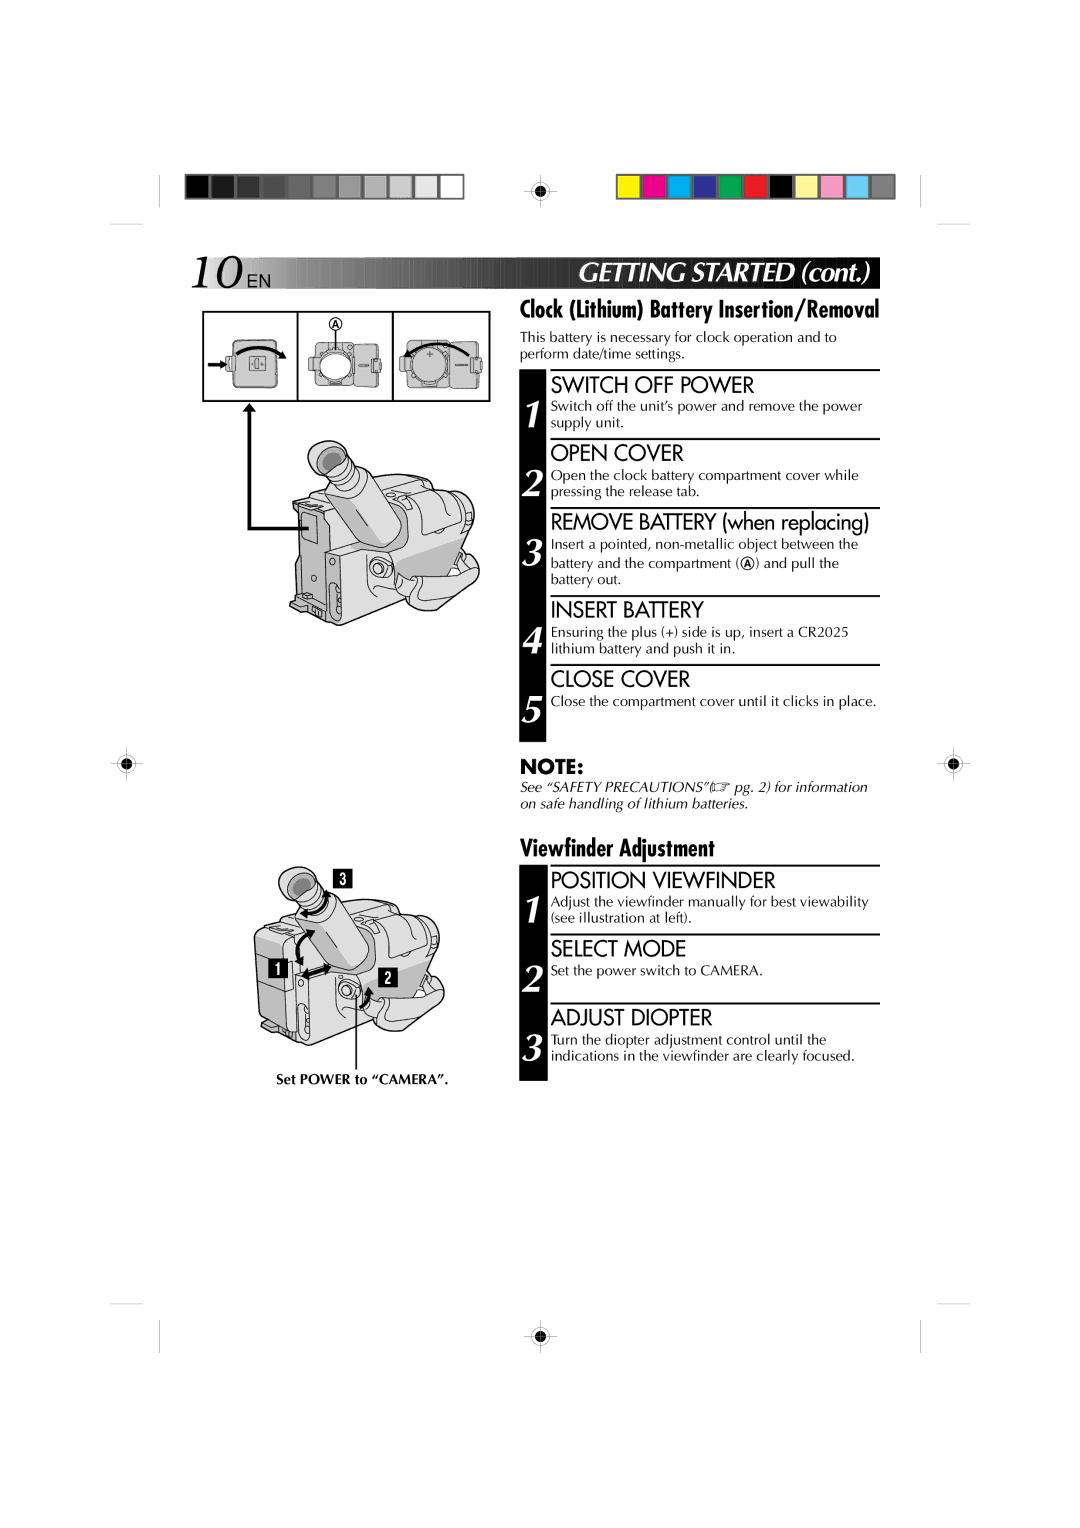
Clock (Lithium) Battery Insertion/Removal
This battery is necessary for clock operation and to perform date/time settings.
SWITCH OFF POWER
1 Switch off the unit’s power and remove the power supply unit.
OPEN COVER
2 Open the clock battery compartment cover while pressing the release tab.
REMOVE BATTERY (when replacing)
3 Insert a pointed,
INSERT BATTERY
4 Ensuring the plus (+) side is up, insert a CR2025 lithium battery and push it in.
CLOSE COVER
5 Close the compartment cover until it clicks in place.
NOTE:
See “SAFETY PRECAUTIONS”(☞ pg. 2) for information on safe handling of lithium batteries.
3
1 2
Set POWER to “CAMERA”.
Viewfinder Adjustment
POSITION VIEWFINDER
1 Adjust the viewfinder manually for best viewability (see illustration at left).
SELECT MODE
2 Set the power switch to CAMERA.
ADJUST DIOPTER
3 Turn the diopter adjustment control until the indications in the viewfinder are clearly focused.