30![]()
![]()
![]() EN
EN ![]()
![]()
![]()
![]()
![]()
![]()
![]()
![]()
![]()
![]()
![]()
![]()
![]()
![]()
![]()
![]()
![]()
![]()
![]()
![]()
![]()
![]()
![]()
![]()
![]()
![]()
![]()
![]()
![]()
![]()
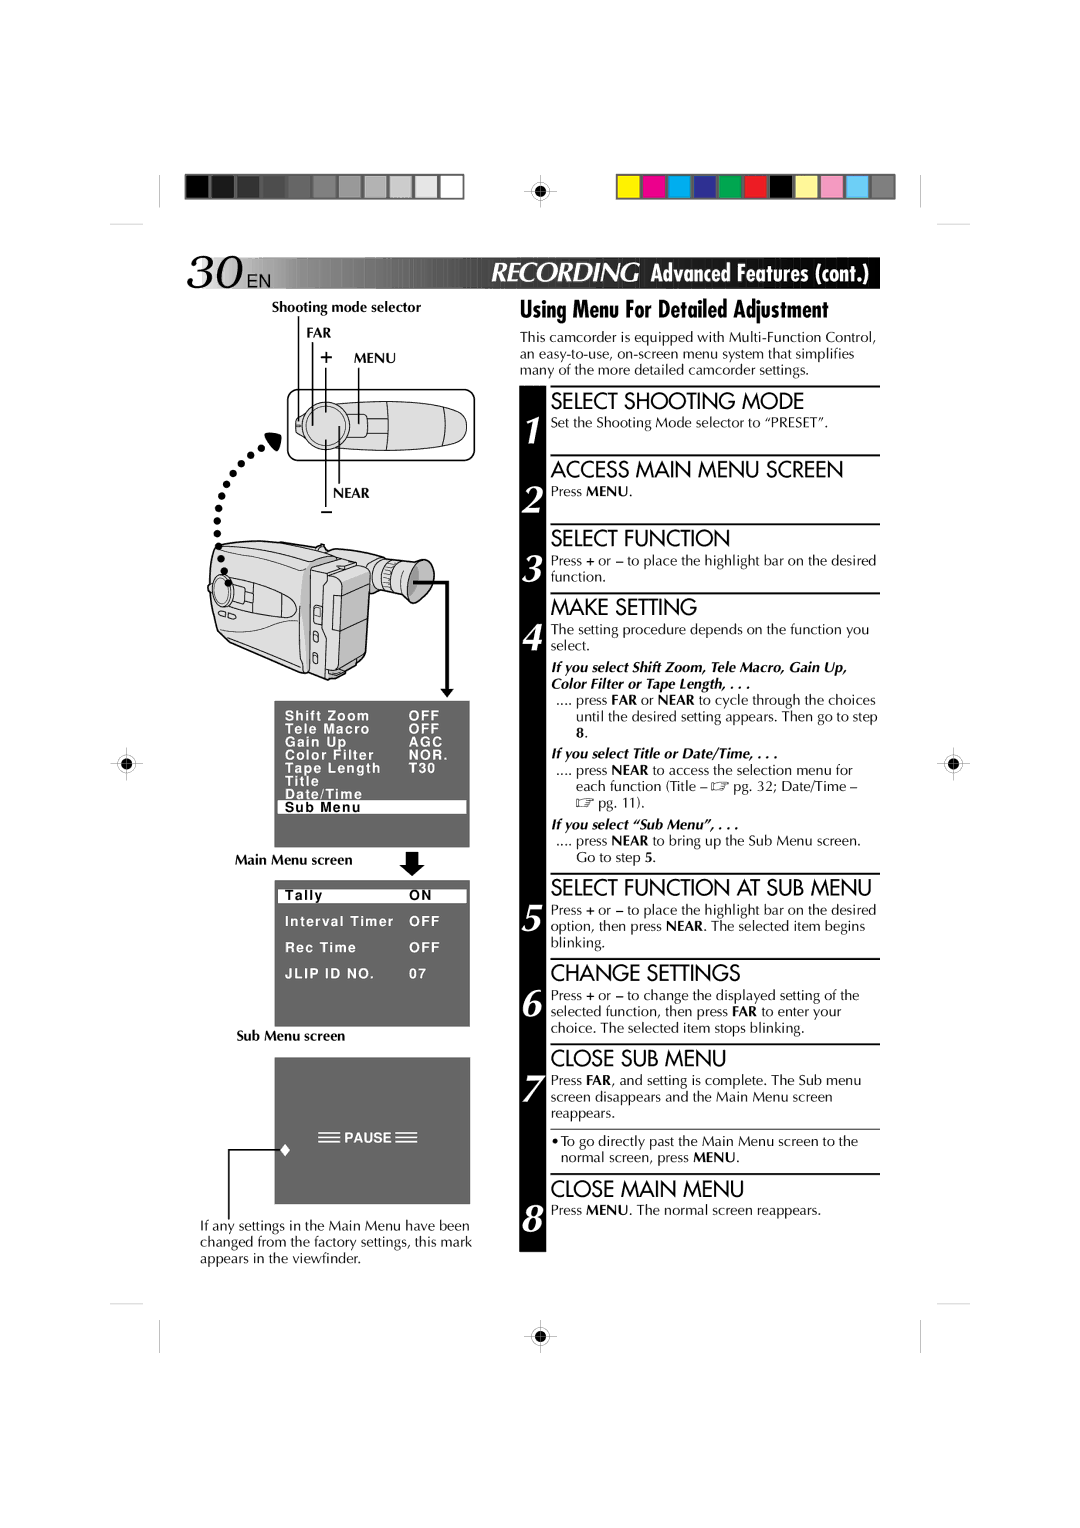
Shooting mode selector
FAR
+MENU
NEAR
–
Shift Zoom | OFF |
Tele Macro | OFF |
Gain Up | AGC |
Color Filter | NOR . |
Tape Length | T30 |
Title |
|
Date/Time |
|
Sub Menu |
|
|
|
Main Menu screen
RECORDI NG
NG

 Advanced
 Featur
 es
es (cont.)
Using Menu For Detailed Adjustment
This camcorder is equipped with
SELECT SHOOTING MODE
1 Set the Shooting Mode selector to “PRESET”.
ACCESS MAIN MENU SCREEN
2 Press MENU.
SELECT FUNCTION
3 Press + or – to place the highlight bar on the desired function.
MAKE SETTING
4 The setting procedure depends on the function you select.
If you select Shift Zoom, Tele Macro, Gain Up, Color Filter or Tape Length, . . .
.... press FAR or NEAR to cycle through the choices
until the desired setting appears. Then go to step 8.
If you select Title or Date/Time, . . .
.... press NEAR to access the selection menu for
each function (Title – ☞ pg. 32; Date/Time –
☞pg. 11).
If you select “Sub Menu”, . . .
.... press NEAR to bring up the Sub Menu screen.
Go to step 5.
TallyON
Interval Timer OFF
Rec Time | OFF |
JLIP ID NO . 07
Sub Menu screen
![]() PAUSE
PAUSE ![]()
♦
If any settings in the Main Menu have been changed from the factory settings, this mark appears in the viewfinder.
SELECT FUNCTION AT SUB MENU
5 Press + or – to place the highlight bar on the desired option, then press NEAR. The selected item begins blinking.
CHANGE SETTINGS
6 Press + or – to change the displayed setting of the selected function, then press FAR to enter your choice. The selected item stops blinking.
CLOSE SUB MENU
7 Press FAR, and setting is complete. The Sub menu screen disappears and the Main Menu screen reappears.
•To go directly past the Main Menu screen to the normal screen, press MENU.
CLOSE MAIN MENU
8 Press MENU. The normal screen reappears.
