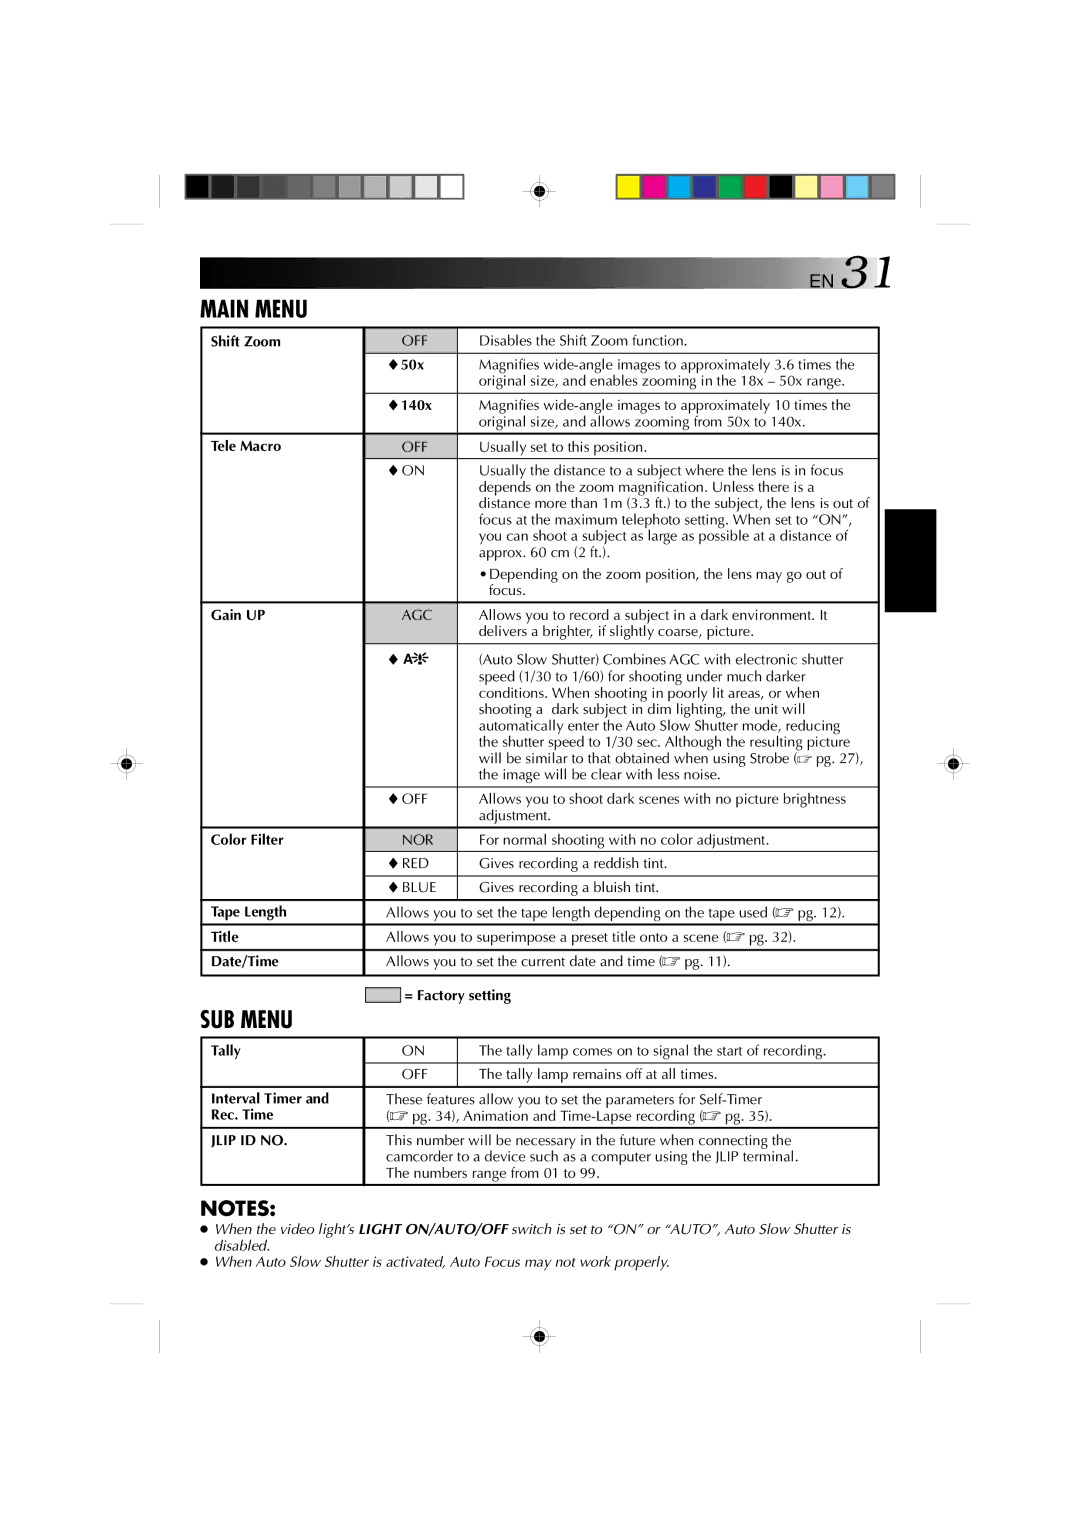
MAIN MENU |
|
| EN 31 | ||
|
|
|
|
| |
|
|
|
|
| |
Shift Zoom |
| OFF | Disables the Shift Zoom function. |
| |
| ♦50x | Magnifies |
|
| |
|
|
| original size, and enables zooming in the 18x – 50x range. |
| |
|
|
|
| ||
| ♦140x | Magnifies |
|
| |
|
|
| original size, and allows zooming from 50x to 140x. |
| |
Tele Macro |
| OFF | Usually set to this position. |
|
|
| ♦ON | Usually the distance to a subject where the lens is in focus |
| ||
|
|
| depends on the zoom magnification. Unless there is a |
| |
|
|
| distance more than 1m (3.3 ft.) to the subject, the lens is out of |
| |
|
|
| focus at the maximum telephoto setting. When set to “ON”, |
|
|
|
|
| you can shoot a subject as large as possible at a distance of |
|
|
|
|
| approx. 60 cm (2 ft.). |
|
|
|
|
| •Depending on the zoom position, the lens may go out of |
|
|
|
|
| focus. |
|
|
Gain UP |
| AGC | Allows you to record a subject in a dark environment. It |
|
|
| |||||
|
|
| delivers a brighter, if slightly coarse, picture. |
| |
| ♦ A | (Auto Slow Shutter) Combines AGC with electronic shutter |
|
| |
|
|
| speed (1/30 to 1/60) for shooting under much darker |
| |
|
|
| conditions. When shooting in poorly lit areas, or when |
| |
|
|
| shooting a dark subject in dim lighting, the unit will |
| |
|
|
| automatically enter the Auto Slow Shutter mode, reducing |
| |
|
|
| the shutter speed to 1/30 sec. Although the resulting picture |
| |
|
|
| will be similar to that obtained when using Strobe (☞ pg. 27), |
| |
|
|
| the image will be clear with less noise. |
| |
|
|
|
| ||
| ♦OFF | Allows you to shoot dark scenes with no picture brightness |
|
| |
|
|
| adjustment. |
| |
|
|
|
|
| |
Color Filter |
| NOR | For normal shooting with no color adjustment. |
|
|
| ♦RED | Gives recording a reddish tint. |
|
| |
|
|
|
| ||
| ♦BLUE | Gives recording a bluish tint. |
|
| |
|
|
|
|
| |
Tape Length | Allows you to set the tape length depending on the tape used (☞ pg. 12). |
|
| ||
|
|
| |||
Title | Allows you to superimpose a preset title onto a scene (☞ pg. 32). |
|
| ||
|
|
| |||
Date/Time | Allows you to set the current date and time (☞ pg. 11). |
|
| ||
|
|
|
|
| |
SUB MENU |
| = Factory setting | |||
| |||||
|
|
|
|
| |
|
|
|
|
| |
Tally |
| ON | The tally lamp comes on to signal the start of recording. |
| |
|
|
|
|
| |
|
| OFF | The tally lamp remains off at all times. |
|
|
|
|
|
|
| |
Interval Timer and | These features allow you to set the parameters for |
|
| ||
Rec. Time | (☞ pg. 34), Animation and |
| |||
JLIP ID NO. | This number will be necessary in the future when connecting the |
|
| ||
| camcorder to a device such as a computer using the JLIP terminal. |
| |||
| The numbers range from 01 to 99. |
| |||
NOTES:
●When the video light’s LIGHT ON/AUTO/OFF switch is set to “ON” or “AUTO”, Auto Slow Shutter is disabled.
●When Auto Slow Shutter is activated, Auto Focus may not work properly.
