START EDITING
Press PLAY on the camcorder and engage the VCR’s Record mode.
STOP EDITING TEMPORARILY
Engage the VCR’s Record-Pause mode and press PAUSE on the camcorder.
EDIT MORE SEGMENTS
Repeat steps 4 through 6 for additional editing, then stop the VCR and camcorder when finished.
FIND EDIT-IN POINT
Engage the VCR’s AUX and Record-Pause modes.
3
4 Engage the camcorder’s Play mode to find a spot just before the edit-in point. Once it’s reached, press PAUSE on the camcorder.
SELECT VCR MODE
PREPARE FOR DUBBING
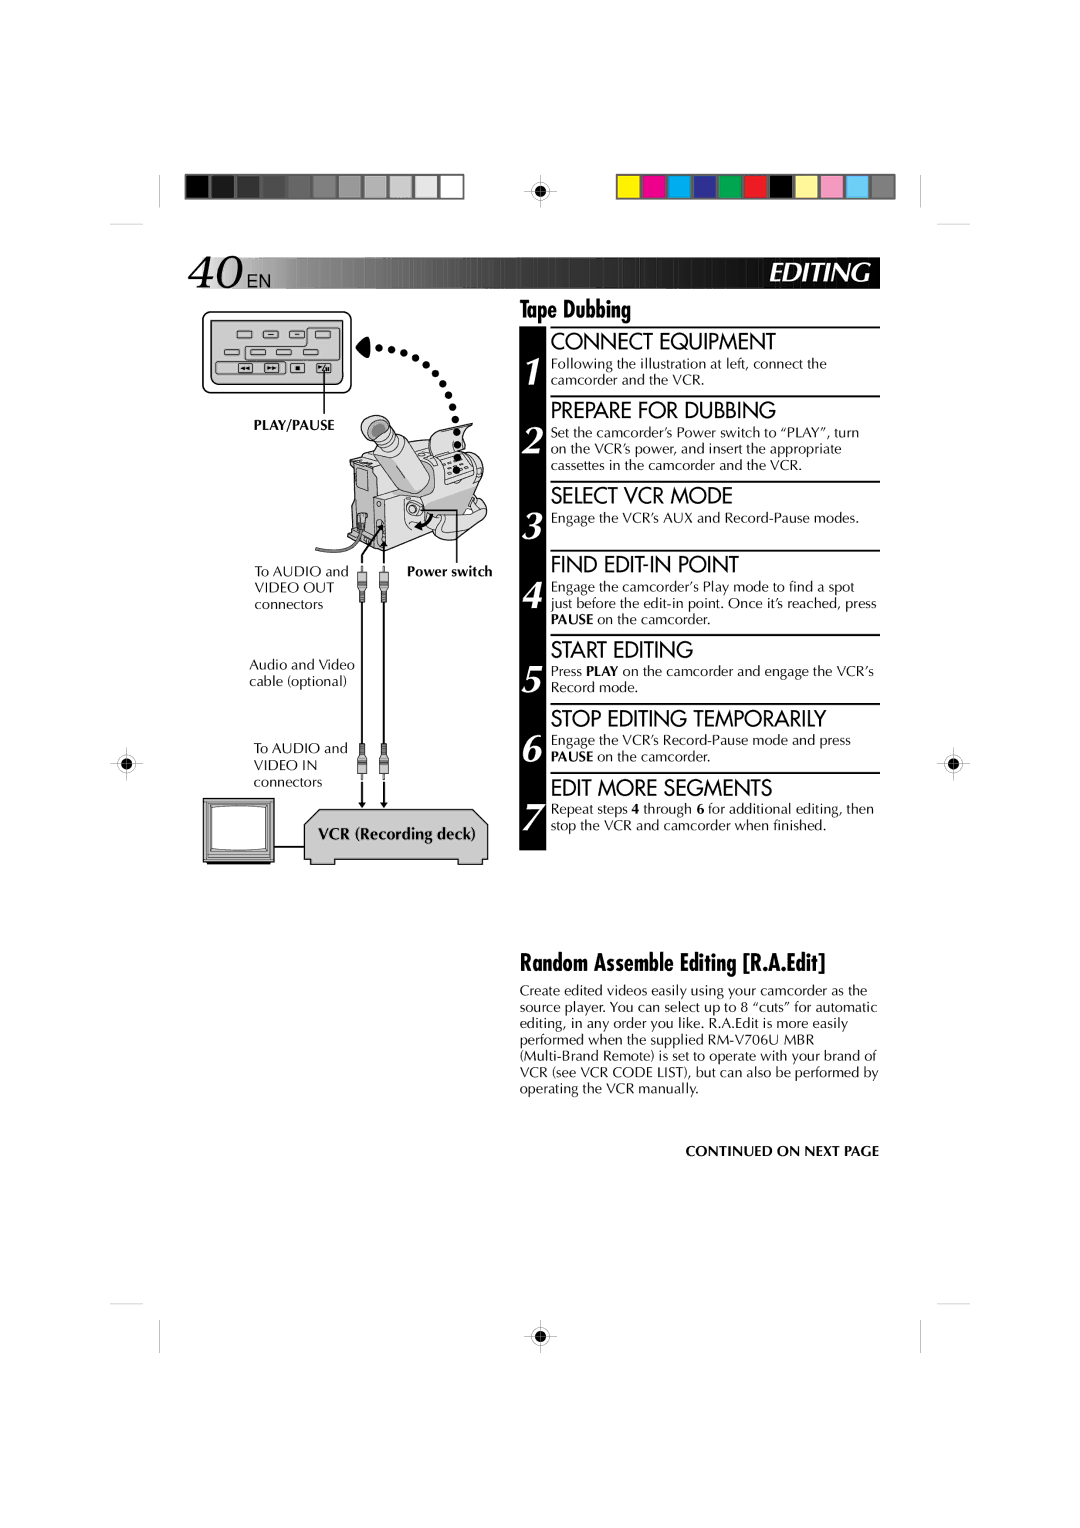
Following the illustration at left, connect the camcorder and the VCR.
1
2 Set the camcorder’s Power switch to “PLAY”, turn on the VCR’s power, and insert the appropriate cassettes in the camcorder and the VCR.
Tape Dubbing
CONNECT EQUIPMENT
EDITING
40![]()
![]()
![]() EN
EN ![]()
![]()
![]()
![]()
![]()
![]()
![]()
![]()
![]()
![]()
![]()
![]()
![]()
![]()
![]()
![]()
![]()
![]()
![]()
![]()
![]()
![]()
![]()
![]()
![]()
![]()
![]()
![]()
![]()
![]()
![]()
![]()
![]()
![]()
![]()
![]()
![]()
![]()
![]()
![]()
![]()
![]()
![]()
![]()
![]()
PLAY/PAUSE
To AUDIO and |
| Power switch | |||||
VIDEO OUT |
|
|
|
|
|
|
|
|
|
|
|
| |||
|
|
| |||||
connectors |
|
| |||||
Audio and Video |
|
| |||||
cable (optional) |
|
| |||||
To AUDIO and
VIDEO IN connectors
VCR (Recording deck)
5
6
7
Random Assemble Editing [R.A.Edit]
Create edited videos easily using your camcorder as the source player. You can select up to 8 “cuts” for automatic editing, in any order you like. R.A.Edit is more easily performed when the supplied