Names of Parts
Front |
| Rear |
|
|
|
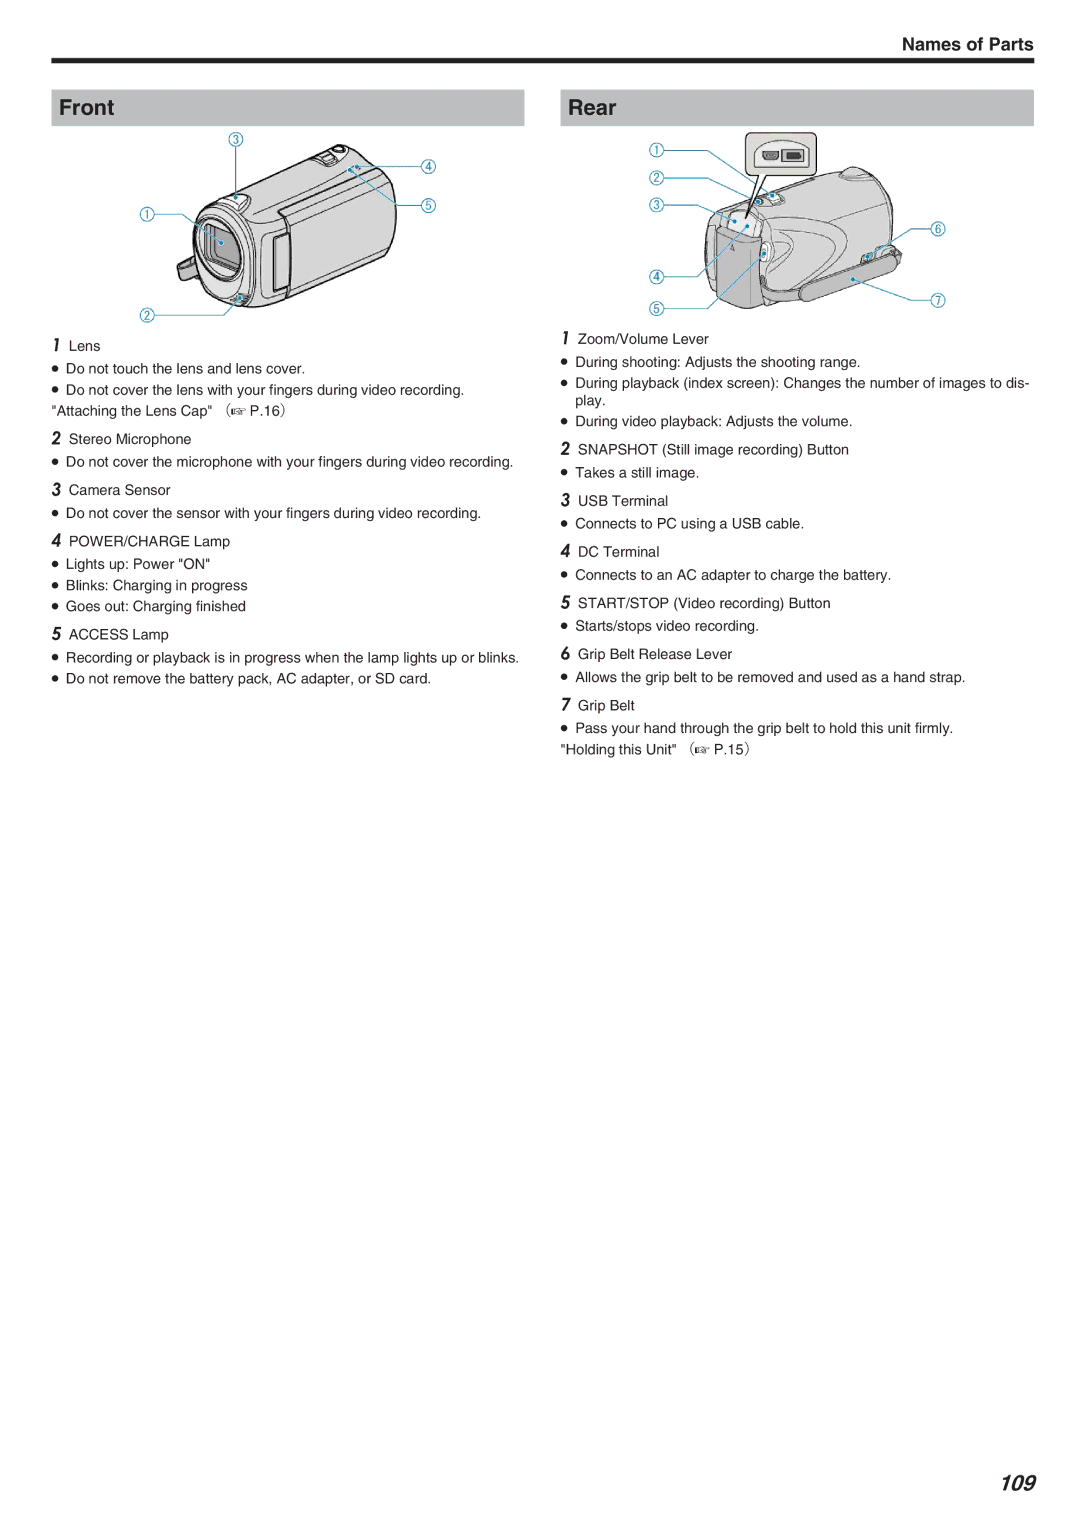
1Lens
●Do not touch the lens and lens cover.
●Do not cover the lens with your fingers during video recording. "Attaching the Lens Cap" (A P.16)
2Stereo Microphone
●Do not cover the microphone with your fingers during video recording.
3Camera Sensor
●Do not cover the sensor with your fingers during video recording.
4POWER/CHARGE Lamp ● Lights up: Power "ON"
● Blinks: Charging in progress
● Goes out: Charging finished
5ACCESS Lamp
●Recording or playback is in progress when the lamp lights up or blinks.
●Do not remove the battery pack, AC adapter, or SD card.
1Zoom/Volume Lever
●During shooting: Adjusts the shooting range.
●During playback (index screen): Changes the number of images to dis- play.
●During video playback: Adjusts the volume.
2SNAPSHOT (Still image recording) Button
● Takes a still image.
3USB Terminal
●Connects to PC using a USB cable.
4DC Terminal
●Connects to an AC adapter to charge the battery.
5START/STOP (Video recording) Button ● Starts/stops video recording.
6Grip Belt Release Lever
●Allows the grip belt to be removed and used as a hand strap.
7Grip Belt
●Pass your hand through the grip belt to hold this unit firmly. "Holding this Unit" (A P.15)