Filename
|
EN 67
*The default setting is bold in the table below.
L“POWER SAVE” When this function is set to “ON”, you can reduce the power consumption. While the
“ON” | VCR is turned off, the front display panel does not show the clock. |
“OFF” | When this function is set to “ON”, an i.LINK device cannot be recognized. As a result, it |
| is not possible to record a program using the digital tuner’s* timer function. In addition |
| the device does not pass along data if it is in a branched connection. |
| *For details of a digital tuner, refer to the instruction manual of the digital tuner. |
| NOTE: |
| It takes some time until VCR completes its set up when you turn on the VCR. |
L
“ON” | for recording on |
“OFF” | When this function is set to “ON”, you can record on |
| VHS picture quality. |
| When this function is set to “OFF”, you can record on |
| VHS picture quality. |
NOTES:
•To record in
•
•
L“AV COMPU- The [REMOTE PAUSE/AV COMPULINK] terminal on the rear panel can be used as
LINK” | either the [REMOTE PAUSE] terminal or the [AV COMPULINK] terminal. |
“ON” | When this function is set to “ON”, you can use this terminal as the [AV COMPULINK] |
“OFF” | terminal. |
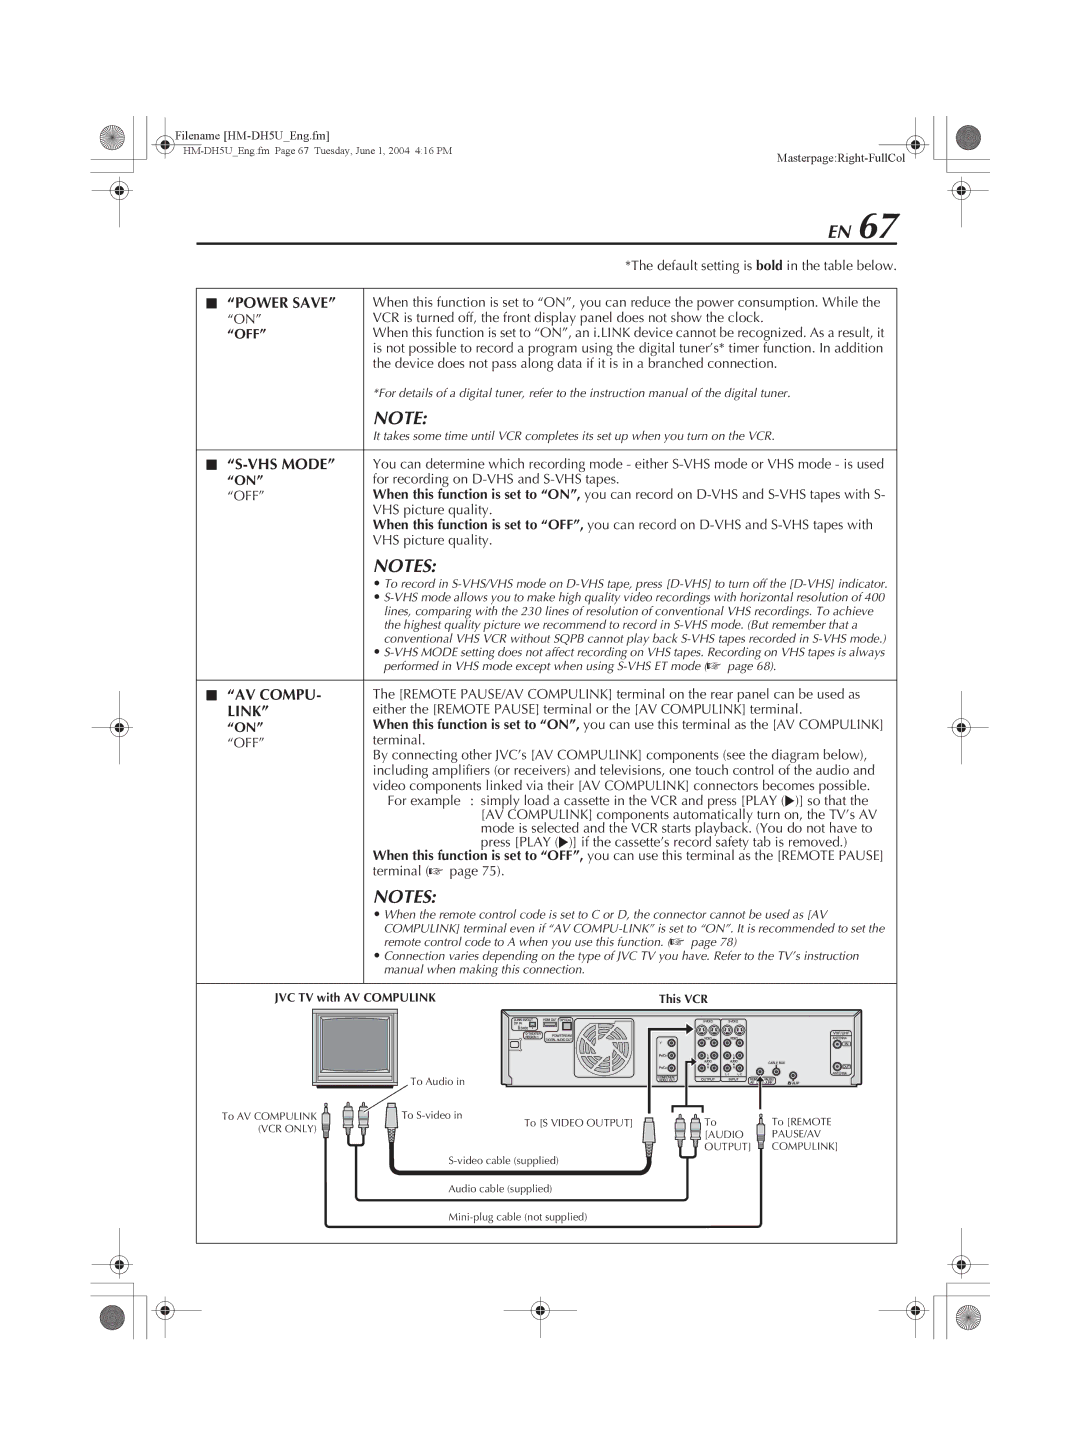
| By connecting other JVC’s [AV COMPULINK] components (see the diagram below), |
| including amplifiers (or receivers) and televisions, one touch control of the audio and |
| video components linked via their [AV COMPULINK] connectors becomes possible. |
| For example : simply load a cassette in the VCR and press [PLAY (I)] so that the |
| [AV COMPULINK] components automatically turn on, the TV’s AV |
| mode is selected and the VCR starts playback. (You do not have to |
| press [PLAY (I)] if the cassette’s record safety tab is removed.) |
| When this function is set to “OFF”, you can use this terminal as the [REMOTE PAUSE] |
| terminal (A page 75). |
NOTES:
•When the remote control code is set to C or D, the connector cannot be used as [AV
COMPULINK] terminal even if “AV
•Connection varies depending on the type of JVC TV you have. Refer to the TV’s instruction manual when making this connection.
JVC TV with AV COMPULINK |
|
|
|
| This VCR |
|
|
|
|
|
|
|
|
|
|
|
|
|
|
|
|
|
|
|
|
|
|
|
|
To AV COMPULINK (VCR ONLY) ![]()
To Audio in
To
To [S VIDEO OUTPUT]
Audio cable (supplied)
To | To [REMOTE |
[AUDIO | PAUSE/AV |
OUTPUT] | COMPULINK] |