![]() INSTALLING
INSTALLING![]()
![]() YOUR
YOUR![]() NEW
NEW![]()
![]() RECORD
RECORD![]() ER
ER![]()
![]()
![]()
![]()
![]()
![]()
![]()
![]()
![]()
![]()
![]()
![]()
![]()
![]()
![]()
![]()
![]()
![]()
![]()
![]()
![]()
![]()
![]()
![]()
![]()
![]()
![]()
![]()
![]()
![]()
![]()
![]()
![]()
![]()
![]()
![]()
![]()
![]()
![]()
![]()
![]()
![]() EN
EN![]()
![]() 3
3
Basic |
| It's essential that your video recorder be properly connected. | ||
| FORMED. | |||
|
| Follow these steps carefully. THESE STEPS MUST BE COM- | ||
Connections | PLETED BEFORE ANY VIDEO OPERATION CAN BE PER- | |||
| Make sure the package contains all of the accessories | |||
|
|
| CHECK CONTENTS | |
|
| 1 listed in “Specifications” (☞ pg. 47). | ||
|
| 2 | SITUATE RECORDER | |
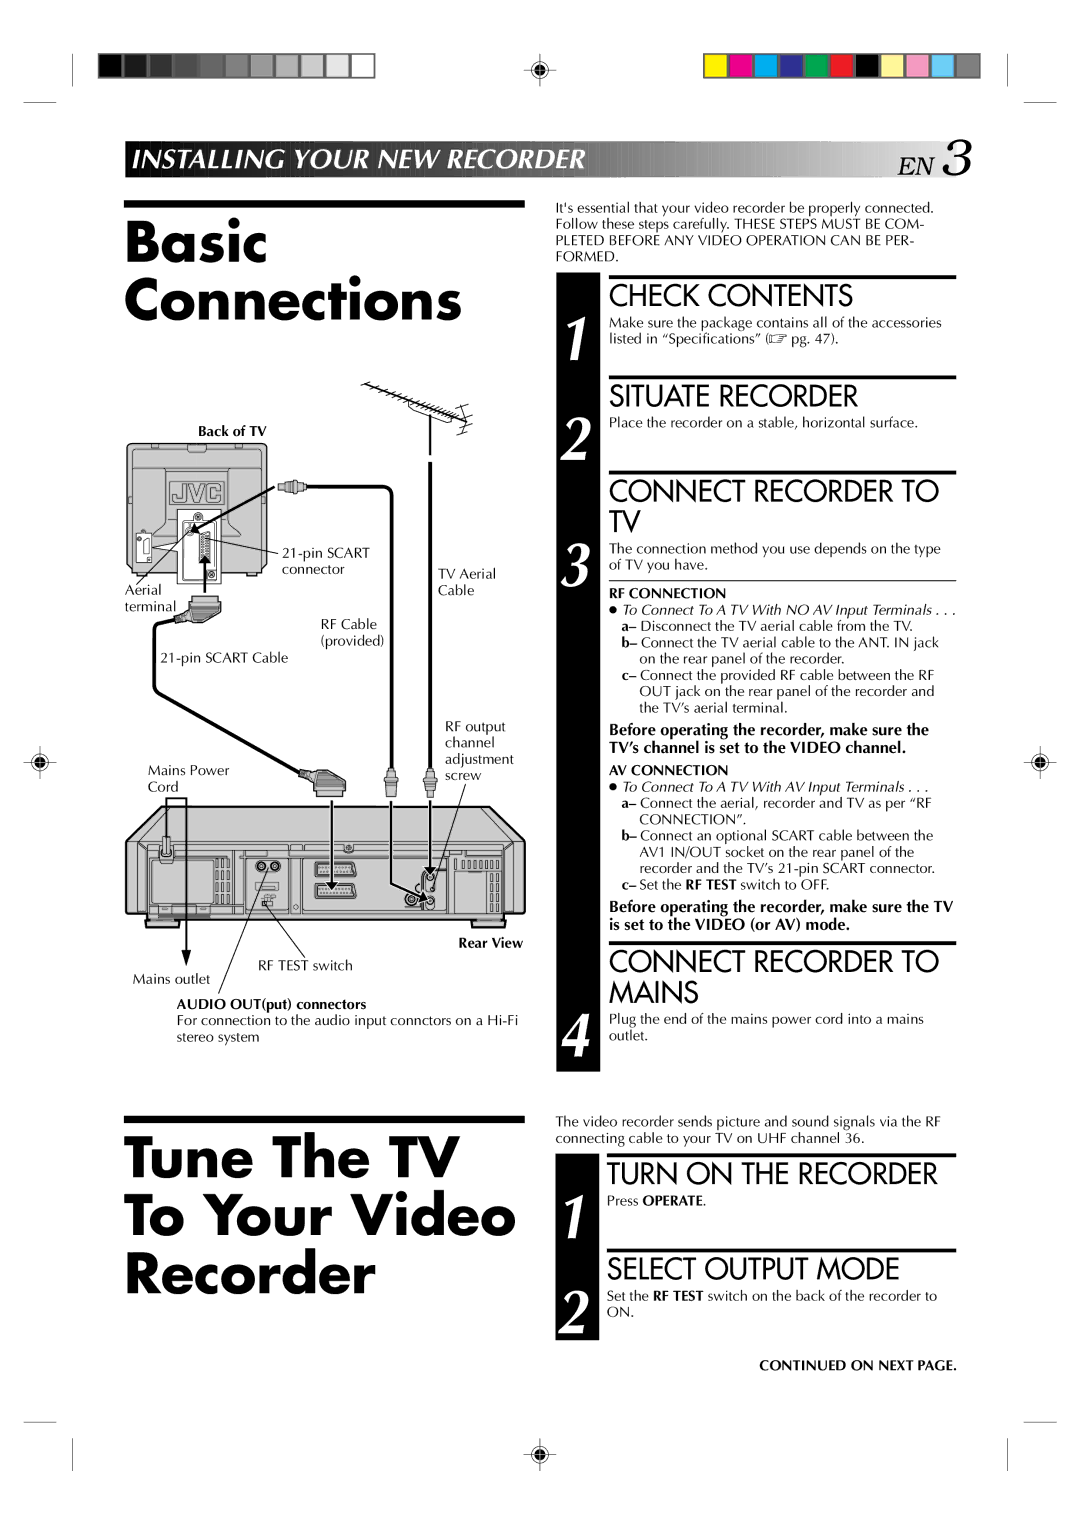
Back of TV |
| Place the recorder on a stable, horizontal surface. | ||
|
| |||
|
|
| ||
|
|
| CONNECT RECORDER TO | |
|
|
| TV | |
|
| The connection method you use depends on the type | ||
|
| of TV you have. | ||
connector |
|
| ||
TV Aerial | 3 RF CONNECTION | |||
Aerial | ||||
Cable | ||||
terminal |
|
| ● To Connect To A TV With NO AV Input Terminals . . . | |
RF Cable |
|
| a– Disconnect the TV aerial cable from the TV. | |
(provided) |
|
| b– Connect the TV aerial cable to the ANT. IN jack | |
|
| on the rear panel of the recorder. | ||
|
|
| c– Connect the provided RF cable between the RF | |
|
|
| OUT jack on the rear panel of the recorder and | |
|
|
| the TV’s aerial terminal. | |
| RF output | Before operating the recorder, make sure the | |
| channel | TV’s channel is set to the VIDEO channel. | |
Mains Power | adjustment | AV CONNECTION | |
screw | |||
Cord | ● To Connect To A TV With AV Input Terminals . . . | ||
| |||
|
| a– Connect the aerial, recorder and TV as per “RF | |
|
| CONNECTION”. | |
|
| b– Connect an optional SCART cable between the | |
|
| AV1 IN/OUT socket on the rear panel of the | |
|
| recorder and the TV’s | |
|
| c– Set the RF TEST switch to OFF. | |
|
| Before operating the recorder, make sure the TV | |
|
| is set to the VIDEO (or AV) mode. | |
| Rear View | CONNECT RECORDER TO | |
RF TEST switch |
| ||
Mains outlet |
| MAINS | |
AUDIO OUT(put) connectors |
| ||
For connection to the audio input connctors on a | Plug the end of the mains power cord into a mains | ||
stereo system |
| 4 outlet. | |
Tune The TV
To Your Video
Recorder
The video recorder sends picture and sound signals via the RF connecting cable to your TV on UHF channel 36.
| 1 |
| TURN ON THE RECORDER |
|
| Press OPERATE. | |
| 2 |
| SELECT OUTPUT MODE |
|
| Set the RF TEST switch on the back of the recorder to | |
|
| ON. |
CONTINUED ON NEXT PAGE.