Tape Remaining Time
1 | DISPLAY REMAINING TIME |
Press DISPLAY until the time remaining on the tape | |
appears. | |
● By pressing the DISPLAY button, you can change the | |
| display to show the counter reading, tape remaining |
| time, or clock time. |
NOTE:
Depending on the type of tape used, there may be times when the tape remaining time reading may not appear right away, or is not correct. "-
Counter Memory
Returns to the counter reading of “0:00:00” to conveniently find a specific place on the tape automatically.
1 | SET COUNTER MEMORY |
Press C. RESET during playback at a point you wish to | |
locate later. The counter reads “0:00:00”. Then press C. | |
MEMORY, and “M” appears in front of the counter digits. |
| ACTIVATE COUNTER |
2 | MEMORY |
When you wish to return to the designated point, press | |
STOP and then REW or FF. | |
| ● The tape rewinds or |
| 0:00:00 automatically. |
| ● To cancel Counter Memory, press C.MEMORY again. |
![]()
![]()
![]()
![]()
![]()
![]()
![]()
![]()
![]()
![]()
![]()
![]()
![]()
![]()
![]()
![]()
![]()
![]()
![]()
![]()
![]()
![]()
![]()
![]()
![]()
![]()
![]()
![]()
![]()
![]()
![]()
![]()
![]()
![]()
![]()
![]()
![]()
![]()
![]()
![]()
![]()
![]()
![]()
![]()
![]()
![]() EN
EN![]()
![]() 13
13![]()
Remote A/B Code Switching
The remote control is capable of controlling two JVC video recorders independently; one set to respond to the remote control’s A code control signals and another set to respond to B code control signals. The remote control is preset to send A code signals because your video recorder is initially set to respond to A code signals. You can easily modify your video recorder to respond to B code signals.
| 1 |
| REMOVE POWER SUPPLY |
|
| Unplug the mains power cord from the mains outlet. | |
| 2 |
| SET A/B CODE SWITCH |
|
| Set to B. | |
| 3 |
|
|
|
| Plug the mains power cord back into the mains outlet. | |
| 4 |
| TURN THE RECORDER ON |
|
| Press OPERATE on the remote control. The recorder | |
|
| will now only respond to B code signals. | |
|
|
|
|
NOTE:
Some TV sets may malfunction in response to the B mode. If this happens, switch back to the A mode.
Soundtrack Selection
Your video recorder is capable of recording three soundtracks
During Playback
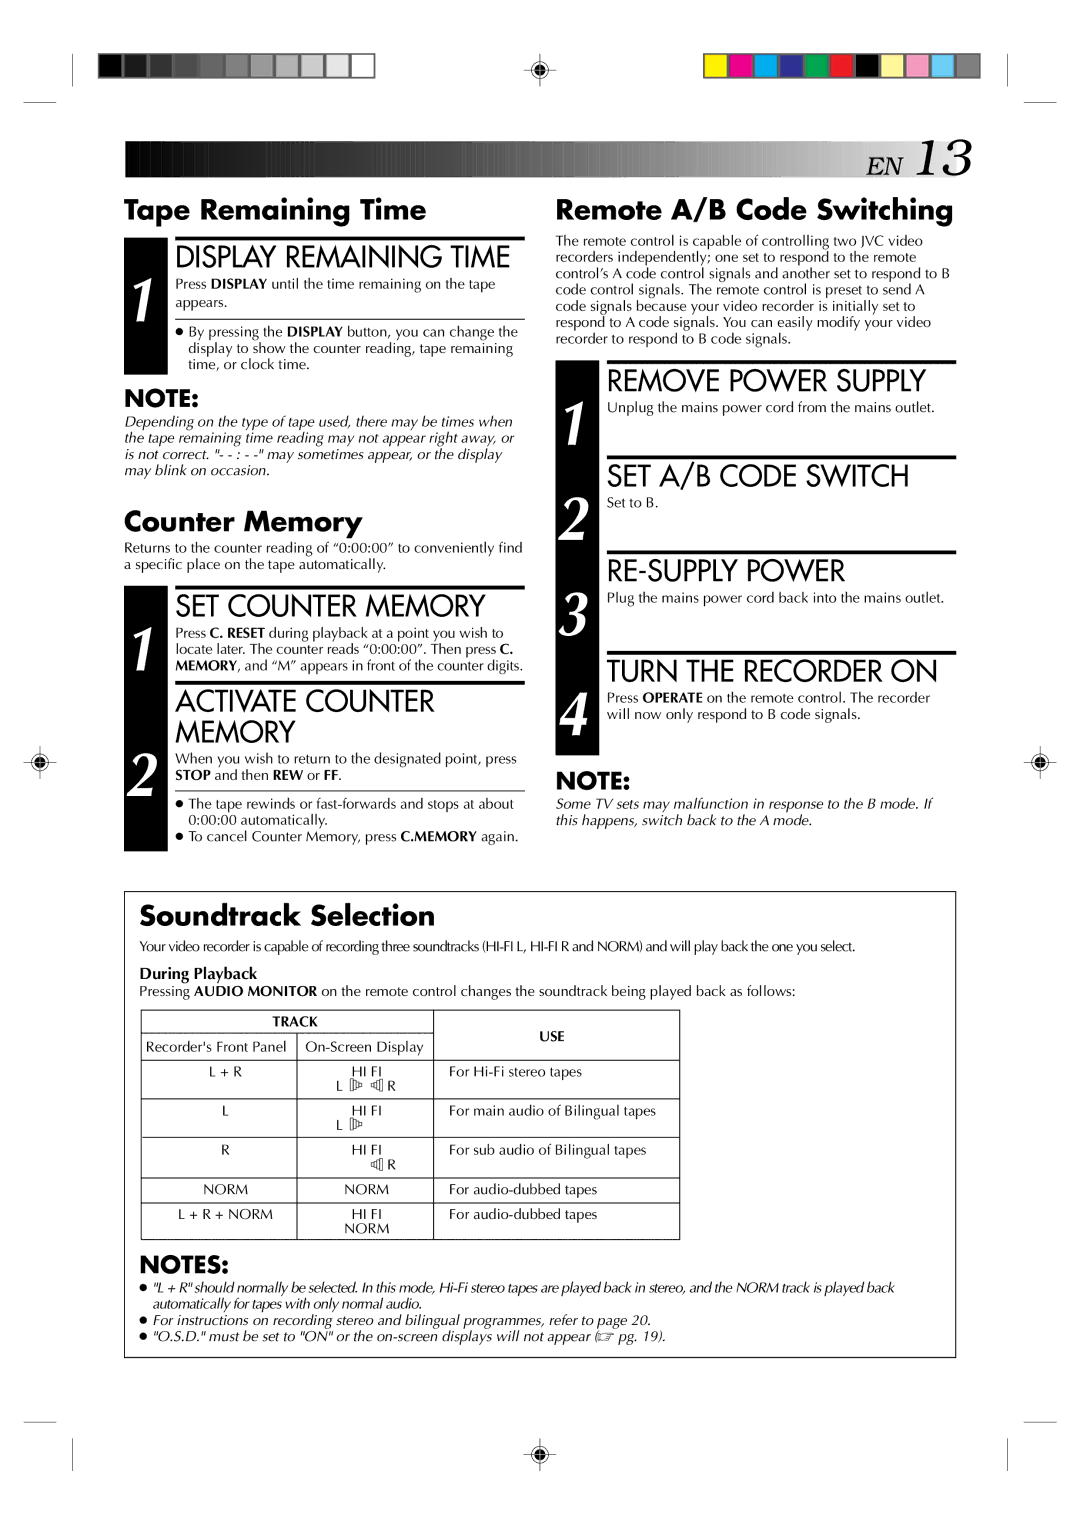
Pressing AUDIO MONITOR on the remote control changes the soundtrack being played back as follows:
TRACK |
|
|
|
|
| USE | ||
|
|
|
|
|
|
| ||
Recorder's Front Panel | ||||||||
| ||||||||
|
|
|
|
|
|
|
| |
L + R |
|
| HI FI | For | ||||
| L |
|
|
|
| R |
| |
|
|
|
|
| ||||
|
|
|
|
|
| |||
L | L |
| HI FI | For main audio of Bilingual tapes | ||||
|
|
|
|
|
|
| ||
|
|
|
|
|
| |||
R |
|
| HI FI | For sub audio of Bilingual tapes | ||||
|
|
|
|
|
| R |
| |
|
|
|
| |||||
NORM |
| NORM | For | |||||
|
|
|
|
|
|
|
| |
L + R + NORM |
|
| HI FI | For | ||||
|
| NORM |
| |||||
NOTES:
●"L + R" should normally be selected. In this mode,
●For instructions on recording stereo and bilingual programmes, refer to page 20.
●"O.S.D." must be set to "ON" or the
