EN 67
Audio Dubbing 2 Loadsourcea cassette and prepare the audio
| Select input mode | |
| 3 Select | |
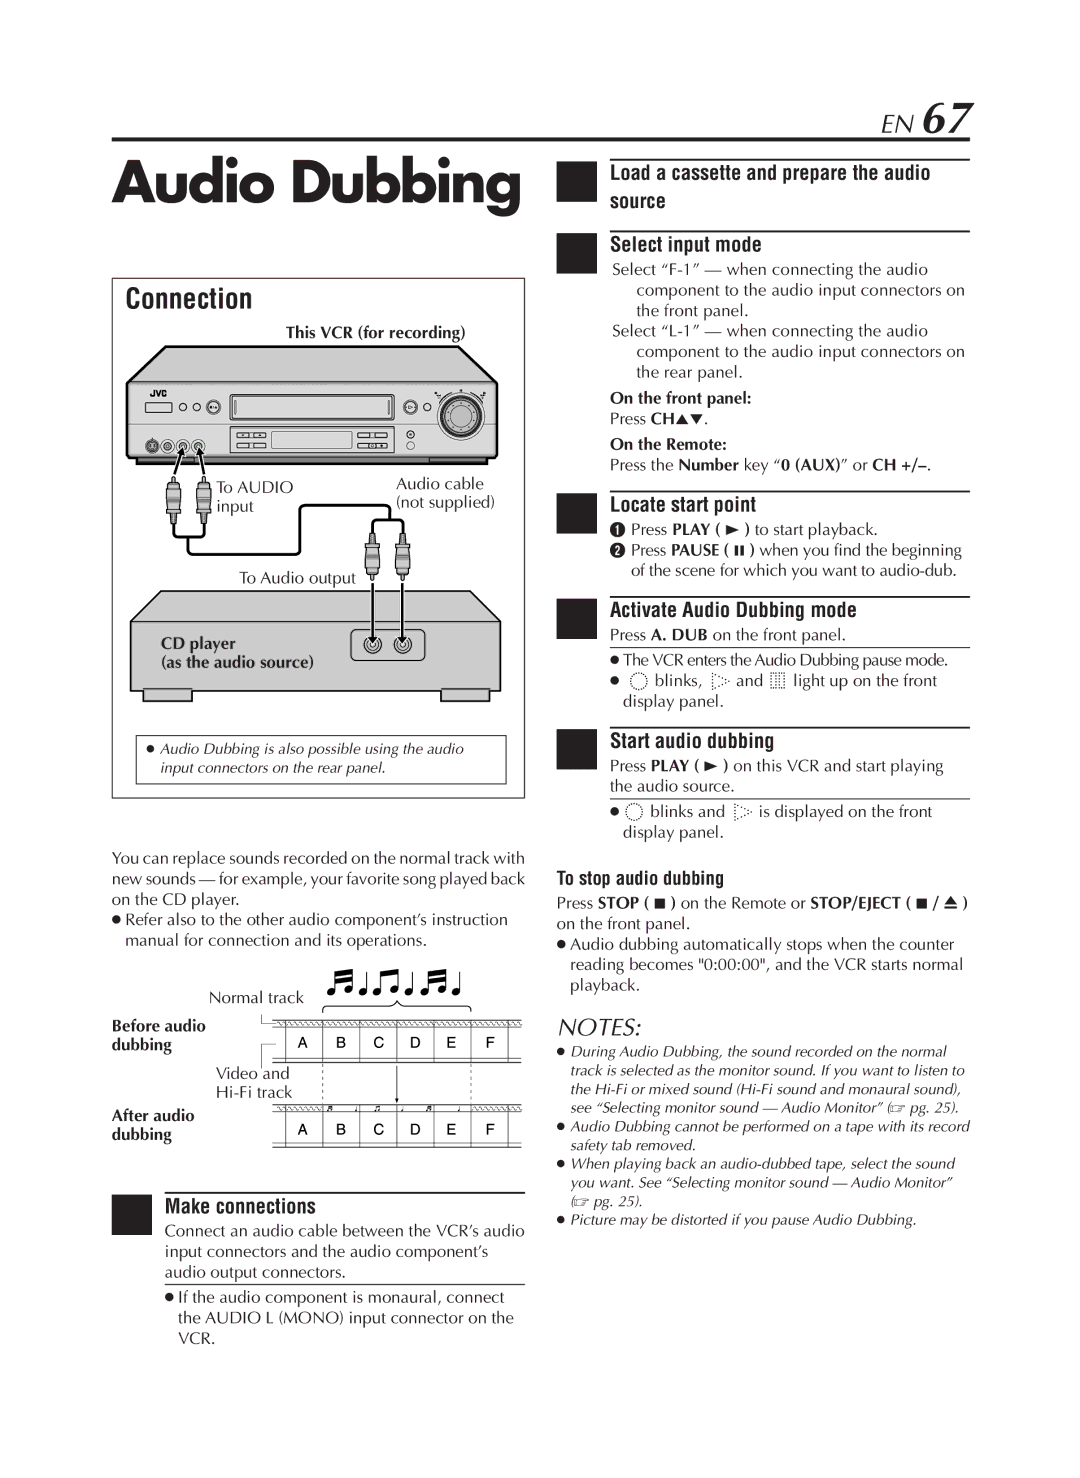
Connection | component to the audio input connectors on | |
the front panel. | ||
| ||
This VCR (for recording) | Select | |
| component to the audio input connectors on | |
| the rear panel. |
On the front panel:
Press CH5°.
|
|
| On the Remote: |
|
|
| Audio cable |
| Press the Number key “0 (AUX)” or CH | ||
To AUDIO | 4 | Locate start point |
| ||
input | (not supplied) |
| |||
|
| 1 Press PLAY ( 3 ) to start playback. | |||
|
|
| 2 Press PAUSE ( 8 ) when you find the beginning | ||
To Audio output |
|
| of the scene for which you want to | ||
|
|
|
|
| |
|
|
| Activate Audio Dubbing mode | ||
CD player |
| 5 Press A. DUB on the front panel. | |||
|
| The VCR enters the Audio Dubbing pause mode. | |||
(as the audio source) |
|
| |||
|
|
| blinks, | and | light up on the front |
|
|
| display panel. |
|
|
|
|
|
|
|
|
|
|
|
|
|
|
|
|
|
|
|
|
|
| Start audio dubbing | |
| Audio Dubbing is also possible using the audio |
|
|
| |||||||||||||||||
|
|
| 6 Press PLAY ( 3 ) on this VCR and start playing | ||||||||||||||||||
| input connectors on the rear panel. |
|
| ||||||||||||||||||
|
|
|
|
|
|
|
|
|
|
|
|
|
|
|
|
|
|
|
| the audio source. |
|
|
|
|
|
|
|
|
|
|
|
|
|
|
|
|
|
|
|
|
|
| |
|
|
|
|
|
|
|
|
|
|
|
|
|
|
|
|
|
|
|
|
|
|
|
|
|
|
|
|
|
|
|
|
|
|
|
|
|
|
|
|
|
| blinks and | is displayed on the front |
|
|
|
|
|
|
|
|
|
|
|
|
|
|
|
|
|
|
|
| display panel. |
|
You can replace sounds recorded on the normal track with | To stop audio dubbing |
| |||||||||||||||||||
new sounds — for example, your favorite song played back |
| ||||||||||||||||||||
on the CD player. | Press STOP ( 7 ) on the Remote or STOP/EJECT ( 7 / 0 ) | ||||||||||||||||||||
Refer also to the other audio component’s instruction | on the front panel. |
| |||||||||||||||||||
manual for connection and its operations. | Audio dubbing automatically stops when the counter | ||||||||||||||||||||
|
|
|
|
|
|
|
|
|
|
|
|
|
|
|
|
|
|
| reading becomes "0:00:00", and the VCR starts normal | ||
|
|
|
|
|
|
|
|
|
|
|
|
|
|
|
|
|
|
| playback. |
| |
|
| Normal track |
| ||||||||||||||||||
|
|
|
|
| |||||||||||||||||
Before audio |
|
|
|
|
|
|
|
|
|
|
|
|
|
|
| NOTES: |
| ||||
|
|
|
|
|
|
|
|
|
|
|
|
|
|
|
|
| |||||
|
|
|
|
|
|
|
|
|
|
|
|
|
|
|
| ||||||
dubbing |
|
|
|
|
|
|
|
|
|
|
|
|
|
| During Audio Dubbing, the sound recorded on the normal | ||||||
|
|
|
|
|
|
|
|
|
|
|
|
|
| ||||||||
|
|
|
|
|
|
|
|
|
|
|
|
|
|
|
|
|
|
| |||
|
|
|
|
|
|
|
|
|
|
|
|
|
|
|
|
|
|
| track is selected as the monitor sound. If you want to listen to | ||
|
| Video |
| and |
|
|
|
| |||||||||||||
|
|
|
|
|
|
|
|
|
| ||||||||||||
|
|
|
|
|
|
| the | ||||||||||||||
|
|
|
|
|
|
|
|
|
|
|
|
|
|
|
|
|
|
| see “Selecting monitor sound — Audio Monitor” ( pg. 25). | ||
After audio |
|
|
|
|
|
|
|
|
|
| Audio Dubbing cannot be performed on a tape with its record | ||||||||||
dubbing |
|
|
|
|
|
|
|
|
|
|
|
| |||||||||
|
|
|
|
|
|
|
|
|
| safety tab removed. |
| ||||||||||
|
|
|
|
|
|
|
|
|
|
|
|
|
|
|
|
|
|
|
| ||
|
|
|
|
|
|
|
|
|
|
|
|
|
|
|
|
|
|
|
| ||
|
|
|
|
|
|
|
|
|
|
|
|
|
|
|
|
|
|
| When playing back an | ||
|
|
|
|
|
|
|
|
|
|
|
|
|
|
|
|
|
|
| you want. See “Selecting monitor sound — Audio Monitor” | ||
|
| Make connections | ( pg. 25). |
| |||||||||||||||||
1 Connect an audio cable between the VCR’s audio | Picture may be distorted if you pause Audio Dubbing. | ||||||||||||||||||||
|
|
| |||||||||||||||||||
input connectors and the audio component’s audio output connectors.
If the audio component is monaural, connect the AUDIO L (MONO) input connector on the VCR.