Settings (Step 2 Network Settings)
2-2 Setting PC's IP Address [Windows XP]
Upon installing the camera, set the IP address of the PC that is used to operate this camera.
For Windows XP, set according to the following procedure.
(For Windows 2000, ☞ Page 30)
Note
Under a DHCP environment and when the IP address assigned to V. Networks is already known, it will not be necessary to perform
1.Click  .
.
•
2.Slect the network for which the PC that operates this camera is connected to.
•
![]()
![]() Ensure that it is selected.
Ensure that it is selected.
Note
Select "Install (N) ..." if [Client for
Microsoft Networks] or [Internet
Protocol (TCP/IP)] is not displayed.
28
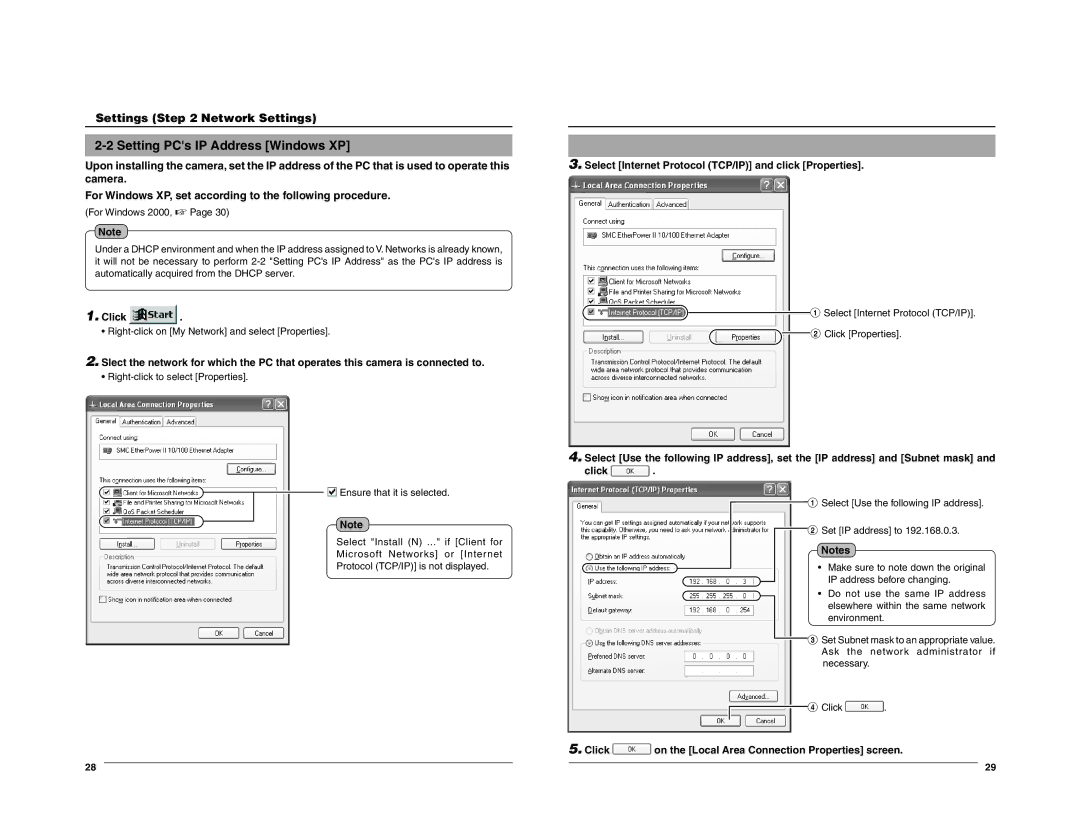
3.Select [Internet Protocol (TCP/IP)] and click [Properties].
![]() 1 Select [Internet Protocol (TCP/IP)].
1 Select [Internet Protocol (TCP/IP)]. ![]() 2 Click [Properties].
2 Click [Properties].
4.Select [Use the following IP address], set the [IP address] and [Subnet mask] and
click ![]() .
.
1 Select [Use the following IP address].
2 Set [IP address] to 192.168.0.3.
Notes
• Make sure to note down the original IP address before changing.
• Do not use the same IP address elsewhere within the same network environment.
3 Set Subnet mask to an appropriate value. Ask the network administrator if necessary.
4 Click ![]() .
.
5.Click  on the [Local Area Connection Properties] screen.
29