Preparation (Step 1 Connection/Installation)
1-2 Mounting the Camera to the Ceiling
Cautions
Ceiling
●Attachment of a embedded cover in the ceiling (recess bracket) may be mandatory in certain regions. If this is so, ensure that the embedded cover (recess bracket) is securely attached before installing the camera.
●Please refer to the instruction manual for the cover in use for details on installation of the embedded cover (recess bracket).
●For more detail, please contact the JVC.
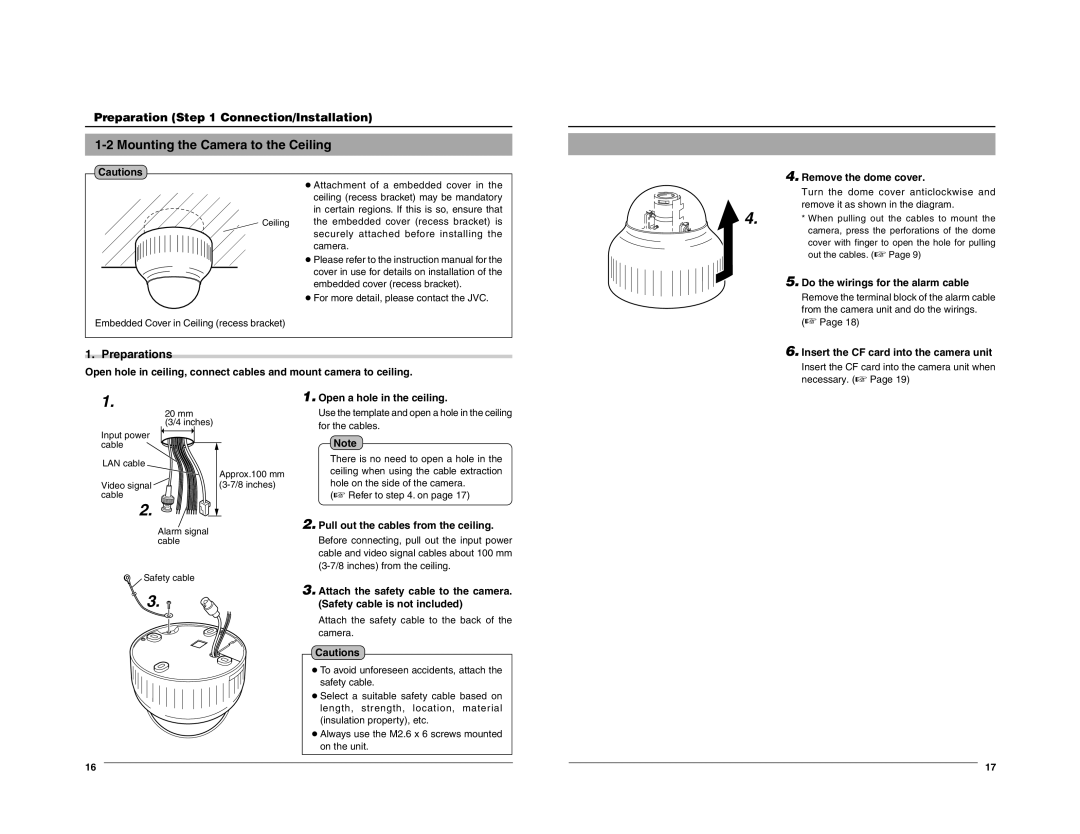
| 4. Remove the dome cover. |
| Turn the dome cover anticlockwise and |
4. | remove it as shown in the diagram. |
* When pulling out the cables to mount the | |
| camera, press the perforations of the dome |
| cover with finger to open the hole for pulling |
| out the cables. (☞ Page 9) |
| 5. Do the wirings for the alarm cable |
| Remove the terminal block of the alarm cable |
| from the camera unit and do the wirings. |
Embedded Cover in Ceiling (recess bracket)
1. Preparations
Open hole in ceiling, connect cables and mount camera to ceiling.
(☞ Page 18) |
6. Insert the CF card into the camera unit |
Insert the CF card into the camera unit when |
necessary. (☞ Page 19) |
1.
20 mm
(3/4 inches)
Input power cable
LAN cable
Video signal ![]() cable
cable![]()
2.
Approx.100 mm
1.Open a hole in the ceiling.
Use the template and open a hole in the ceiling for the cables.
Note
There is no need to open a hole in the ceiling when using the cable extraction hole on the side of the camera.
(☞ Refer to step 4. on page 17)
2. Pull out the cables from the ceiling. |
Alarm signal cable
Safety cable
3. ![]()
16
Before connecting, pull out the input power |
cable and video signal cables about 100 mm |
3. Attach the safety cable to the camera. |
(Safety cable is not included) |
Attach the safety cable to the back of the |
camera. |
Cautions
●To avoid unforeseen accidents, attach the safety cable.
●Select a suitable safety cable based on length, strength, location, material (insulation property), etc.
●Always use the M2.6 x 6 screws mounted on the unit.
17