Operations (Step 4 Operation Using the V.Networks Controller)
The "V.Networks Controller" can be used to select a camera as well as record/play back camera images.
(The controller screen is identical to other V.Networks versions, and there are functions that cannot be operated from
4-2 Record/Stop
The "V.Networks Controller" can be used to save camera images to a file.
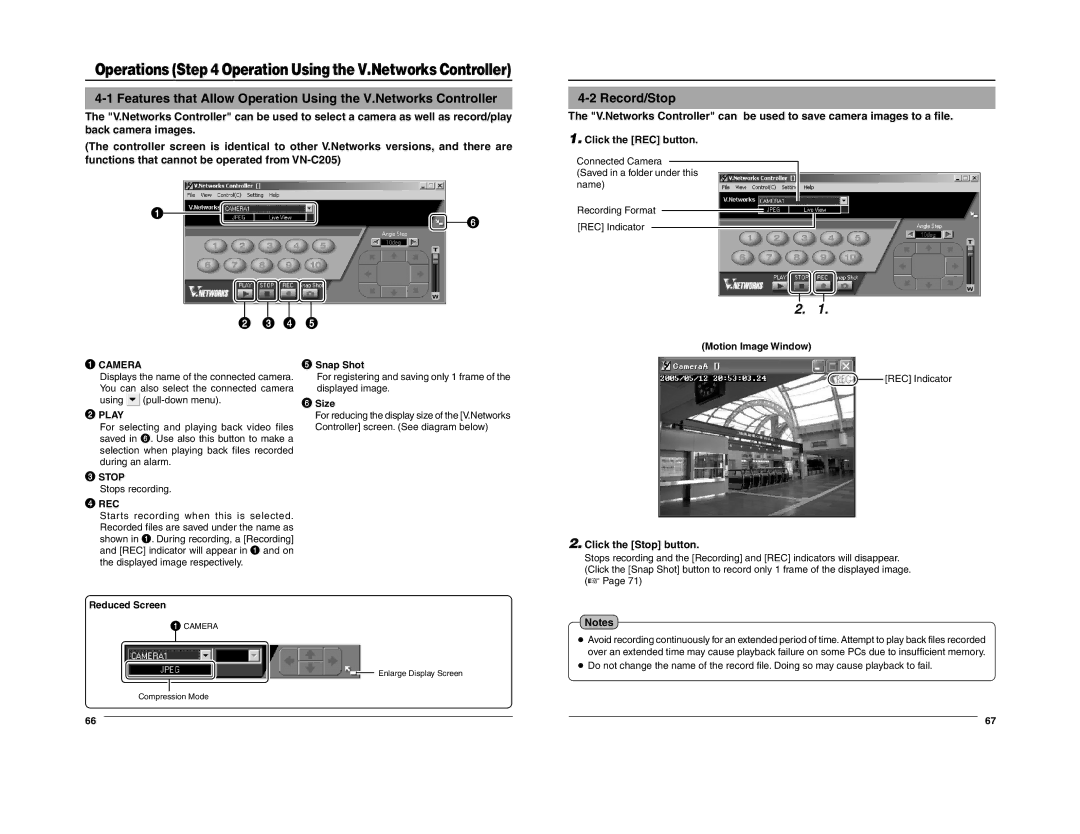
1.Click the [REC] button.
Connected Camera
(Saved in a folder under this name)
1
![]() 6
6
Recording Format
[REC] Indicator
2. 1.
2 3 4 5
(Motion Image Window)
1CAMERA
Displays the name of the connected camera. You can also select the connected camera
using ![]()
2PLAY
For selecting and playing back video files saved in 6. Use also this button to make a selection when playing back files recorded during an alarm.
3STOP
Stops recording.
4REC
5 Snap Shot
For registering and saving only 1 frame of the displayed image.
6Size
For reducing the display size of the [V.Networks Controller] screen. (See diagram below)
![]()
![]() [REC] Indicator
[REC] Indicator
Starts recording when this is selected. Recorded files are saved under the name as shown in 1. During recording, a [Recording] and [REC] indicator will appear in 1 and on the displayed image respectively.
Reduced Screen
1CAMERA
Enlarge Display Screen
Compression Mode
2.Click the [Stop] button.
Stops recording and the [Recording] and [REC] indicators will disappear.
(Click the [Snap Shot] button to record only 1 frame of the displayed image. (☞ Page 71)
Notes
●Avoid recording continuously for an extended period of time. Attempt to play back files recorded over an extended time may cause playback failure on some PCs due to insufficient memory.
●Do not change the name of the record file. Doing so may cause playback to fail.
66 |
|
|
| 67 |