7 Recording only one track from an external component
Digital recording from an MD recorder, a CD player, or a DAT deck connected to the DIGITAL IN terminals is initially set to record entire disc. You can also use Synchronized Recording for recording only one track. To use Synchronized Recording for one track, follow the procedure below.
Available source
OPTICAL IN, COAXIAL IN
34
To cancel the unfinalization,
press CANCEL in step 3.
Press SET to unfinalize the disc.
Unfinalization starts. The REC indicator lights up and the 3 indicator and “UNFINALIZE” start flashing on the display.
• Unfinalization requires a few minutes to complete. (When the disc is unfinalized, the REC indicator goes off and the 3 indicator and “UNFINALIZE” stop flashing then go off.)
4
The CD-RW and FINALIZED indicators light up on the display.
2 While 3-CD Changer and CD Recorder are in stop mode, press MENU.
3 Turn MULTI JOG ¢ / 4 on the unit or press 3 or 2 on the remote control until “UNFINALIZE” appears on the display then press SET. “UNFINALIZE?” appears on the display.
• If an unfinalized disc is loaded, “ALREADY UNFIN” appears on the display.
Load a finalized disc you want to unfinalize on the CD Recorder disc tray.
1
XL – R5020 CD/CDR MULTIPLE COMPACT DISC RECORDER
Recordable
ReWritable
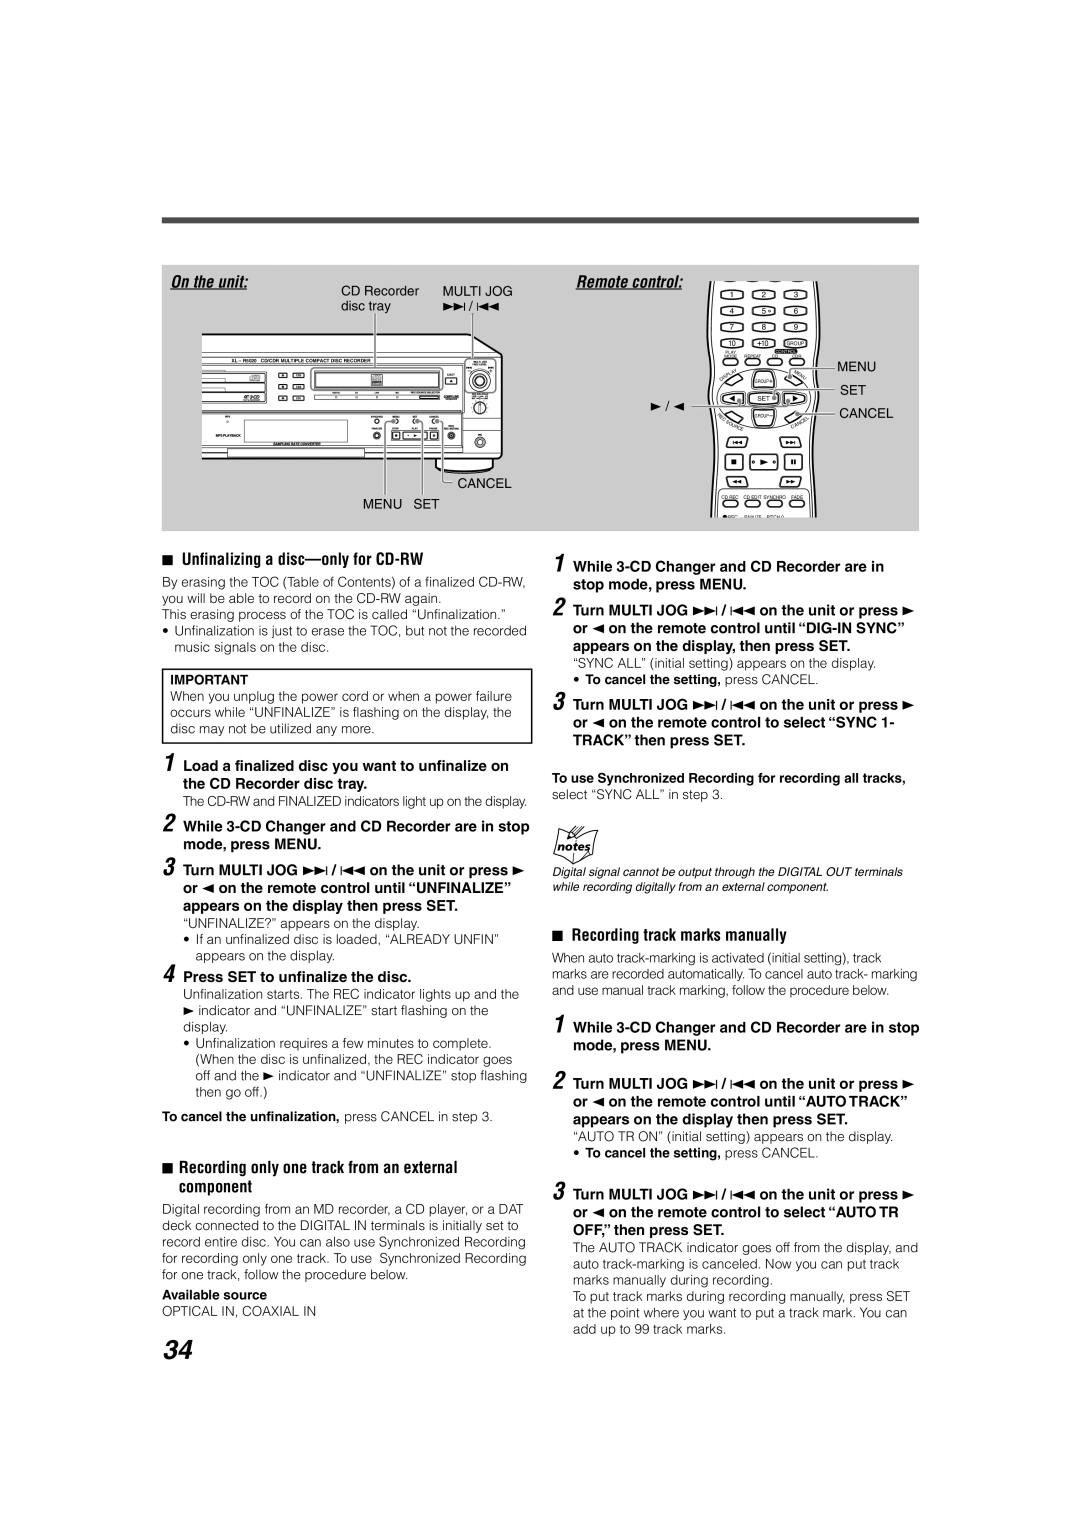
CANCEL
MENU SET
7 Unfinalizing a disc—only for CD-RW
By erasing the TOC (Table of Contents) of a finalized CD-RW, you will be able to record on the CD-RW again.
This erasing process of the TOC is called “Unfinalization.”
• Unfinalization is just to erase the TOC, but not the recorded music signals on the disc.
IMPORTANT
When you unplug the power cord or when a power failure occurs while “UNFINALIZE” is flashing on the display, the disc may not be utilized any more.
MULTI JOG ¢ / 4
CD Recorder disc tray
On the unit:
1 2 3
4 | 5 | | 6 | |
7 | 8 | | 9 | |
10 | 10 | | GROUP |
PLAY | | CONTROL | |
MODE | REPEAT | CD | CDR |
Y | | | M | |
A | | | |
L | | | E |
P | | | | N |
IS | GROUP | | | U |
D | | | |
| | | | SET | |
E | | | | GROUP | |
R | | | | | |
C | | | | | L |
S | | | | E |
| | | | C |
| O | | | A |
| | UR | CE | | N |
| | | C |
CD REC CD EDIT SYNCHRO FADE
 REC FINALIZE PITCH 0
1 While 3-CD Changer and CD Recorder are in stop mode, press MENU.
2 Turn MULTI JOG ¢ / 4 on the unit or press 3 or 2 on the remote control until “DIG-IN SYNC” appears on the display, then press SET.
“SYNC ALL” (initial setting) appears on the display.
•To cancel the setting, press CANCEL.
3 Turn MULTI JOG ¢ / 4 on the unit or press 3
or 2 on the remote control to select “SYNC 1-
TRACK” then press SET.
To use Synchronized Recording for recording all tracks,
select “SYNC ALL” in step 3.
Digital signal cannot be output through the DIGITAL OUT terminals while recording digitally from an external component.
7Recording track marks manually
When auto track-marking is activated (initial setting), track marks are recorded automatically. To cancel auto track- marking and use manual track marking, follow the procedure below.
1 While 3-CD Changer and CD Recorder are in stop mode, press MENU.
2 Turn MULTI JOG ¢ / 4 on the unit or press 3 or 2 on the remote control until “AUTO TRACK” appears on the display then press SET.
“AUTO TR ON” (initial setting) appears on the display.
•To cancel the setting, press CANCEL.
3 Turn MULTI JOG ¢ / 4 on the unit or press 3 or 2 on the remote control to select “AUTO TR
OFF,” then press SET.
The AUTO TRACK indicator goes off from the display, and auto track-marking is canceled. Now you can put track marks manually during recording.
To put track marks during recording manually, press SET at the point where you want to put a track mark. You can add up to 99 track marks.