Using YourSmokerBox
NOTE: The smoker box is an accessory on some models. See “Accessories” in the “Assistance or Service” section to order.
The smoker box can be used when grilling or when using your rotisserie.
1.Prepare wood chips/pellets following manufacturer’s directions.
2.Open smoker box lid and add prepared chips/pellets onto the grate inside the smoker box.
NOTE: For about 1 hour of smoking, fill the smoker box approximately ¼ full of chips/pellets.
3.Remove the small grate from the grill and replace with the smoker box.
AB
A. Shown with small grate removed
B. Smoker box
4.Light the burner below the smoker box and preheat on high until smoker begins smoking. Reduce the heat setting to keep the smoke at the amount desired.
To Refill the Smoker Box During Use
IMPORTANT: You may want to wear oven mitts when opening and closing the smoker box lid.
1.Open grill hood.
2.Lift smoker box lid and add more prepared chips/pellets.
3.Close the smoker box lid.
4.Close the grill hood and continue grilling.
Hood Lights
The grill must be plugged in for the hood lights to work. See “Plug in Grill” in the “Freestanding Outdoor Grill Installation” section.
To Use:
Press the LIGHTS button on the control panel to turn the hood lights on and off.
USING YOUR WARMING
DRAWER
|
|
|
| (on some models) |
| ||||||
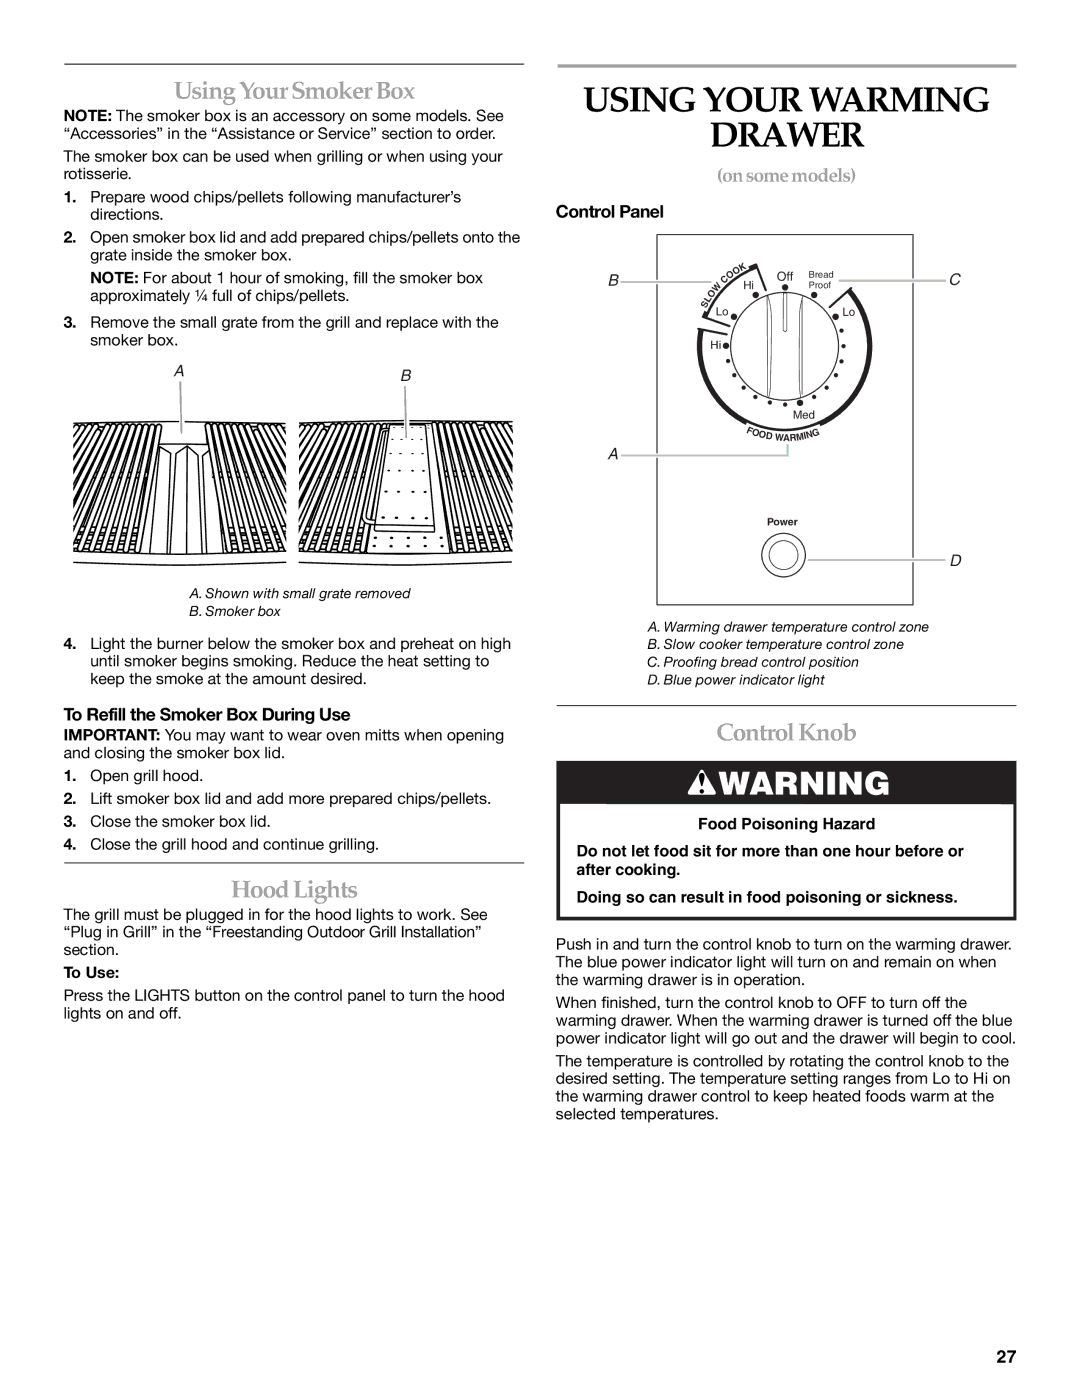
Control Panel |
|
|
|
|
|
|
|
|
|
| |
|
|
|
|
|
| K |
|
|
|
|
|
B |
|
|
|
|
| O |
| Off |
| Bread | C |
|
|
|
| O |
|
| |||||
|
| O | W | C | Hi |
|
|
| Proof | ||
|
| L |
|
|
|
|
|
|
| ||
| S |
|
|
|
|
|
|
|
| ||
|
| Lo |
|
|
|
| Lo |
| |||
|
|
|
|
|
|
|
| ||||
|
|
|
|
|
|
|
|
| |||
|
|
| Hi |
|
|
|
|
|
| ||
|
|
|
|
|
|
|
| Med |
| ||
|
|
|
|
|
| F |
|
|
| G |
|
|
|
|
|
|
| O | O |
|
|
| |
|
|
|
|
|
|
|
| IN |
| ||
|
|
|
|
|
|
|
| D WARM |
|
| |
A |
|
|
|
|
|
|
|
|
|
|
|
|
|
|
|
|
|
|
| Power |
|
|
|
|
|
|
|
|
|
|
|
|
|
| D |
| A. Warming drawer temperature control zone |
| |||||||||
| B. Slow cooker temperature control zone |
| |||||||||
| C. Proofing bread control position |
| |||||||||
| D. Blue power indicator light |
| |||||||||
Control Knob
![]() WARNING
WARNING
Food Poisoning Hazard
Do not let food sit for more than one hour before or after cooking.
Doing so can result in food poisoning or sickness.
Push in and turn the control knob to turn on the warming drawer. The blue power indicator light will turn on and remain on when the warming drawer is in operation.
When finished, turn the control knob to OFF to turn off the warming drawer. When the warming drawer is turned off the blue power indicator light will go out and the drawer will begin to cool.
The temperature is controlled by rotating the control knob to the desired setting. The temperature setting ranges from Lo to Hi on the warming drawer control to keep heated foods warm at the selected temperatures.
27