CONTROL PANEL GRAPHICS
IMPORTANT: To avoid damage to control panel graphics, do not use steel wool, abrasive cleaners or oven cleaner.
Do not spray cleaner directly onto panel.
Cleaning Method:
■Clean around the burner labels gently; scrubbing may remove printing.
■Mild detergent, soft cloth and warm water.
■Rinse and dry.
ROTISSERIE SPIT ROD AND FORKS
Cleaning Method:
■Wash with mild detergent, using a soft cloth and warm water.
■Rinse and dry.
■For stubborn areas, use a multipurpose cleaner, a
DRAWERS
Cleaning Method:
Routine cleaning
■Paper towel and spray glass cleaner:
Make sure drawer is cool. Follow manufacturer’s instructions.
■Warm, soapy water or
Wash, wipe with clean water and dry thoroughly.
Stubborn stains and baked-on residue
Rub in direction of grain to avoid damaging.
■Mildly abrasive cleanser or
Wash, wipe with clean water and dry thoroughly. Repeat if necessary.
RACKS
Cleaning Method:
■
DrawerSlides
The drawer slides allow you to fully extend the drawer for easier cleaning. If necessary, the drawer can be removed.
NOTE: Load capacity for the drawer and slides is 100 lbs (45 kg).
DrawerRemoval
Remove all items from inside the warming drawer, and allow the warming drawer to cool completely before attempting to remove the drawer.
To Remove:
1.Open drawer to its full open position.
2.Locate the black tabs on both sides of the drawer.
A
A. Tab
3.Press the tab down on the right side and lift tab up on the left side at the same time, then pull drawer out another inch to disengage latch.
4.Hold the drawer by its sides (not by its front). Pull it slowly all the way out.
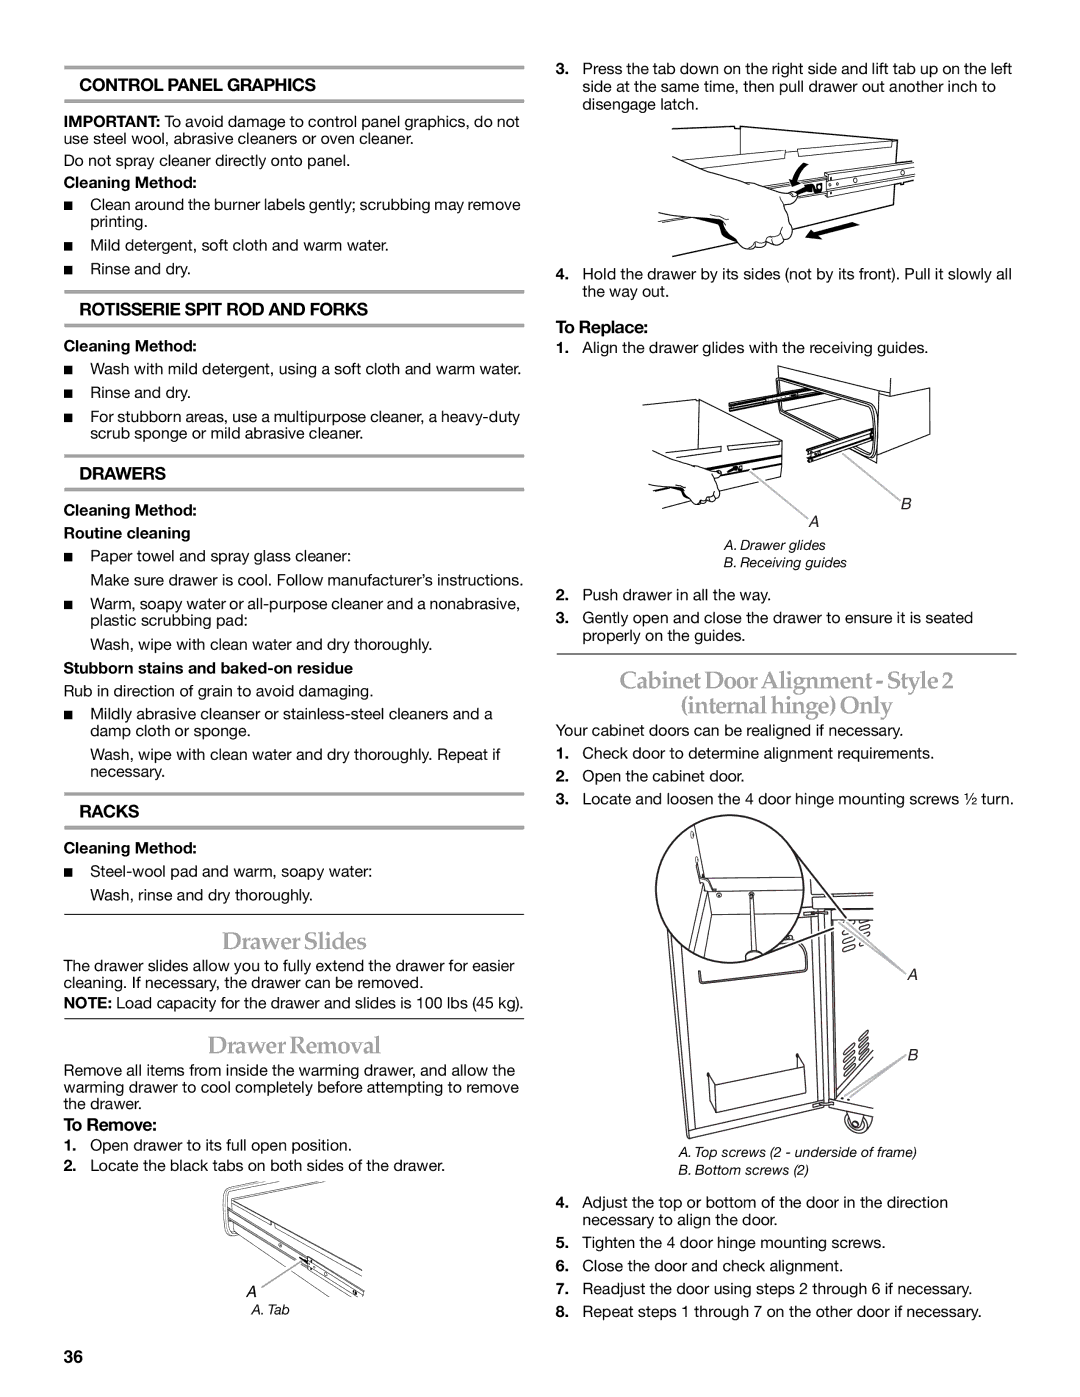
To Replace:
1.Align the drawer glides with the receiving guides.
B
A
A. Drawer glides
B. Receiving guides
2.Push drawer in all the way.
3.Gently open and close the drawer to ensure it is seated properly on the guides.
Cabinet DoorAlignment - Style2
(internal hinge)Only
Your cabinet doors can be realigned if necessary.
1.Check door to determine alignment requirements.
2.Open the cabinet door.
3.Locate and loosen the 4 door hinge mounting screws ½ turn.
A
B
A. Top screws (2 - underside of frame)
B. Bottom screws (2)
4.Adjust the top or bottom of the door in the direction necessary to align the door.
5.Tighten the 4 door hinge mounting screws.
6.Close the door and check alignment.
7.Readjust the door using steps 2 through 6 if necessary.
8.Repeat steps 1 through 7 on the other door if necessary.
36