VinylJet 36TM Reference Guide
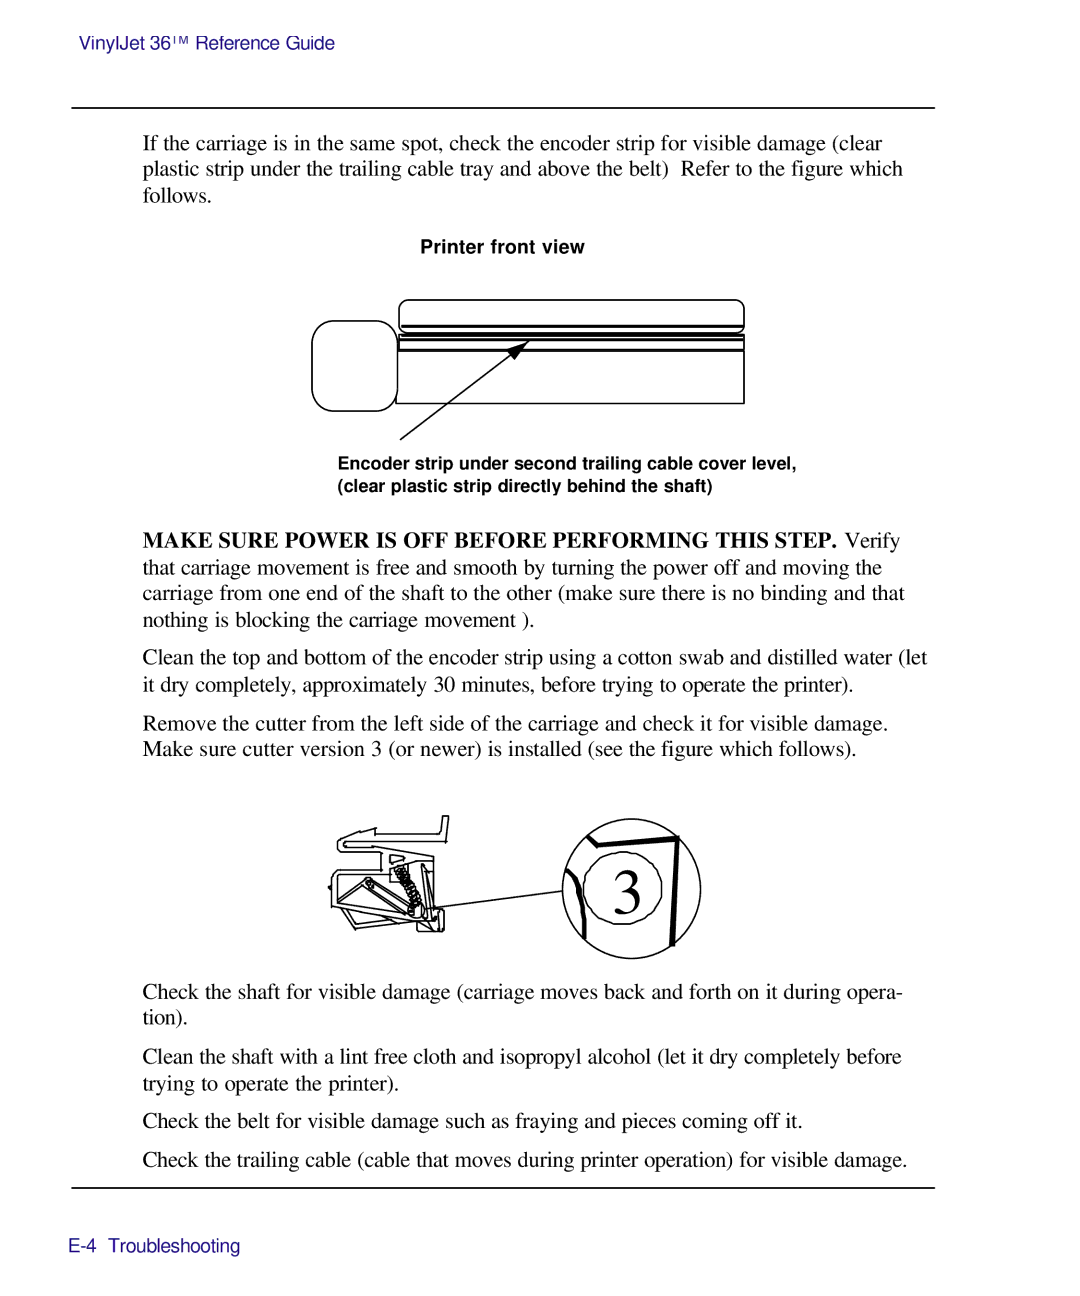
If the carriage is in the same spot, check the encoder strip for visible damage (clear plastic strip under the trailing cable tray and above the belt) Refer to the figure which follows.
Printer front view
Encoder strip under second trailing cable cover level, (clear plastic strip directly behind the shaft)
MAKE SURE POWER IS OFF BEFORE PERFORMING THIS STEP. Verify that carriage movement is free and smooth by turning the power off and moving the carriage from one end of the shaft to the other (make sure there is no binding and that nothing is blocking the carriage movement ).
Clean the top and bottom of the encoder strip using a cotton swab and distilled water (let it dry completely, approximately 30 minutes, before trying to operate the printer).
Remove the cutter from the left side of the carriage and check it for visible damage. Make sure cutter version 3 (or newer) is installed (see the figure which follows).
3 |
Check the shaft for visible damage (carriage moves back and forth on it during opera- tion).
Clean the shaft with a lint free cloth and isopropyl alcohol (let it dry completely before trying to operate the printer).
Check the belt for visible damage such as fraying and pieces coming off it.
Check the trailing cable (cable that moves during printer operation) for visible damage.
