Care and Maintenance
Clearing a Jam
■Clearing a media jam
Make sure that you follow these guidelines to avoid frequent media jams:
•Always use
•Make sure that you load specialty media only in the
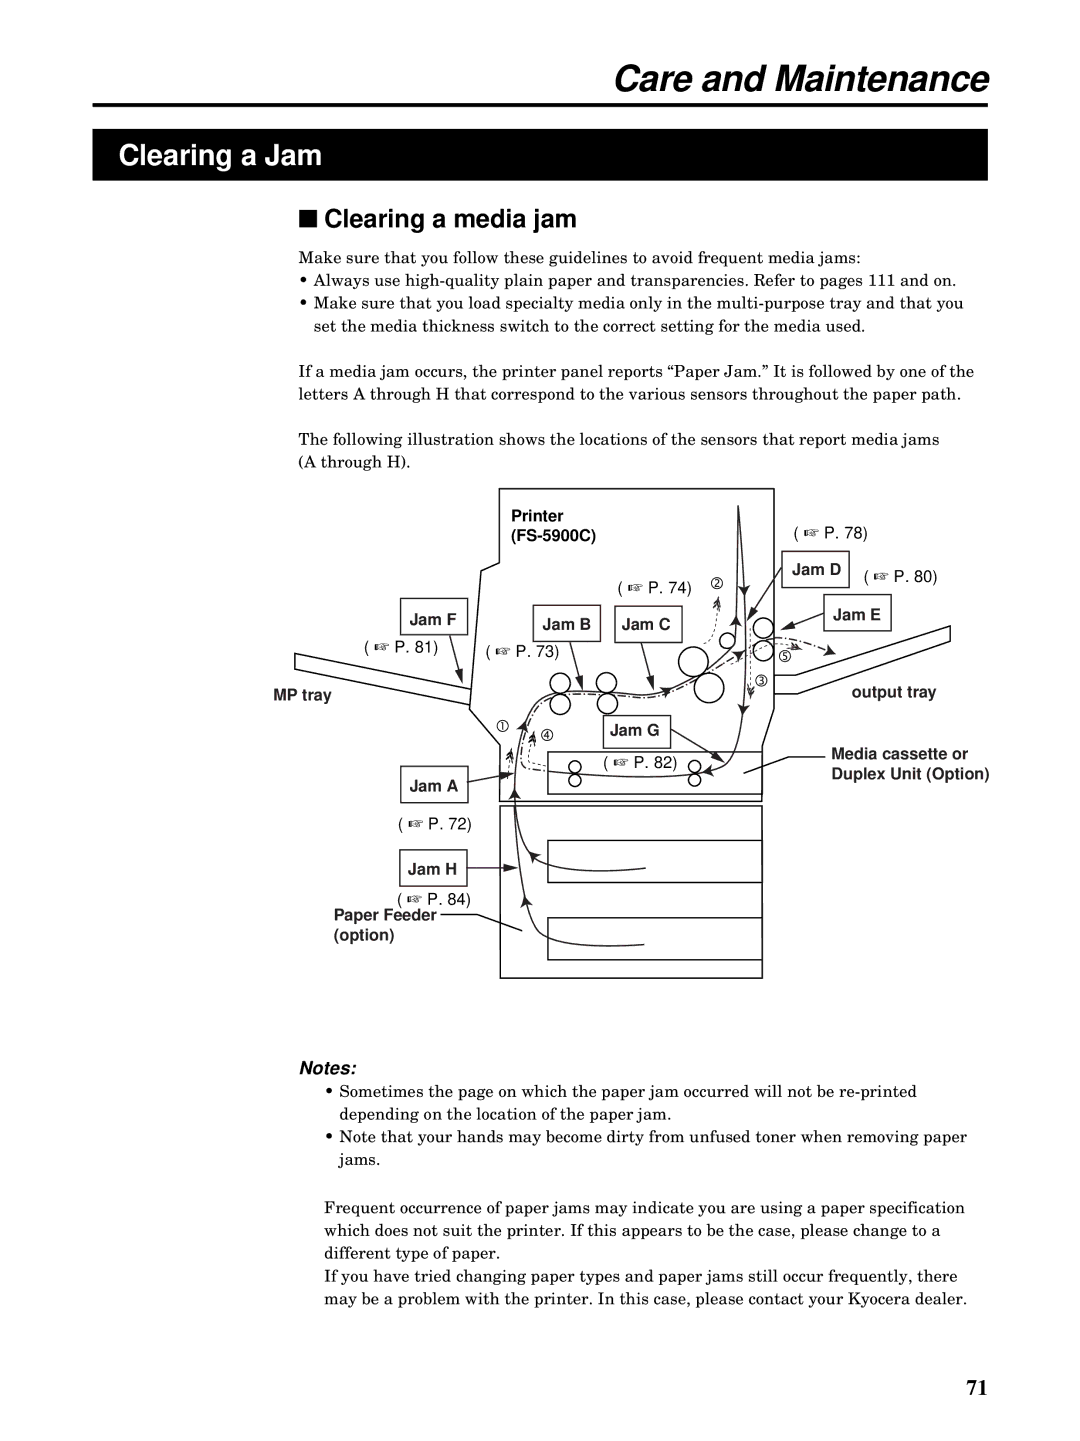
If a media jam occurs, the printer panel reports “Paper Jam.” It is followed by one of the letters A through H that correspond to the various sensors throughout the paper path.
The following illustration shows the locations of the sensors that report media jams (A through H).
| Printer |
| |
| ( ☞ P. 74) |
Jam F | Jam B Jam C |
| |
( ☞ P. 81) | ( ☞ P. 73) |
MP tray |
|
| Jam G |
( ☞ P. 82)
Jam A
( ☞ P. 72)
Jam H
( ☞ P. 84)
Paper Feeder (option)
( ☞ P. 78) | ||||
Jam D |
| ( ☞ P. 80) | ||
| ||||
|
|
| ||
|
| |||
| Jam E |
| ||
|
|
|
|
|
output tray
Media cassette or Duplex Unit (Option)
Notes:
•Sometimes the page on which the paper jam occurred will not be
•Note that your hands may become dirty from unfused toner when removing paper jams.
Frequent occurrence of paper jams may indicate you are using a paper specification which does not suit the printer. If this appears to be the case, please change to a different type of paper.
If you have tried changing paper types and paper jams still occur frequently, there may be a problem with the printer. In this case, please contact your Kyocera dealer.
71
