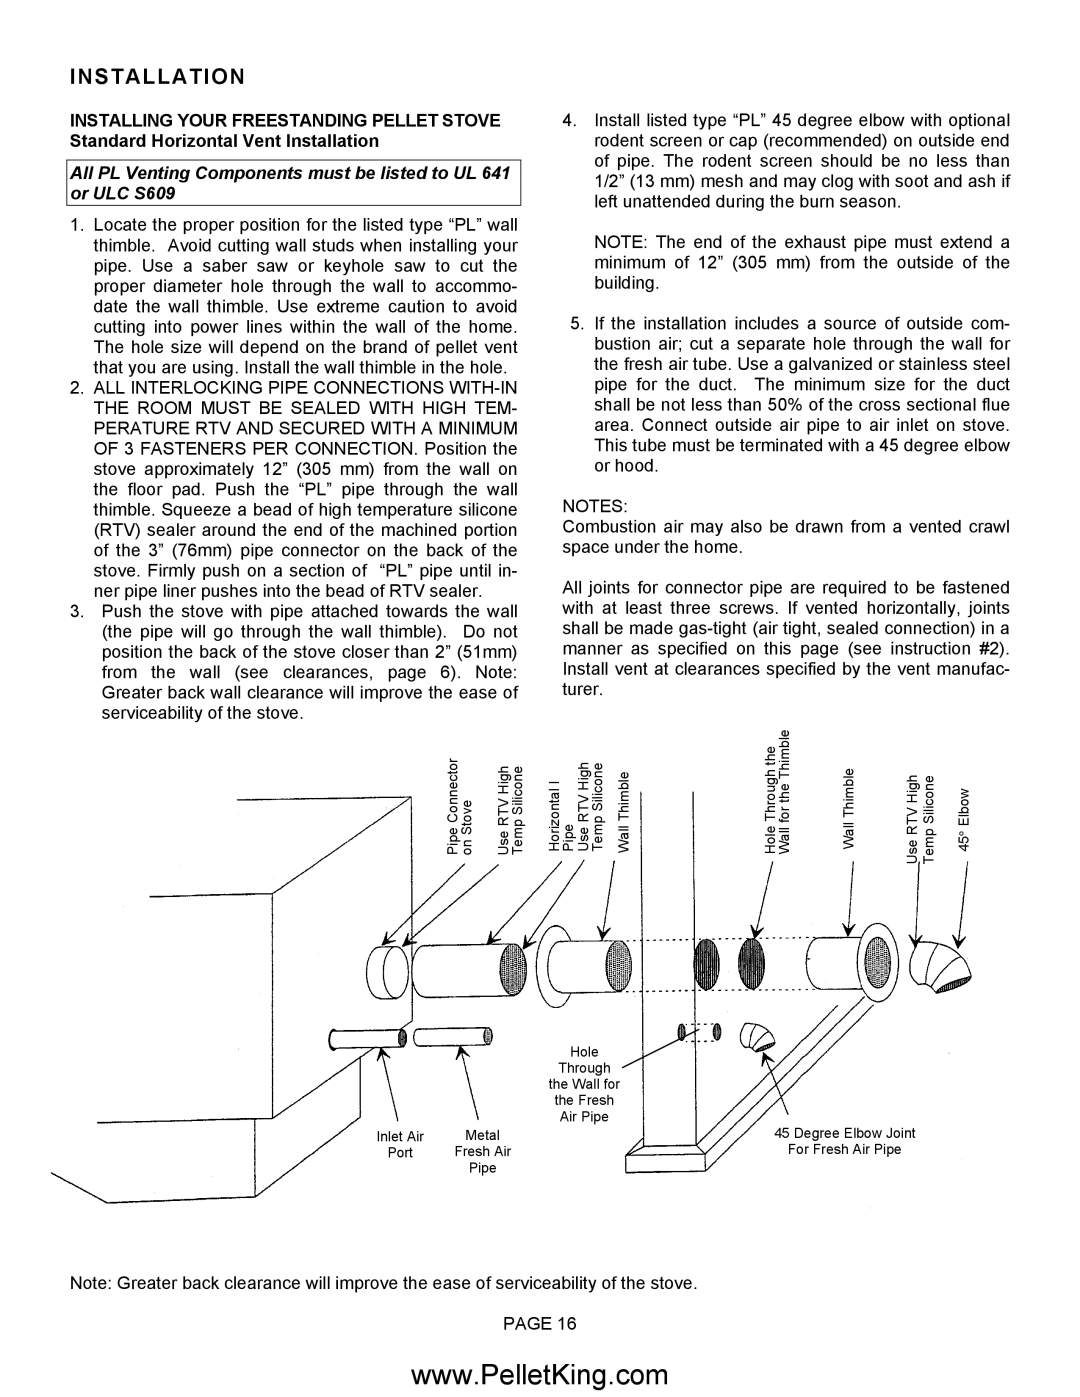
II-T C FS, II-T C INS specifications
The Lennox Hearth II-T C INS and II-T C FS are exemplary models in the world of modern heating solutions, designed for efficiency, comfort, and style. With innovative engineering and advanced technology, these units cater to the needs of contemporary homeowners seeking reliable and aesthetically pleasing heating options.One of the main features of the Lennox Hearth II-T C INS and II-T C FS is their exceptional efficiency ratings. These models are designed to operate at high efficiency levels, reducing energy consumption while providing optimal warmth. This not only translates to lower utility bills but also represents a more sustainable choice for environmentally conscious consumers.
A standout characteristic of these products is their versatility in installation. The II-T C INS is an insert model, allowing it to be fitted into existing fireplaces easily. This makes it an ideal option for homeowners wanting to upgrade their current heating systems without extensive renovations. The II-T C FS, on the other hand, is a freestanding stove that adds a classic touch to any room, making it a perfect focal point while offering powerful heating capabilities.
Both models are equipped with advanced technology designed for seamless operation. The hot air circulation system ensures that warmth is evenly distributed throughout the space, eliminating cold spots and enhancing overall comfort. In addition, their adjustable thermostats allow users to set the desired temperature with ease, ensuring a consistent indoor environment.
The Lennox Hearth units are also designed with user convenience in mind. They come with easy-to-use controls and can often be integrated with smart home systems, offering the flexibility to monitor and adjust settings remotely. This modern approach to home heating makes it simple for users to maintain a cozy atmosphere, even on the coldest days.
Moreover, Lennox places a strong emphasis on safety. These heating models include features such as a glass door that remains cool to the touch and a built-in safety shut-off system, providing peace of mind for families.
In summary, the Lennox Hearth II-T C INS and II-T C FS models stand out for their efficiency, versatility, advanced technology, and safety features. With a focus on optimal performance and user convenience, these units represent a significant advancement in home heating, making them an attractive choice for those looking to enhance their living spaces while staying warm and comfortable.

