
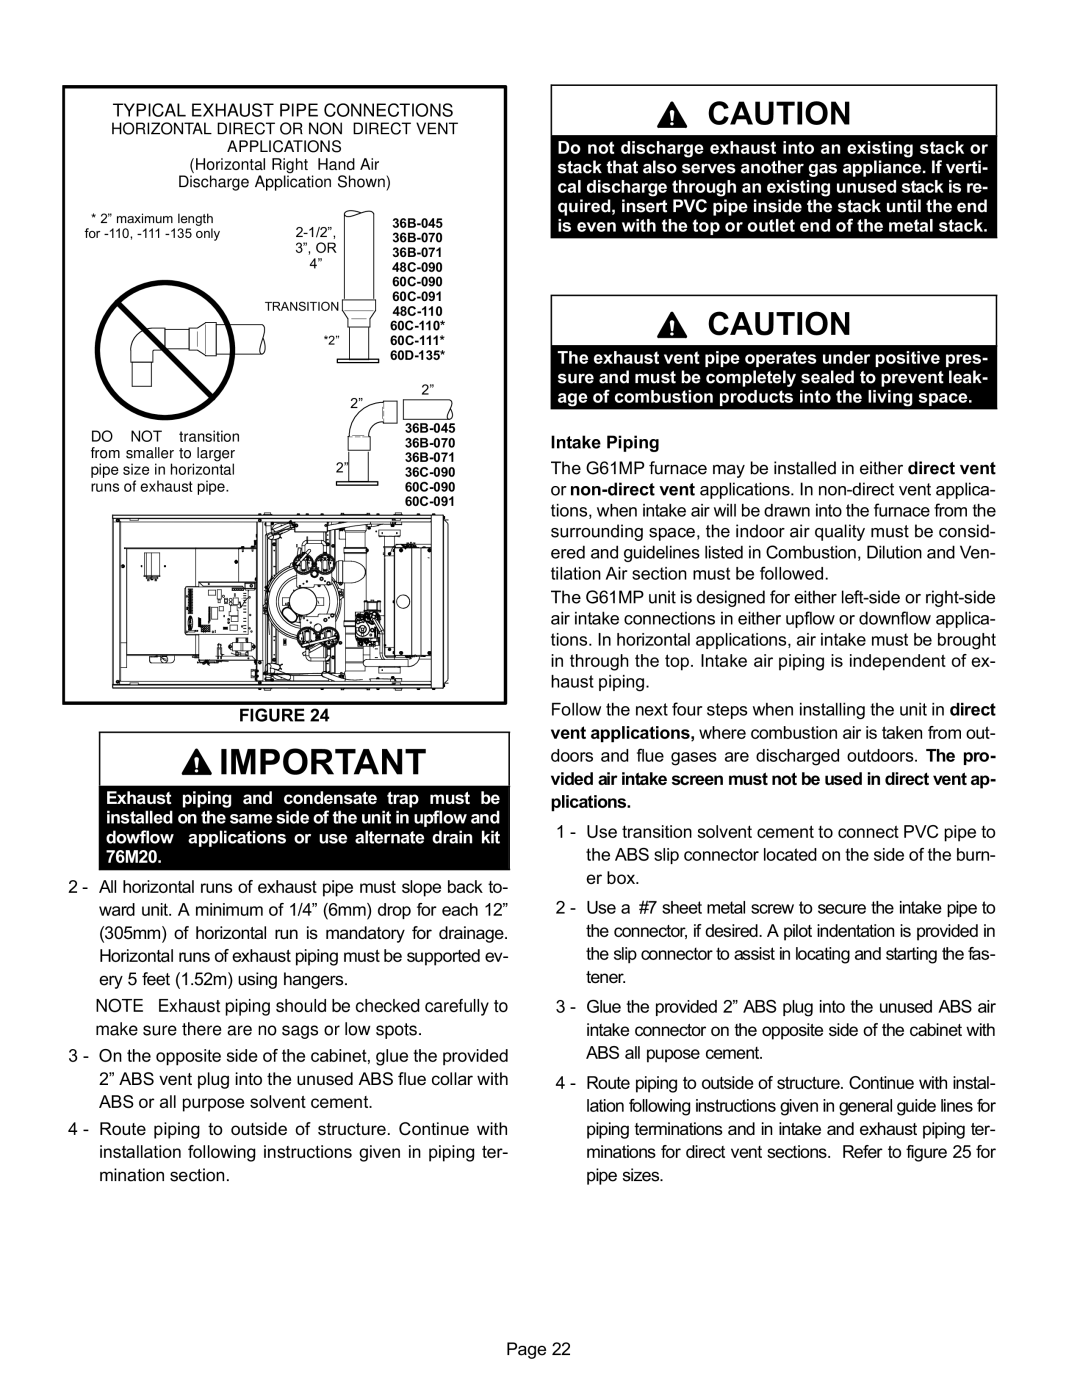
G61MP Series Units, Gas Units specifications
Lennox International Inc. has established itself as a leader in the heating and cooling industry, and its G61MP Series Gas Units stand as a testament to the company's commitment to innovation and energy efficiency. These gas units are specifically designed for residential applications and are recognized for their reliability, performance, and advanced technology.One of the main features of the G61MP Series is its variable speed motor, which offers significantly enhanced comfort over traditional single-stage gas units. This technology allows for precise temperature control and improved humidity management. By adjusting its speed according to the heating demand, the unit minimizes temperature fluctuations, leading to a more consistent indoor climate.
Another notable characteristic of the G61MP Series is its ECM blower motor, which operates quietly and efficiently. This motor not only reduces energy consumption but also enhances the overall comfort of the home by providing a steady flow of warm air without the disruptive noise often associated with traditional gas units.
The G61MP Series units are designed with a focus on energy efficiency, boasting an impressive Annual Fuel Utilization Efficiency (AFUE) rating. This rating indicates that these units convert a significant portion of the fuel they consume into usable heat, resulting in lower energy bills for homeowners. The units are equipped with a modulating gas valve that further optimizes fuel usage by adjusting the gas flow according to the heating needs of the home.
Safety is a paramount consideration in the design of the G61MP Series. These units are built with advanced safety features, including a self-diagnostic control system that continuously monitors the unit’s performance. This system alerts homeowners to any potential issues, allowing for proactive maintenance and ensuring the longevity of the equipment.
The G61MP Series is also designed for ease of installation and servicing. Its compact design allows for flexible placement in various home environments, while the user-friendly access panels simplify routine maintenance tasks.
In conclusion, Lennox International Inc.'s G61MP Series Gas Units deliver a combination of advanced technology, energy efficiency, and reliability, making them an excellent choice for homeowners looking to enhance their heating systems. With features designed to maximize comfort, minimize energy costs, and ensure safety, these units represent a significant advancement in residential heating solutions.