How to clear paper jams
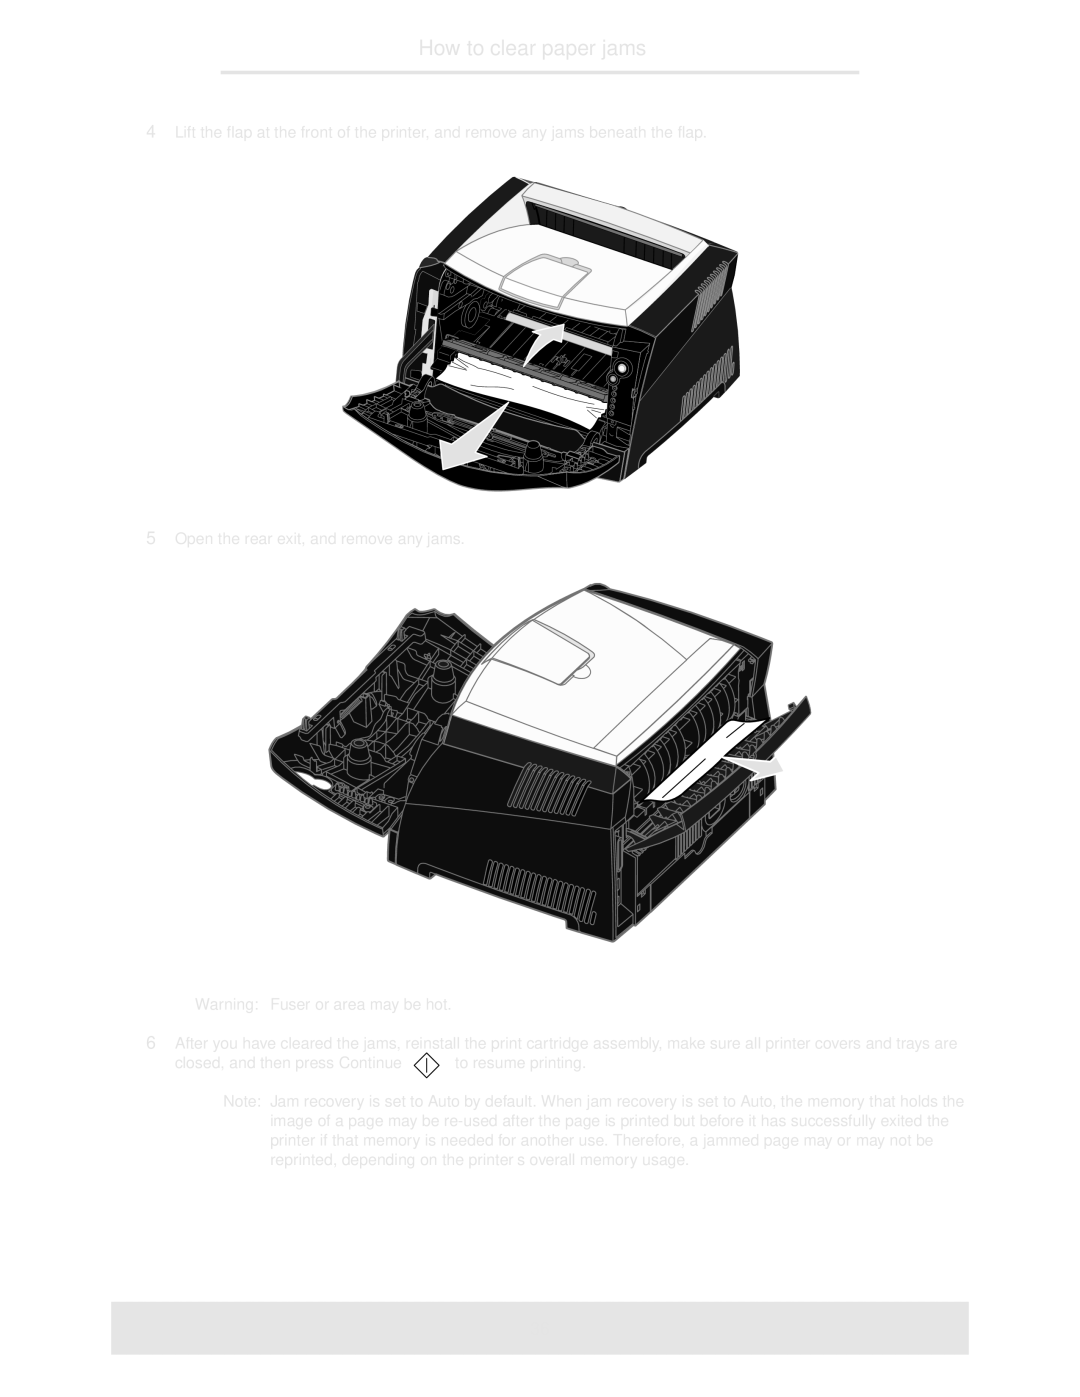
4Lift the flap at the front of the printer, and remove any jams beneath the flap.
5Open the rear exit, and remove any jams.
Warning: Fuser or area may be hot.
6After you have cleared the jams, reinstall the print cartridge assembly, make sure all printer covers and trays are
closed, and then press Continue ![]() to resume printing.
to resume printing.
Note: Jam recovery is set to Auto by default. When jam recovery is set to Auto, the memory that holds the image of a page may be
36