
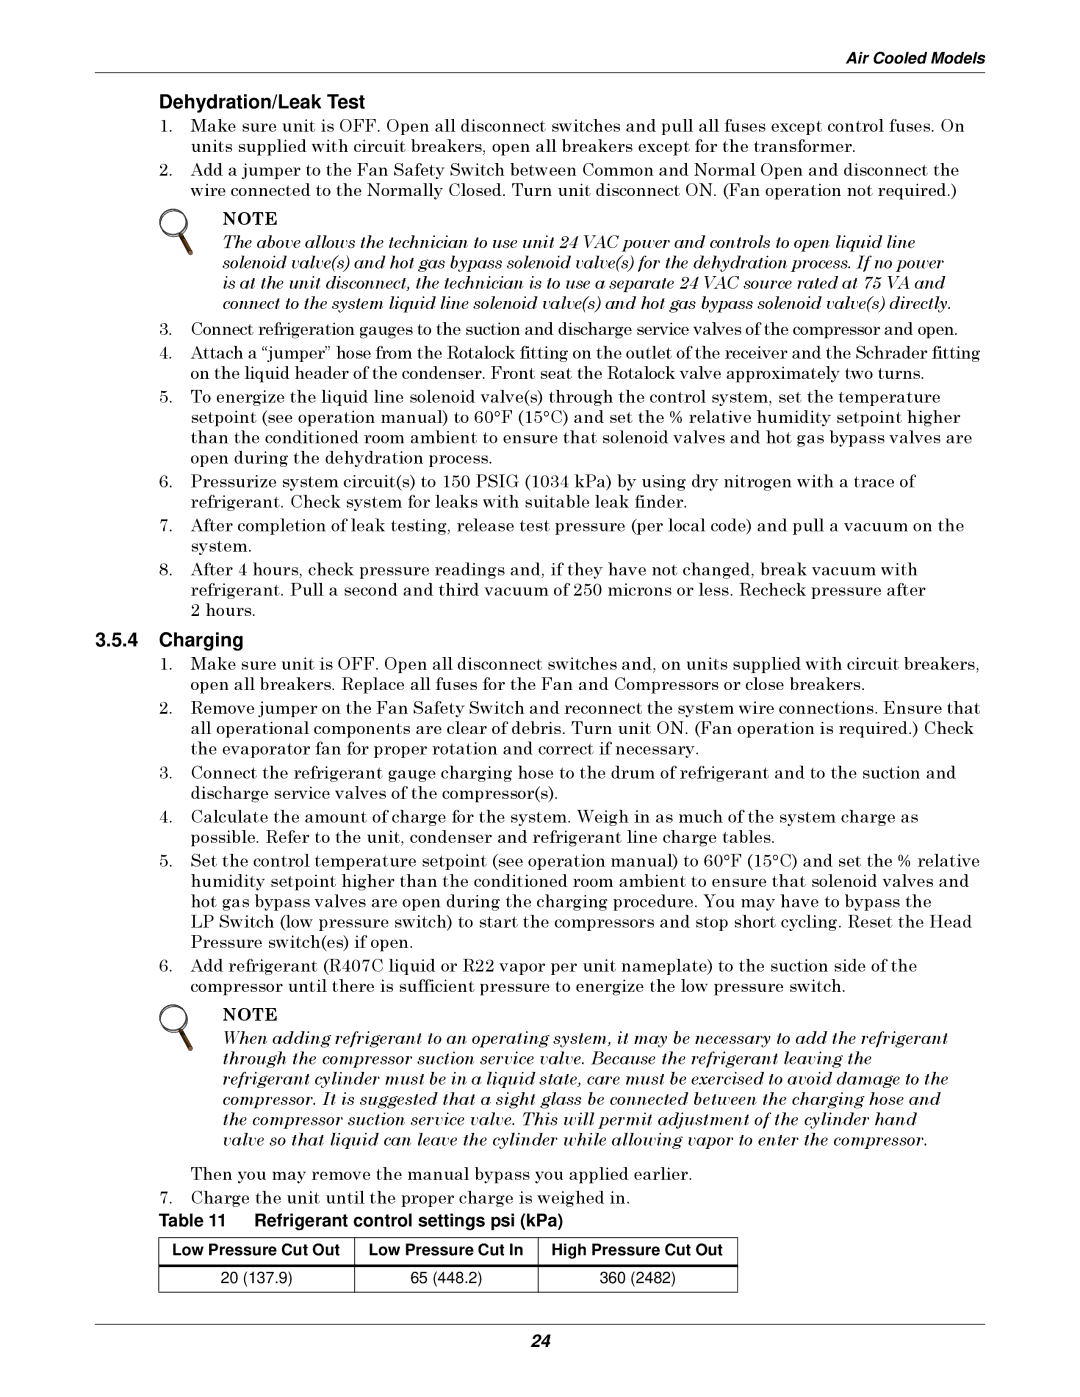
3000 specifications
The Liebert 3000 is a cutting-edge power protection solution designed to provide reliable and efficient backup power for critical applications. This uninterruptible power supply (UPS) system is engineered to safeguard sensitive electronic equipment from power disturbances, ensuring uninterrupted operations in data centers, telecommunications, and industrial environments.One of the standout features of the Liebert 3000 is its high-efficiency design. With an efficiency rating of up to 94%, the system minimizes energy loss, resulting in lower operational costs and a reduced carbon footprint. This is particularly important in today's environmentally conscious climate, as organizations strive to meet sustainability goals while maintaining top-tier performance.
The Liebert 3000 employs advanced technologies to enhance its functionality. It incorporates online double-conversion technology, which provides a continuous supply of clean and regulated power. This technology ensures that connected loads receive stable voltage and frequency, shielding them from voltage spikes, sags, and outages. Additionally, the UPS offers features such as automatic battery testing, which helps ensure peak battery performance and reliability.
Another key characteristic of the Liebert 3000 is its modular design, allowing for flexible scalability. This means that organizations can easily expand the capacity of their UPS system as their power needs grow, without the need for extensive system overhauls. The modular architecture also facilitates simplified maintenance and reduces downtime, as individual modules can be serviced without interrupting power to the critical load.
The system is equipped with comprehensive monitoring and management capabilities. The Liebert 3000 provides real-time data on power usage, battery status, and system performance, enabling facility managers to make informed decisions and proactively address potential issues. The integration of remote management tools allows for seamless monitoring from anywhere, providing peace of mind for operators.
Overall, the Liebert 3000 combines high efficiency, advanced technology, and flexible design to deliver a robust power protection solution. Its reliability and performance make it a preferred choice for organizations seeking to protect their critical infrastructure while enhancing operational efficiency and sustainability. As businesses continue to rely on technology for their everyday operations, the Liebert 3000 stands out as a dependable safeguard against the uncertainties of power quality.