Disassembly Procedures
!WARNING
To avoid risk of electrical shock, personal injury or death; disconnect power to unit before servicing.
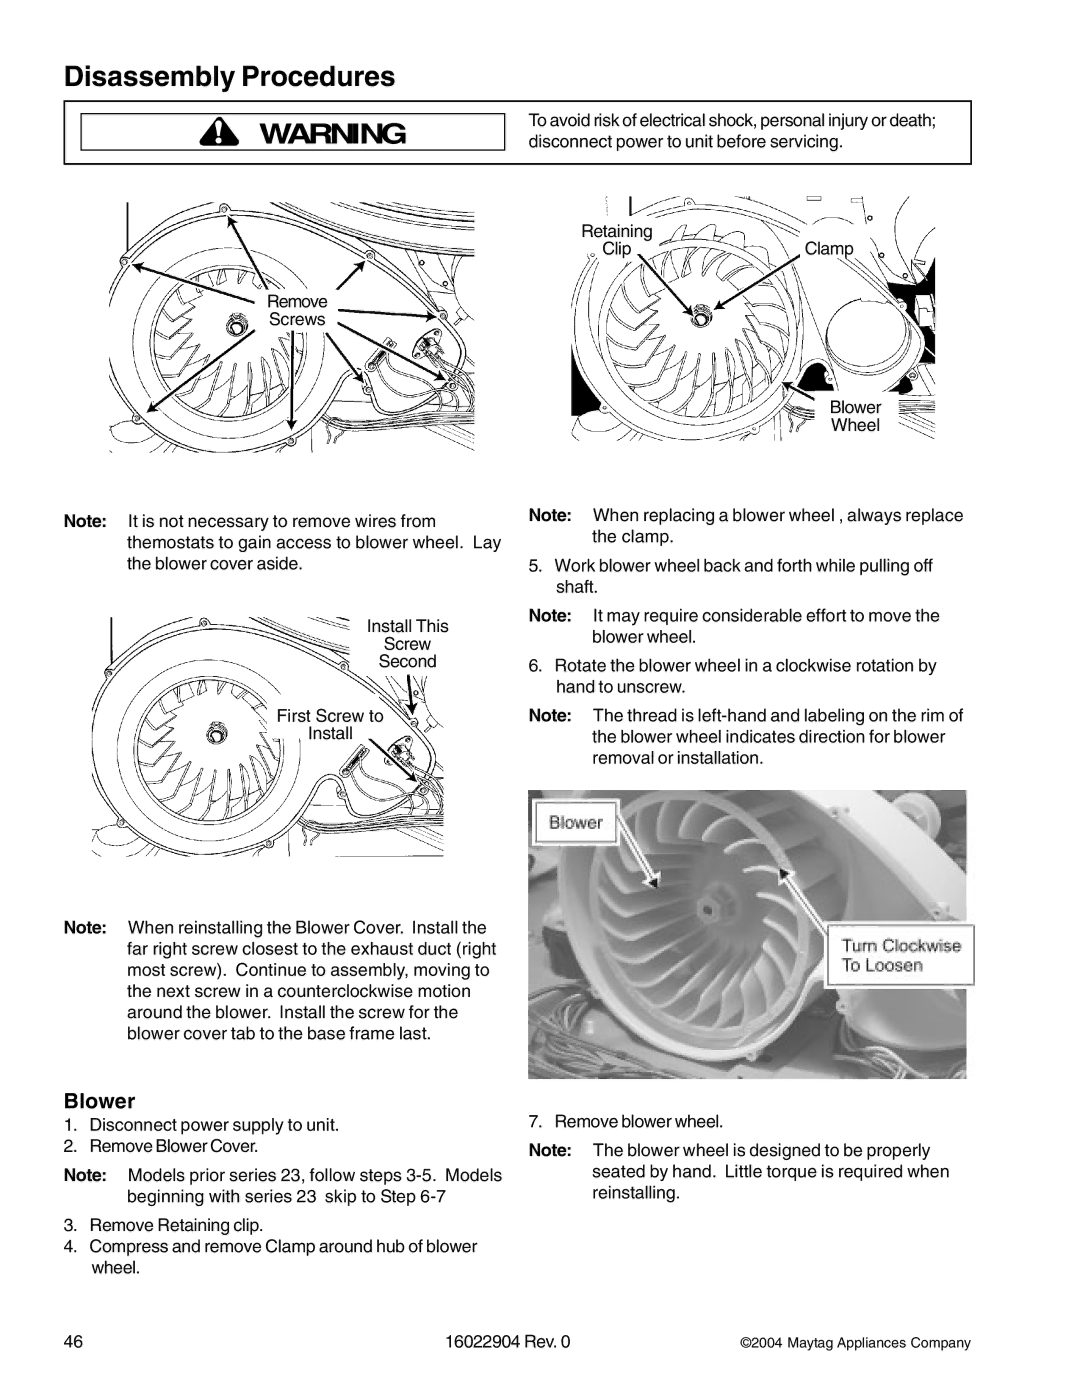
Retaining
ClipClamp
Remove
Screws
Blower
Wheel
Note: It is not necessary to remove wires from themostats to gain access to blower wheel. Lay the blower cover aside.
Install This
Screw
Second
First Screw to
Install
Note: When reinstalling the Blower Cover. Install the far right screw closest to the exhaust duct (right most screw). Continue to assembly, moving to the next screw in a counterclockwise motion around the blower. Install the screw for the blower cover tab to the base frame last.
Note: When replacing a blower wheel , always replace the clamp.
5.Work blower wheel back and forth while pulling off shaft.
Note: It may require considerable effort to move the blower wheel.
6.Rotate the blower wheel in a clockwise rotation by hand to unscrew.
Note: The thread is
Blower
1.Disconnect power supply to unit.
2.Remove Blower Cover.
Note: Models prior series 23, follow steps
3.Remove Retaining clip.
4.Compress and remove Clamp around hub of blower wheel.
7. Remove blower wheel.
Note: The blower wheel is designed to be properly seated by hand. Little torque is required when reinstalling.
46 | 16022904 Rev. 0 | ©2004 Maytag Appliances Company |