Disassembly Procedures
!WARNING
To avoid risk of electrical shock, personal injury or death; disconnect power to unit before servicing.
5. Remove retaining clip from groove in shaft.
6.Remove fiber washer.
7.Remove Idler Pulley and bearing.
8.Remove second fiber washer.
Idler Shaft
Idler Arm
Fiber
Washer
Idler Pulley | Washer |
Fiber | |
Clip Washer | |
| Bolt |
Note: There is a fiber washer between the pulley and the idler arm. When replacing parts, be certain the order of replacement is correct,
4.Remove the two screws securing the coil holding bracket.
Note: The position of the flange of the idler pulley is important. The flange should be positioned on the side opposite the idler arm.
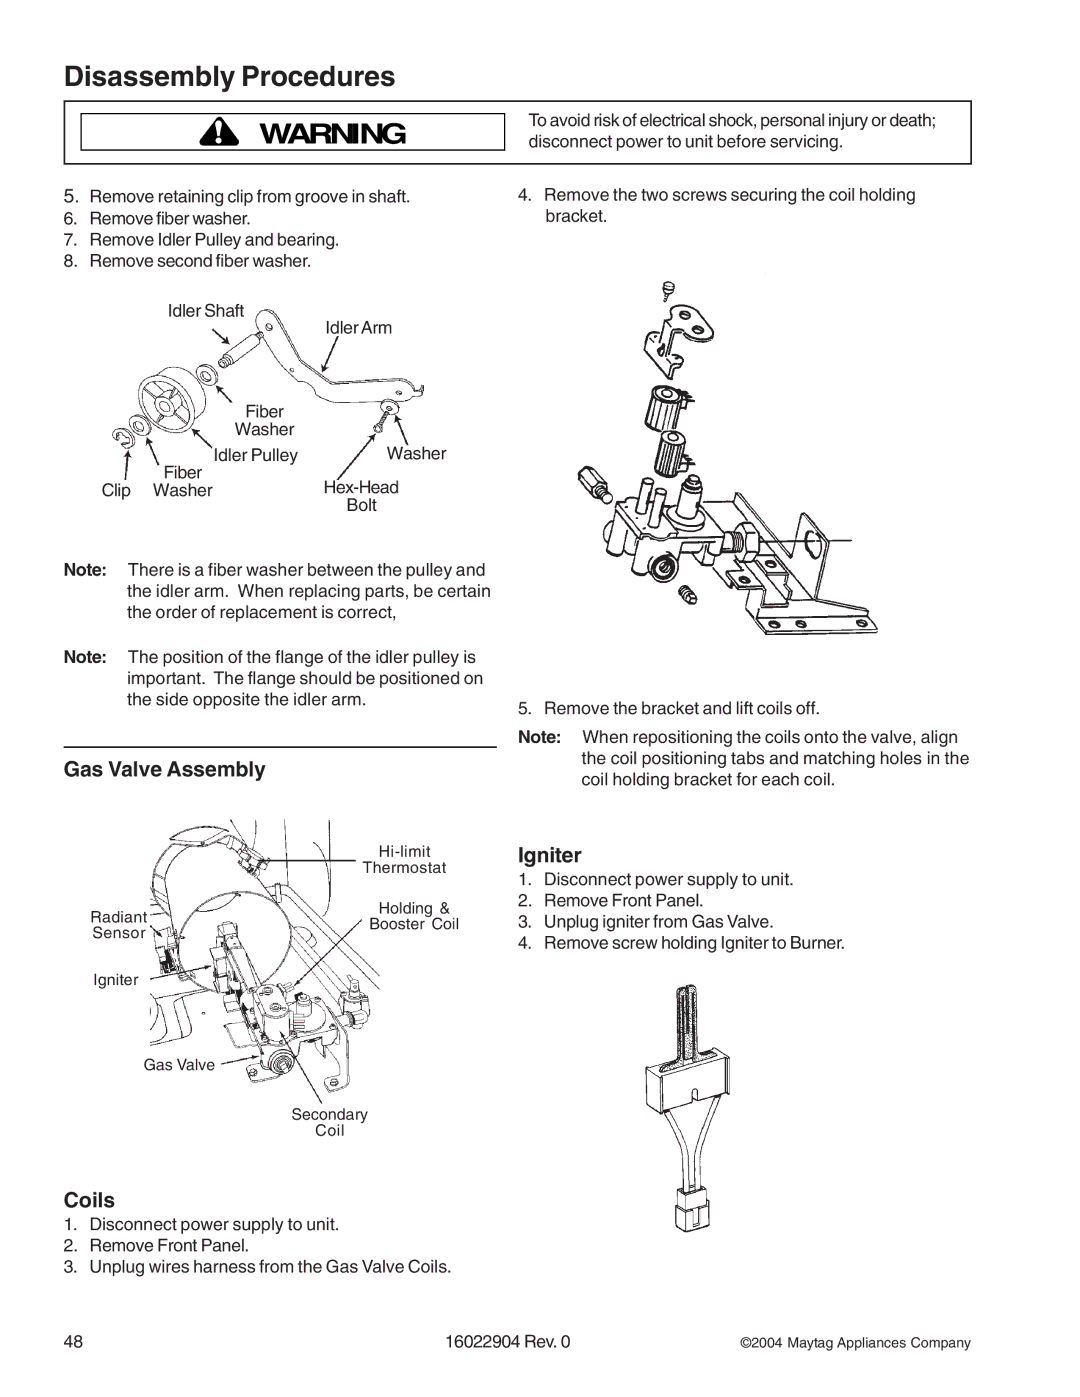
Gas Valve Assembly
Thermostat
Holding &
RadiantBooster Coil
Sensor
Igniter
Gas Valve
Secondary
Coil
Coils
1.Disconnect power supply to unit.
2.Remove Front Panel.
3.Unplug wires harness from the Gas Valve Coils.
5. Remove the bracket and lift coils off.
Note: When repositioning the coils onto the valve, align the coil positioning tabs and matching holes in the coil holding bracket for each coil.
Igniter
1.Disconnect power supply to unit.
2.Remove Front Panel.
3.Unplug igniter from Gas Valve.
4.Remove screw holding Igniter to Burner.
48 | 16022904 Rev. 0 | ©2004 Maytag Appliances Company |