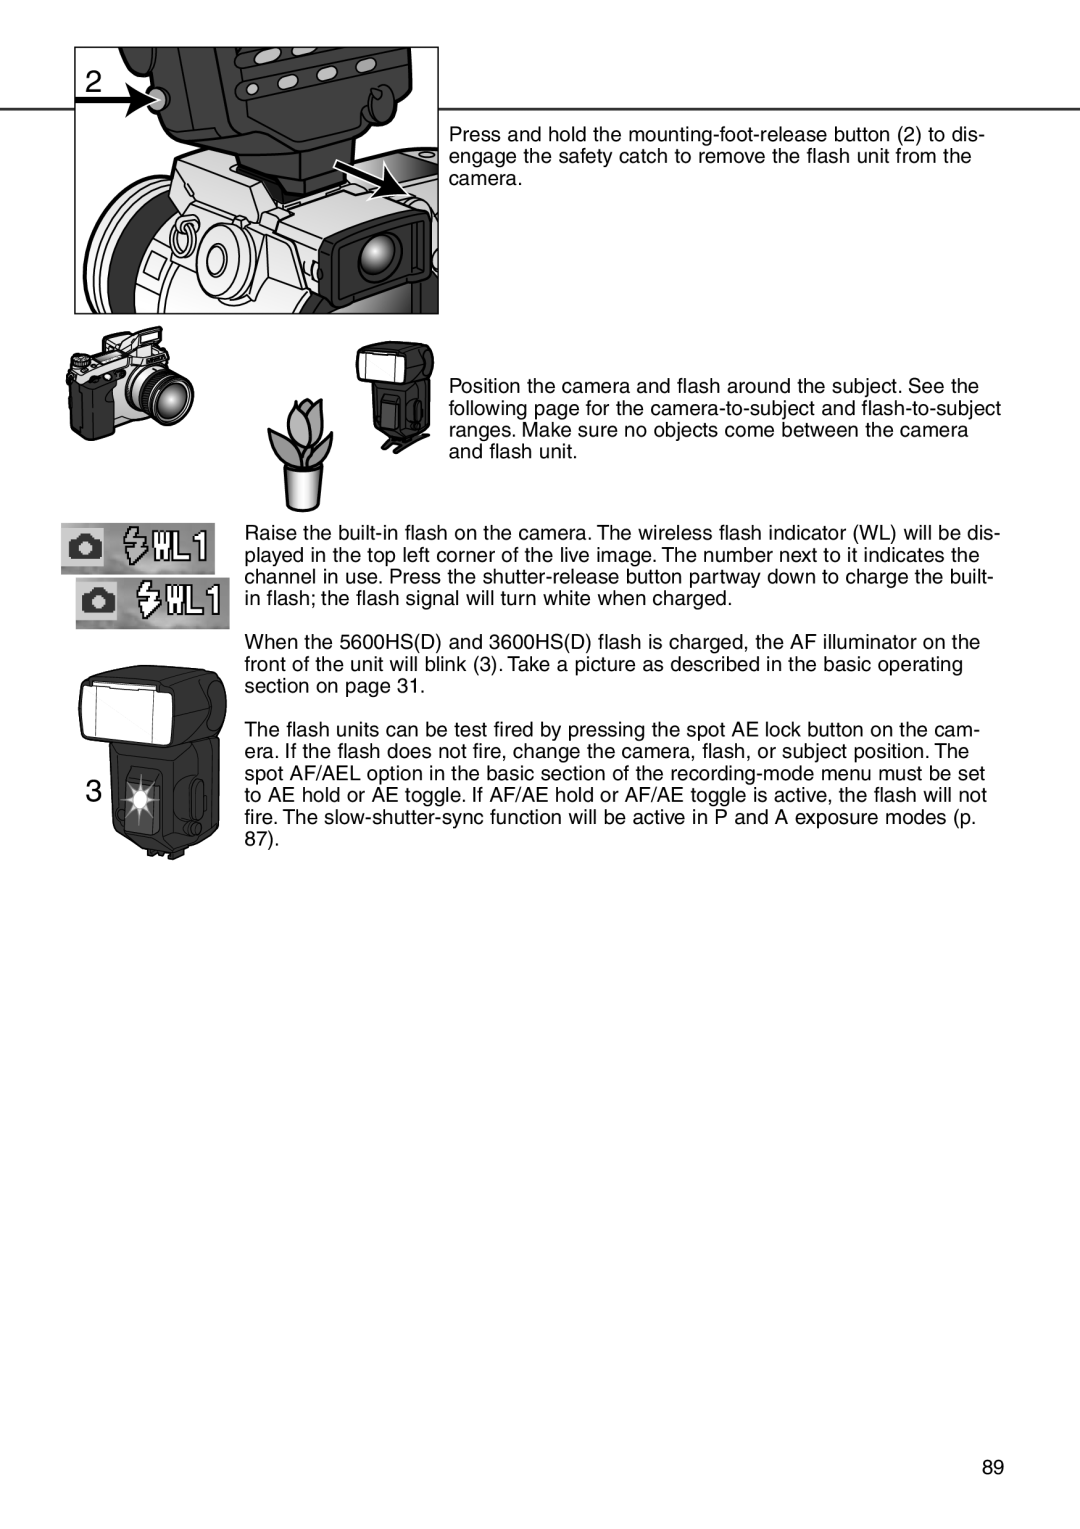
2 |
Press and hold the
Position the camera and flash around the subject. See the following page for the
Raise the
When the 5600HS(D) and 3600HS(D) flash is charged, the AF illuminator on the front of the unit will blink (3). Take a picture as described in the basic operating section on page 31.
| The flash units can be test fired by pressing the spot AE lock button on the cam- |
| era. If the flash does not fire, change the camera, flash, or subject position. The |
3 | spot AF/AEL option in the basic section of the |
to AE hold or AE toggle. If AF/AE hold or AF/AE toggle is active, the flash will not |
fire. The
89