Four-Channel Digital Video Recorder
Highlight the box beside Audio Recording and press the ![]() button. This toggles between On and Off. When it is On, the DVR also records audio when it is recording video.
button. This toggles between On and Off. When it is On, the DVR also records audio when it is recording video.
Highlight the box beside Mute and press the ![]() button. This toggles between On and Off. When it is On, the DVR will NOT play live or recorded audio.
button. This toggles between On and Off. When it is On, the DVR will NOT play live or recorded audio.
Highlight the box beside Audio In and press the ![]() button. A list of cameras appears, and you can select the camera number you would like to associate with audio input. When Audio Recording is set to On, the
button. A list of cameras appears, and you can select the camera number you would like to associate with audio input. When Audio Recording is set to On, the ![]() displays on the associated camera screen.
displays on the associated camera screen.
NOTE: Audio will play through the attached speaker while the DVR is recording audio and the associated camera displays full screen.
You can save your changes by highlighting OK and pressing the ![]() button. Selecting Cancel exits the screen without saving the changes.
button. Selecting Cancel exits the screen without saving the changes.
NOTE: The DVR will NOT record audio when the recording speed is set to less 15 ips (12.5 ips for PAL). The DVR may not record audio depending on the Transfer Speed when the
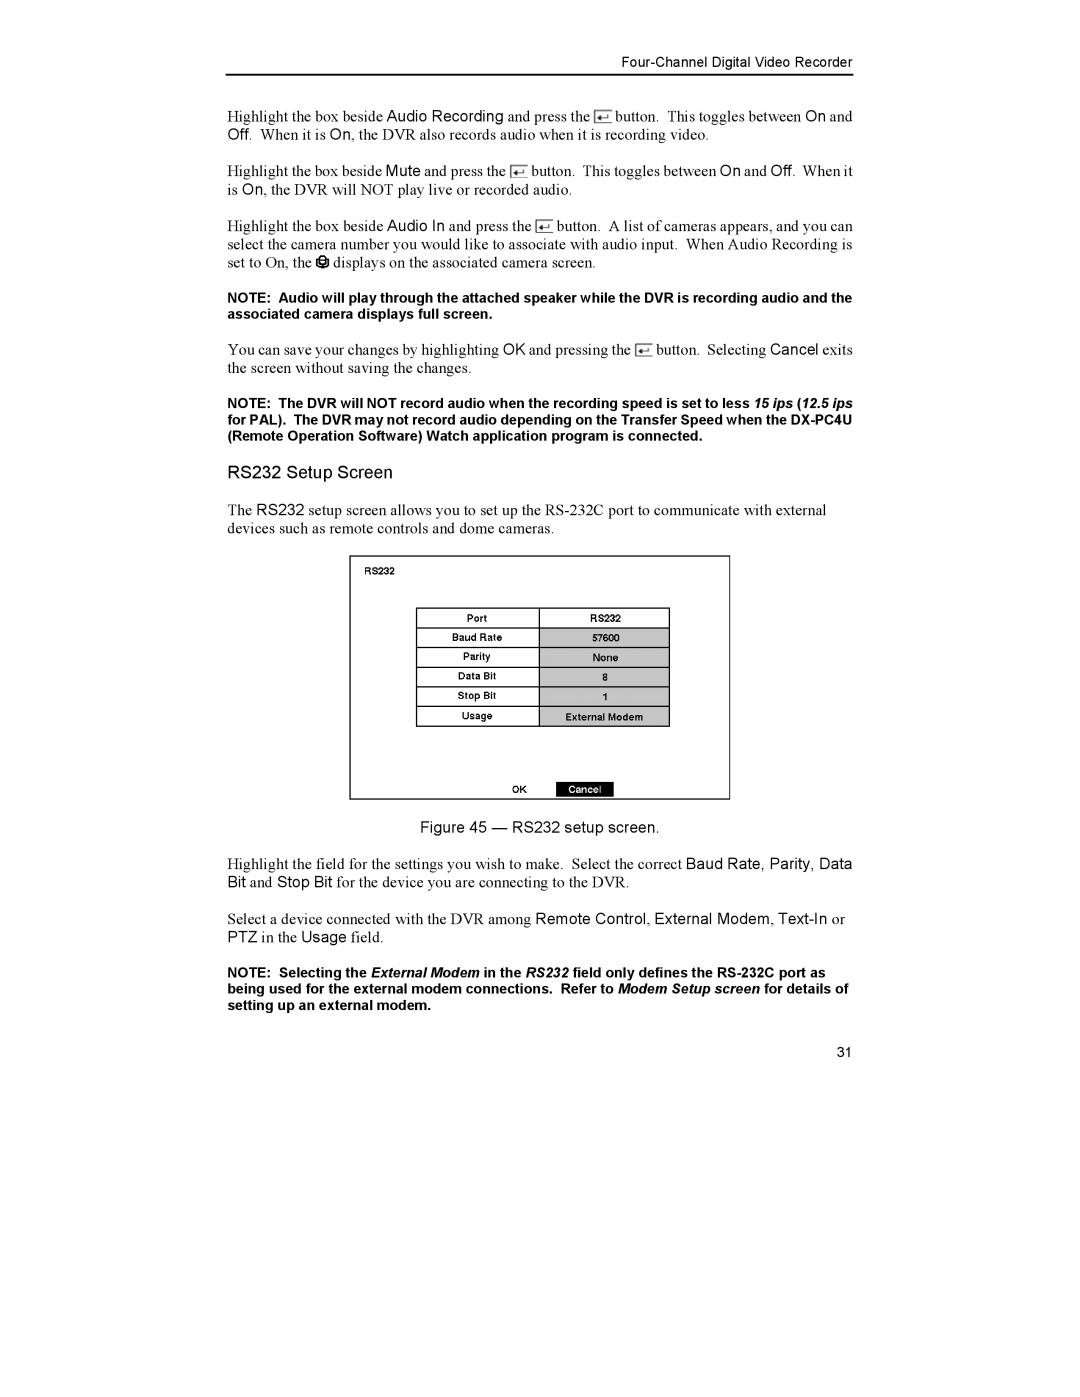
RS232 Setup Screen
The RS232 setup screen allows you to set up the
Figure 45 — RS232 setup screen.
Highlight the field for the settings you wish to make. Select the correct Baud Rate, Parity, Data Bit and Stop Bit for the device you are connecting to the DVR.
Select a device connected with the DVR among Remote Control, External Modem,
NOTE: Selecting the External Modem in the RS232 field only defines the
31