III.DX-VS1UE Initial Configuration
1.Installation Summary
•Connect ethernet cable and supply power to
•Install a setup program of
•Assign an IP address to
•Set user condition.
2.Connecting
•Connect ethernet cable to the ethernet port on the rear.
•Connect power supply unit to a power supply port on the rear..
•Confirm that the LEDs of ethernet port keep blinking.
・Connecting DX-VS1UE with PC
You may use crossover cable (red colored one) to directly connect
Crossover Cable
Connect
*If you use the crossover cable (red colored one) enclosed and follow the method illustrated in the above diagram, but you cannot access, try to connect through HUB using direct cable. Otherwise, set 10Mbps to the communcation speed in terms of network interface configuration of your PC, if it’s possible. In case you cannot access even though you tried the above mentioned method, some- thing can be wrong with PC(including OS setting). Please contact with makers which provide your PC or OS.
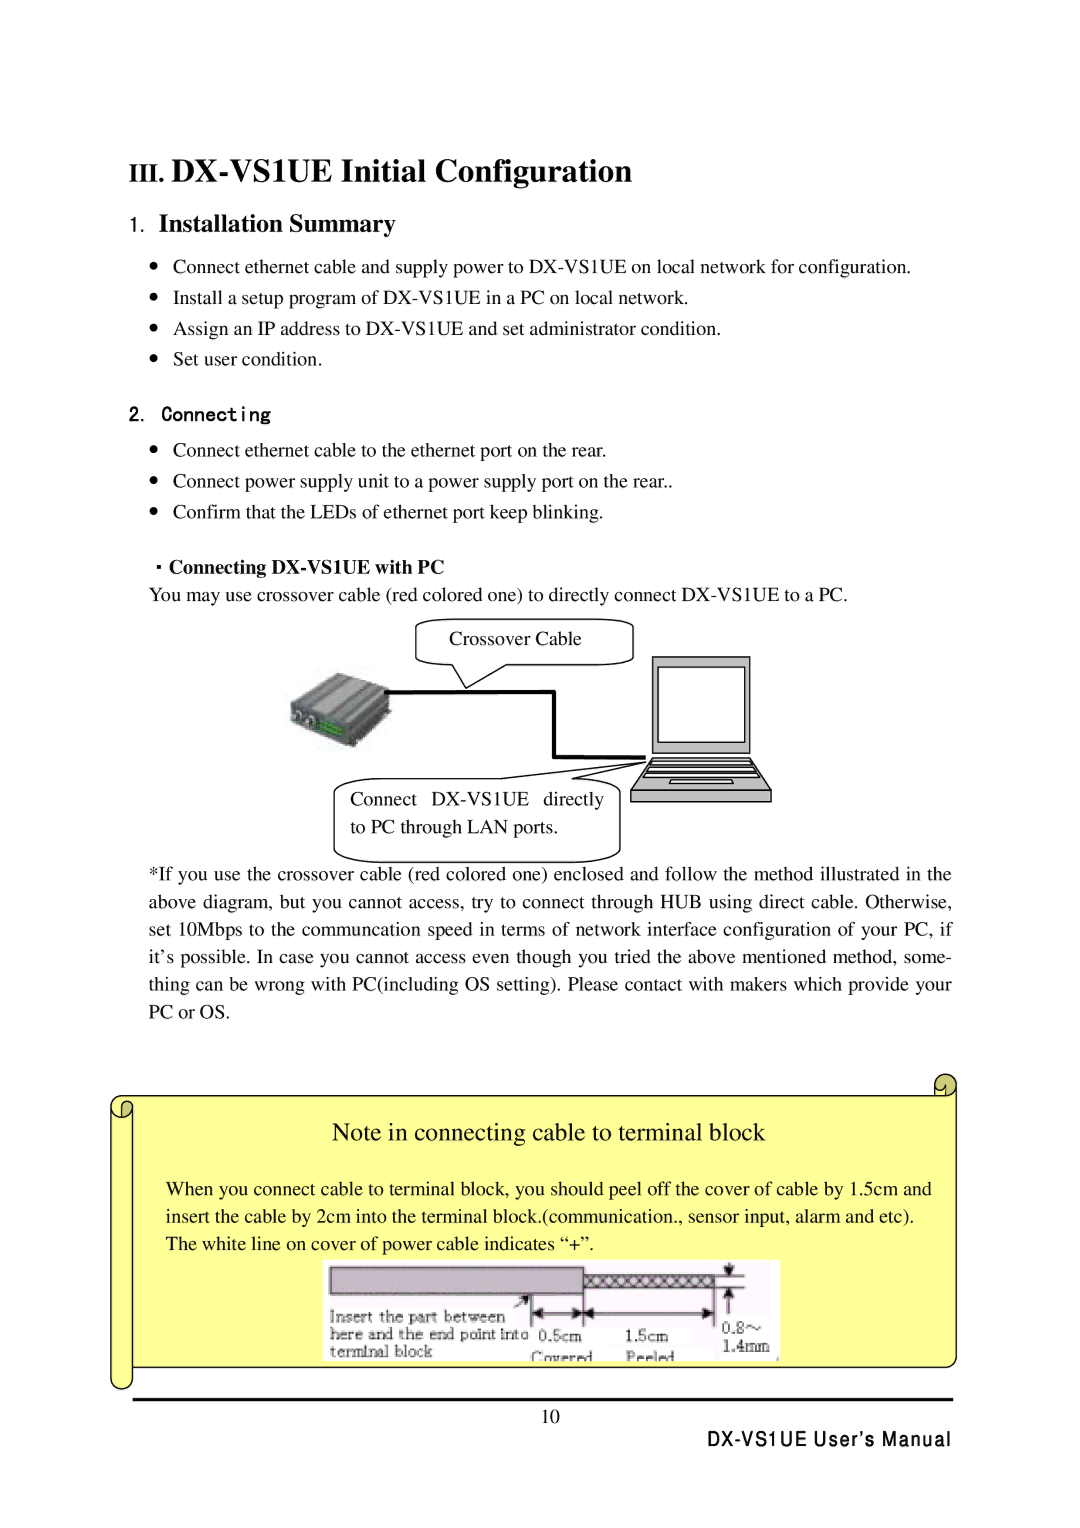
Note in connecting cable to terminal block
When you connect cable to terminal block, you should peel off the cover of cable by 1.5cm and insert the cable by 2cm into the terminal block.(communication., sensor input, alarm and etc). The white line on cover of power cable indicates “+”.
10