42Chapter 3. TV Setup
Initial NetCommand® Setup
What You Need to Know About NetCommand
•NetCommand setup is optional.
•NetCommand operates by sending signals from the TV to your other devices via the IR emitters, telling the devices to play, record, change inputs, adjust volume, change channels and many more functions. All this is accomplished with the TV’s remote control and the slide switch left in the TV position.
•The IR “Learning” feature of NetCommand allows the TV to learn the remote control signals for your A/V devices.
•NetCommand® can control IEEE 1394 devices by sending control signals over a FireWire® cable.
•You can choose the level of NetCommand control for your home theater.
Limited Setup. Perform a limited setup if you:
Want NetCommand to control only a few devices, such as the TV, a playback device (like a DVD player), and a cable box. With this setup, you can use the TV’s remote control to operate these devices.
Want to use TV Guide On Screen® to control your cable box and VCR and/or A/V disc. After performing this setup, you can use the TV’s remote control to operate these devices.
Want the ease and flexibility of NetCommand- controlled recording, with seamless setup of
Full Setup. Perform a full setup if you want to give NetCommand the following additonal control:
Control a surround sound A/V receiver.
Automatically change input selections for the A/V receiver.
Initial NetCommand Setup for Most Device Types
•To set up an A/V receiver, see “Additional Setup Using the NetCommand Menu” later in this chapter.
•For setup later, or to make changes to the setup, see “Additional Setup Using the NetCommand Menu” later in this chapter.
1.Connect and position the IR emitters as described in chapter 2, “TV Connections.”
2.Have the remote controls for the TV and the other device ready before beginning. Set the TV remote control’s slide switch to the TV position.
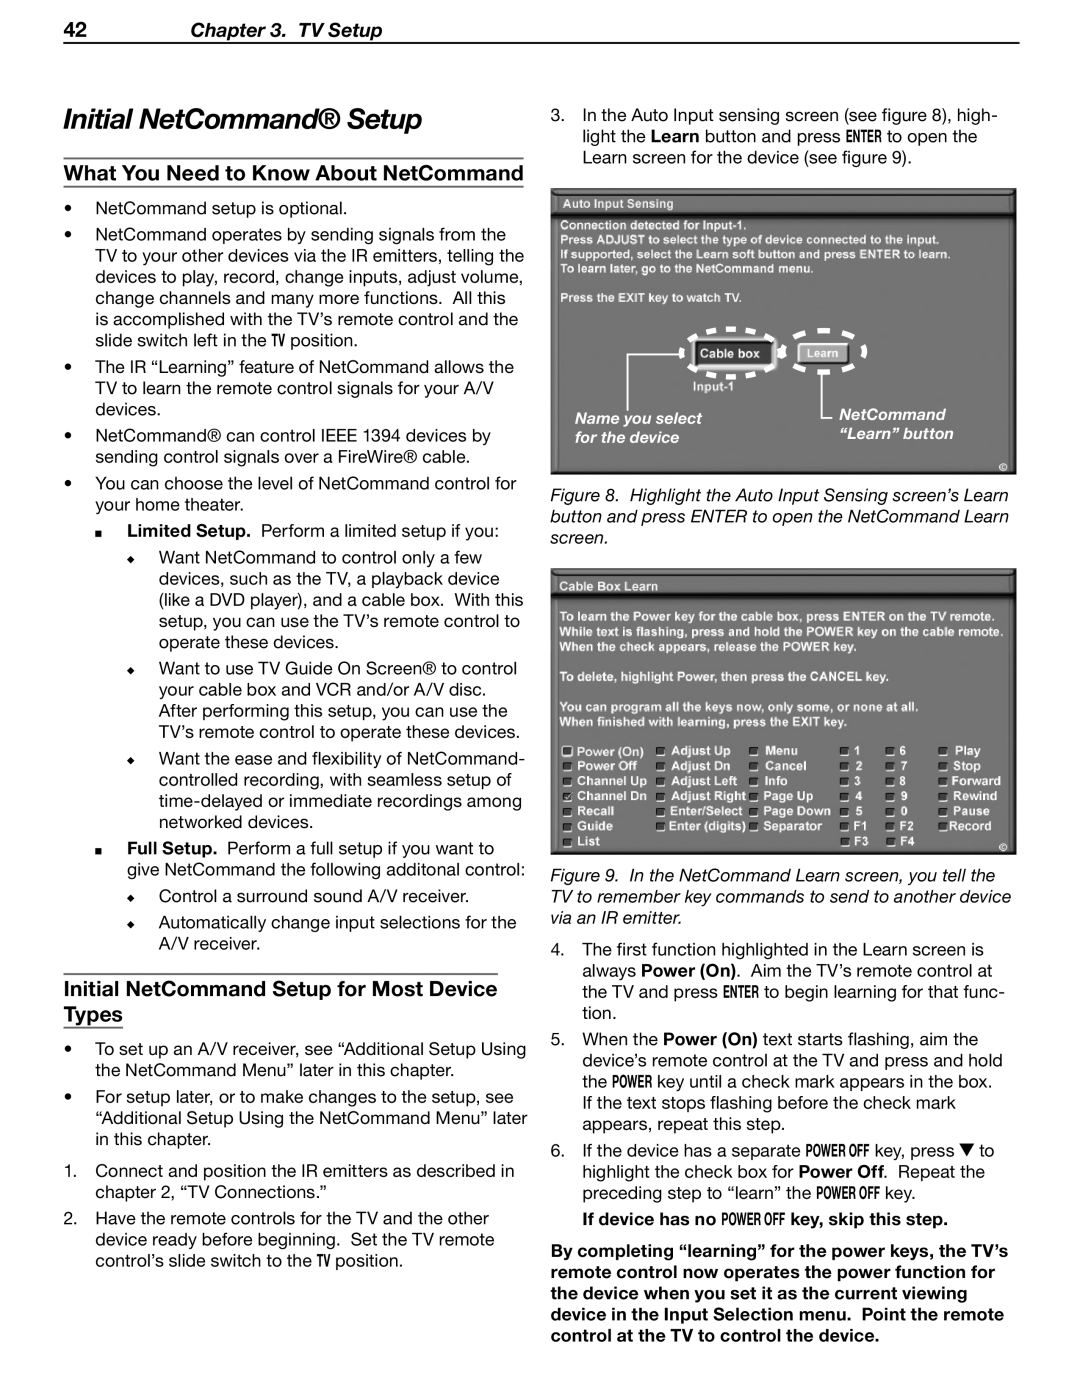
3.In the Auto Input sensing screen (see figure 8), high- light the Learn button and press ENTER to open the Learn screen for the device (see figure 9).
Name you select | NetCommand |
for the device | “Learn” button |
Figure 8. Highlight the Auto Input Sensing screen’s Learn button and press ENTER to open the NetCommand Learn screen.
Figure 9. In the NetCommand Learn screen, you tell the TV to remember key commands to send to another device via an IR emitter.
4.The first function highlighted in the Learn screen is always Power (On). Aim the TV’s remote control at the TV and press ENTER to begin learning for that func- tion.
5.When the Power (On) text starts flashing, aim the device’s remote control at the TV and press and hold the POWER key until a check mark appears in the box. If the text stops flashing before the check mark appears, repeat this step.
6.If the device has a separate POWER OFF key, press ![]() to highlight the check box for Power Off. Repeat the preceding step to “learn” the POWER OFF key.
to highlight the check box for Power Off. Repeat the preceding step to “learn” the POWER OFF key.
If device has no POWER OFF key, skip this step.
By completing “learning” for the power keys, the TV’s remote control now operates the power function for the device when you set it as the current viewing device in the Input Selection menu. Point the remote control at the TV to control the device.