Chapter 3. TV Setup | 37 |
Setup Menu, continued
Note:
•If using a CableCARD™, the complete list of available channels is provided through the CableCARD and the ANT 1 option is grayed out.
•In the TV Guide On Screen® system, the chan- nels displayed and the order in which they are displayed are independent of the TV’s channel memorization. Refer to the TV Guide On Screen Interactive Program Guide User’s Manual for detailed instructions on editing channels shown in this guide.
Clock (Setup Menu)
Set the clock if you wish to use the TV’s Timer function or schedule
Note: If Clock Setting is set to Manual, each time the time change occurs, you must open this menu and set the TV’s clock ahead or back.
If you have selected Auto for Clock Setting, the TV’s clock adjusts automatically to daylight savings time.
Setting the Clock Automatically
Select the Time Zone and the Daylight Savings (DST)
options for your state. Press ![]()
![]() to select Applies or Ignore. You may then tune to a channel on ANT 1 or ANT 2 that uses Extended Data Service (XDS) time data, typically a PBS channel. With Auto selected, the TV auto- matically retrieves the correct time and date information from this channel.
to select Applies or Ignore. You may then tune to a channel on ANT 1 or ANT 2 that uses Extended Data Service (XDS) time data, typically a PBS channel. With Auto selected, the TV auto- matically retrieves the correct time and date information from this channel.
Be aware that if a channel displays incorrect time informa- tion, it is because of information sent from the broadcaster and is not a defect of the TV.
Note: You may find that some channels send the incor- rect time and the TV clock is reset every time you tune to those channels. To prevent unwanted clock resets, first use the Auto method to set the clock from a channel sending the correct time, then change the method to Manual.
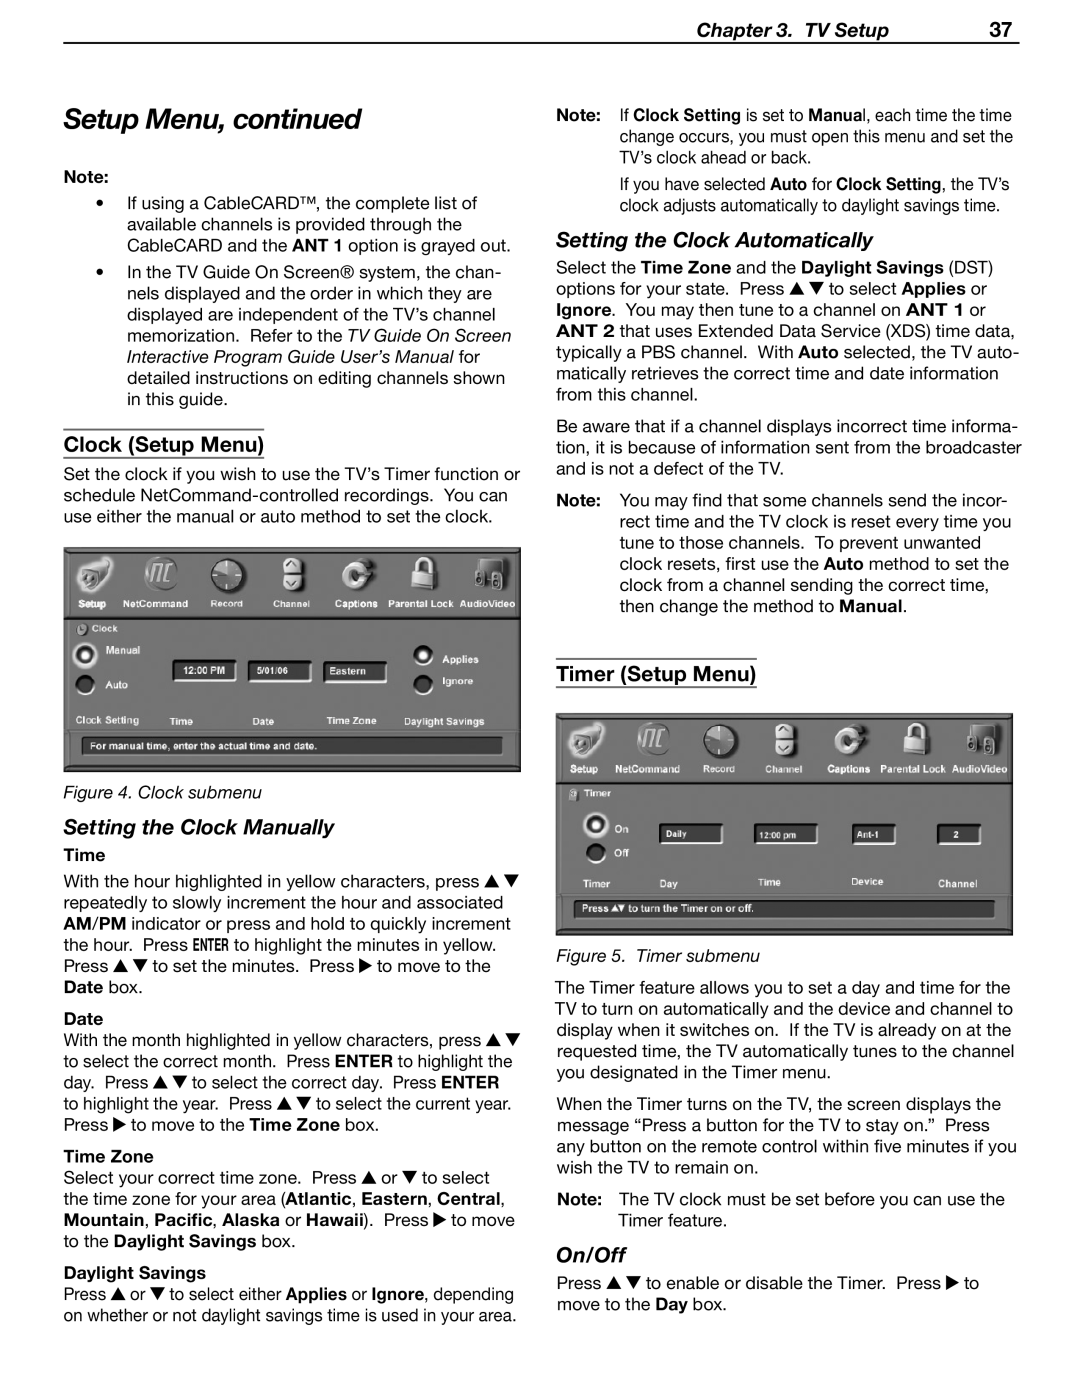
Timer (Setup Menu)
Figure 4. Clock submenu
Setting the Clock Manually
Time
With the hour highlighted in yellow characters, press ![]()
![]() repeatedly to slowly increment the hour and associated AM/PM indicator or press and hold to quickly increment the hour. Press ENTER to highlight the minutes in yellow.
repeatedly to slowly increment the hour and associated AM/PM indicator or press and hold to quickly increment the hour. Press ENTER to highlight the minutes in yellow.
Press ![]()
![]() to set the minutes. Press
to set the minutes. Press ![]() to move to the Date box.
to move to the Date box.
Date
With the month highlighted in yellow characters, press ![]()
![]() to select the correct month. Press ENTER to highlight the
to select the correct month. Press ENTER to highlight the
day. Press ![]()
![]() to select the correct day. Press ENTER
to select the correct day. Press ENTER
to highlight the year. Press ![]()
![]() to select the current year. Press
to select the current year. Press ![]() to move to the Time Zone box.
to move to the Time Zone box.
Time Zone
Select your correct time zone. Press ![]() or
or ![]() to select the time zone for your area (Atlantic, Eastern, Central, Mountain, Pacific, Alaska or Hawaii). Press
to select the time zone for your area (Atlantic, Eastern, Central, Mountain, Pacific, Alaska or Hawaii). Press ![]() to move to the Daylight Savings box.
to move to the Daylight Savings box.
Daylight Savings
Press ![]() or
or ![]() to select either Applies or Ignore, depending on whether or not daylight savings time is used in your area.
to select either Applies or Ignore, depending on whether or not daylight savings time is used in your area.
Figure 5. Timer submenu
The Timer feature allows you to set a day and time for the TV to turn on automatically and the device and channel to display when it switches on. If the TV is already on at the requested time, the TV automatically tunes to the channel you designated in the Timer menu.
When the Timer turns on the TV, the screen displays the message “Press a button for the TV to stay on.” Press any button on the remote control within five minutes if you wish the TV to remain on.
Note: The TV clock must be set before you can use the Timer feature.
On/Off
Press ![]()
![]() to enable or disable the Timer. Press
to enable or disable the Timer. Press ![]() to move to the Day box.
to move to the Day box.