80Chapter 6. NetCommand Functions
NetCommand-Controlled
Recording, continued
Immediate Recording from ChannelView
1.Press INPUT to open the Input Selection menu. High- light an ANT 1 or ANT 2 program source and press
ENTER.
2.Press GUIDE to open the ChannelView channel guide for the current antenna input.
3.Use ![]()
![]() to highlight the channel and program you wish to record from the list of channels.
to highlight the channel and program you wish to record from the list of channels.
4.Press ![]() (RECORD). The TV will tune to the channel if needed.
(RECORD). The TV will tune to the channel if needed.
A red “R” temporarily displays next to the program listing to indicate the program will be recorded.
5.Press EXIT to return to TV viewing.
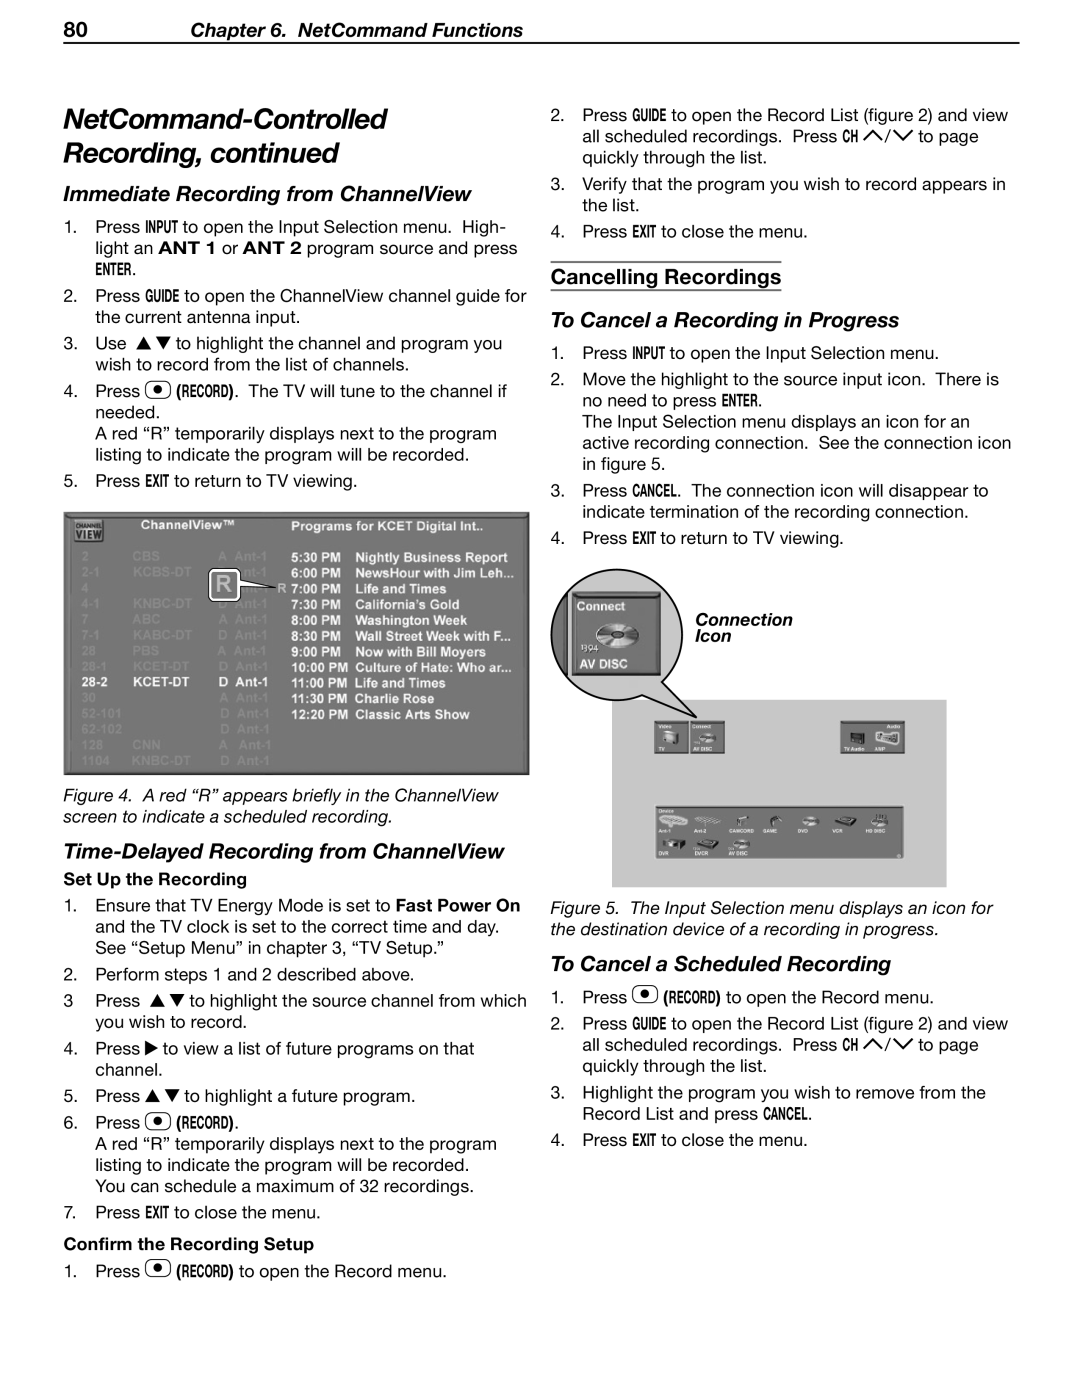
Figure 4. A red “R” appears briefly in the ChannelView screen to indicate a scheduled recording.
Time-Delayed Recording from ChannelView
Set Up the Recording
1.Ensure that TV Energy Mode is set to Fast Power On and the TV clock is set to the correct time and day. See “Setup Menu” in chapter 3, “TV Setup.”
2.Perform steps 1 and 2 described above.
3Press ![]()
![]() to highlight the source channel from which you wish to record.
to highlight the source channel from which you wish to record.
4.Press ![]() to view a list of future programs on that channel.
to view a list of future programs on that channel.
5.Press ![]()
![]() to highlight a future program.
to highlight a future program.
6.Press  (RECORD).
A red “R” temporarily displays next to the program listing to indicate the program will be recorded. You can schedule a maximum of 32 recordings.
7.Press EXIT to close the menu.
Confirm the Recording Setup
1. Press ![]() (RECORD) to open the Record menu.
(RECORD) to open the Record menu.
2.Press GUIDE to open the Record List (figure 2) and view all scheduled recordings. Press CH ![]() /
/![]() to page quickly through the list.
to page quickly through the list.
3.Verify that the program you wish to record appears in the list.
4.Press EXIT to close the menu.
Cancelling Recordings
To Cancel a Recording in Progress
1.Press INPUT to open the Input Selection menu.
2.Move the highlight to the source input icon. There is no need to press ENTER.
The Input Selection menu displays an icon for an active recording connection. See the connection icon in figure 5.
3.Press CANCEL. The connection icon will disappear to indicate termination of the recording connection.
4.Press EXIT to return to TV viewing.
Connection
Icon
Figure 5. The Input Selection menu displays an icon for the destination device of a recording in progress.
To Cancel a Scheduled Recording
1.Press ![]() (RECORD) to open the Record menu.
(RECORD) to open the Record menu.
2.Press GUIDE to open the Record List (figure 2) and view all scheduled recordings. Press CH ![]() /
/![]() to page quickly through the list.
to page quickly through the list.
3.Highlight the program you wish to remove from the Record List and press CANCEL.
4.Press EXIT to close the menu.