62Chapter 5. TV Menu Settings
Setup Menu
See chapter 3, “TV Setup,” for use of the Setup menu.
NetCommand Menu
The features described in this section are available even if you have not performed NetCommand setup. See chapter 3, “TV Setup,” for options available for
Review TV Connections
(no NetCommand setup required)
Press ![]()
![]()
![]()
![]() to highlight Review and press ENTER to display the Review screen (see figure 2).
to highlight Review and press ENTER to display the Review screen (see figure 2).
Figure 2. The Review screen lists all TV connections. IEEE 1394 inputs are listed separately on the right.
Input Name Menu
(no NetCommand setup required)
Use the Input Name menu to assign useful labels to the TV inputs that appear in the Input Selection menu. See figures 3 and 4. The current viewing device and any unused inputs appear grayed out and unselectable in the Input Name menu.
|
|
|
|
|
|
|
|
|
|
|
|
| Icon for the Icon |
| Order menu | ||
Icon for the Input Name menu |
| |||||||
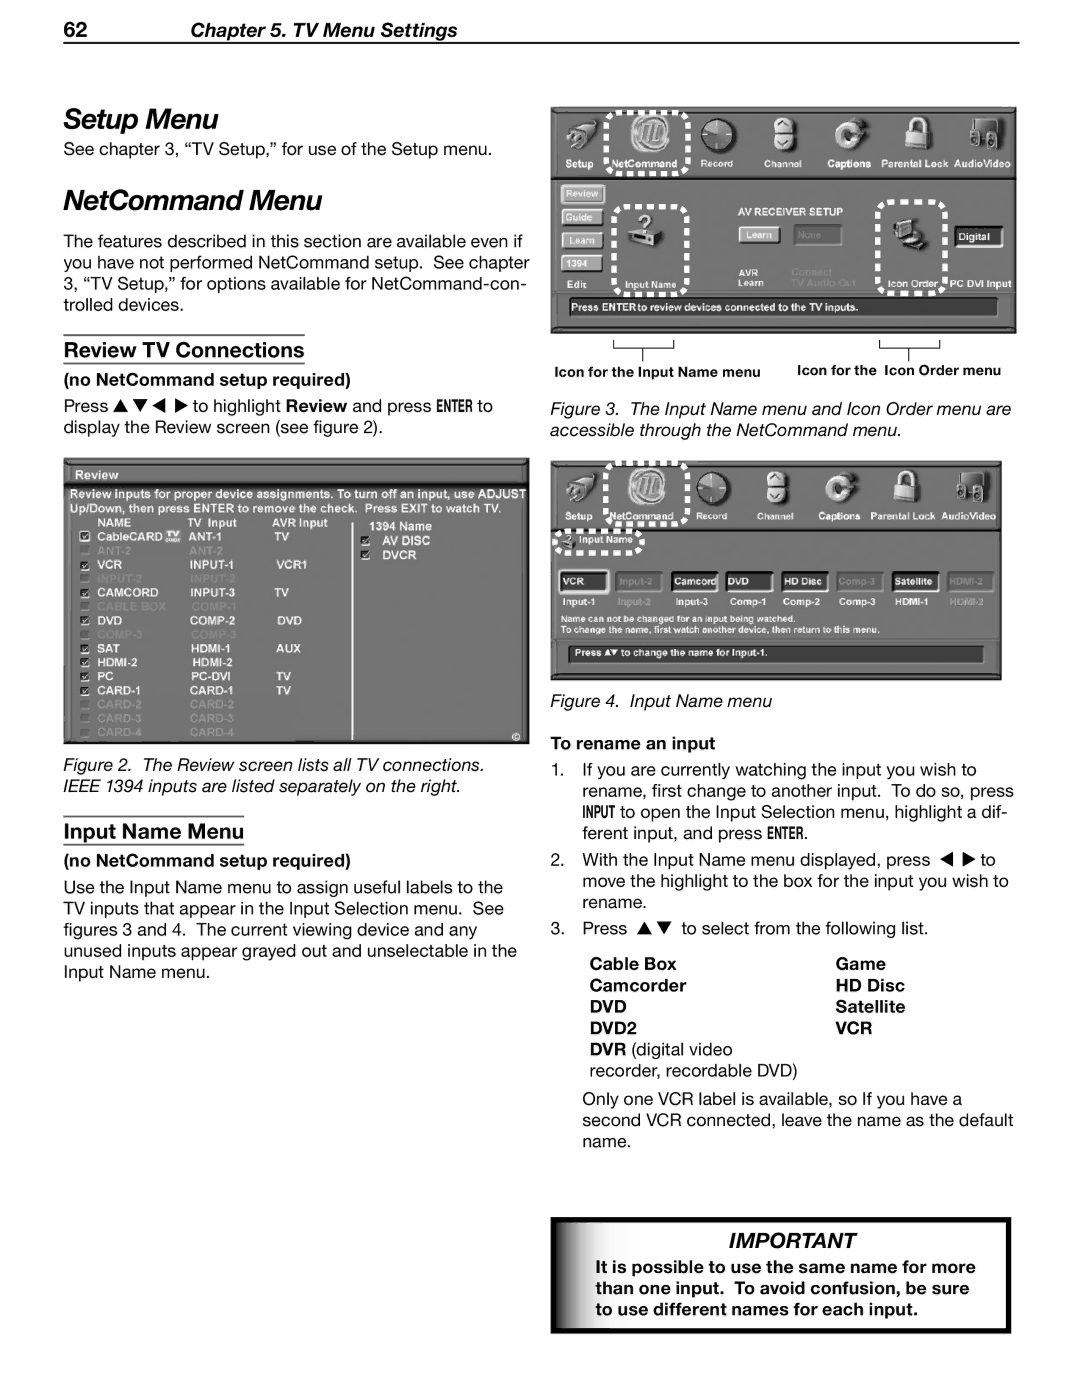
Figure 3. The Input Name menu and Icon Order menu are accessible through the NetCommand menu.
Figure 4. Input Name menu
To rename an input
1.If you are currently watching the input you wish to rename, first change to another input. To do so, press INPUT to open the Input Selection menu, highlight a dif- ferent input, and press ENTER.
2. With the Input Name menu displayed, press to move the highlight to the box for the input you wish to rename.
3. Press ![]() to select from the following list.
to select from the following list.
Cable Box | Game |
Camcorder | HD Disc |
DVD | Satellite |
DVD2 | VCR |
DVR (digital video |
|
recorder, recordable DVD) |
|
Only one VCR label is available, so If you have a second VCR connected, leave the name as the default name.
IMPORTANT
It is possible to use the same name for more than one input. To avoid confusion, be sure to use different names for each input.