N300 Wireless Router WNR2000v4
To set up Dynamic DNS:
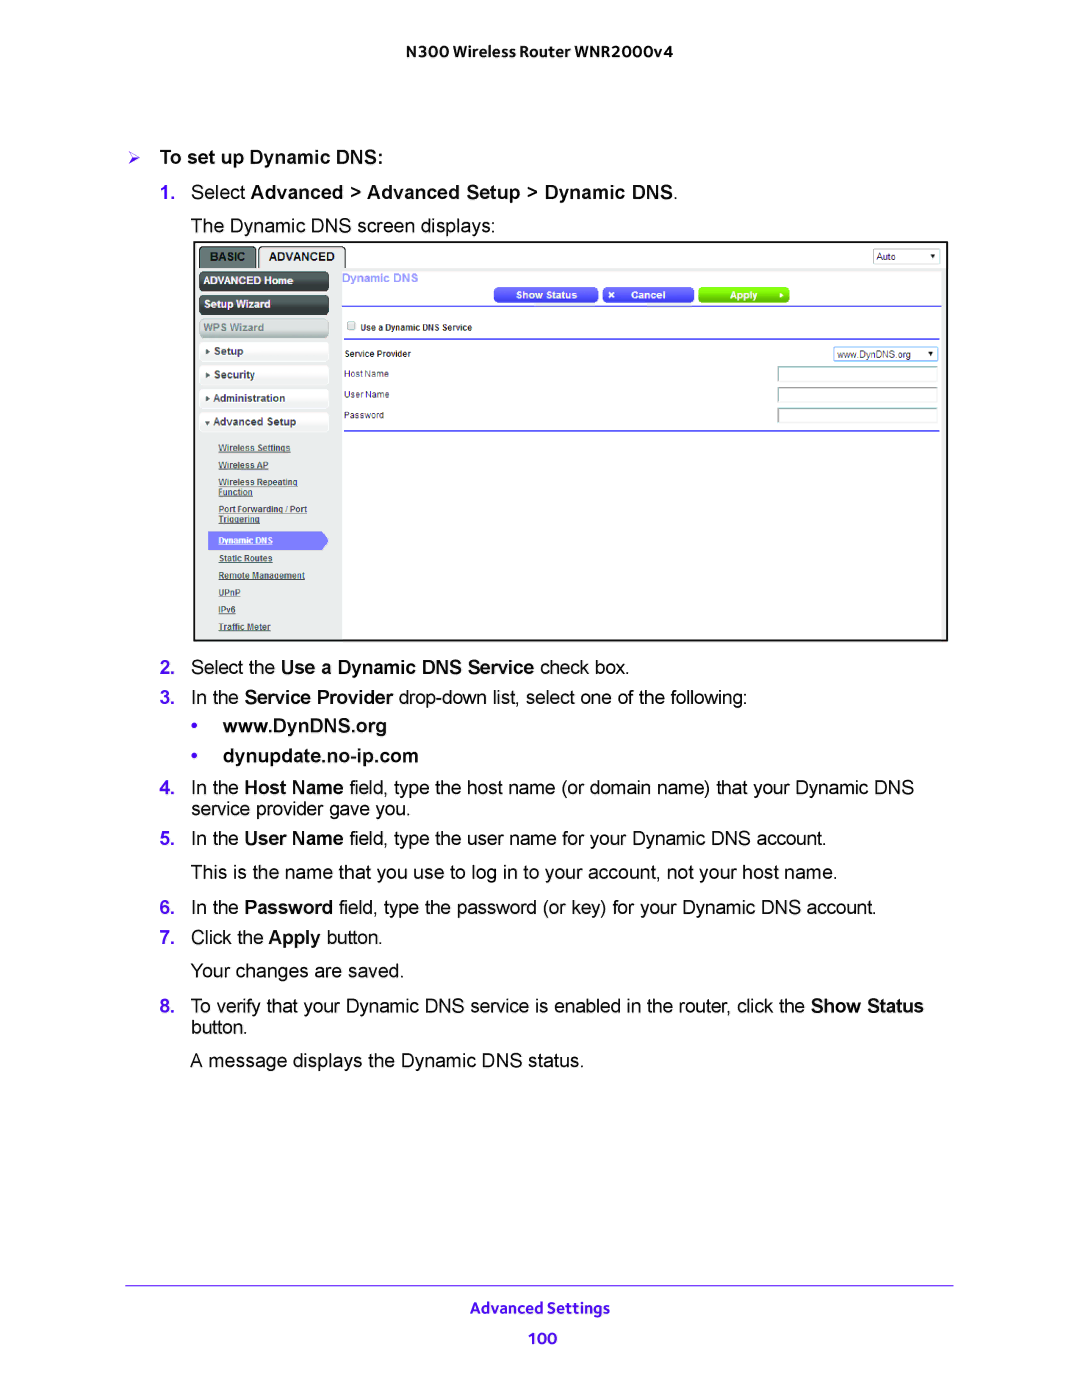
1.Select Advanced > Advanced Setup > Dynamic DNS. The Dynamic DNS screen displays:
2.Select the Use a Dynamic DNS Service check box.
3.In the Service Provider
•www.DynDNS.org
•dynupdate.no-ip.com
4.In the Host Name field, type the host name (or domain name) that your Dynamic DNS service provider gave you.
5.In the User Name field, type the user name for your Dynamic DNS account. This is the name that you use to log in to your account, not your host name.
6.In the Password field, type the password (or key) for your Dynamic DNS account.
7.Click the Apply button. Your changes are saved.
8.To verify that your Dynamic DNS service is enabled in the router, click the Show Status button.
A message displays the Dynamic DNS status.
Advanced Settings
100