N300 Wireless Router WNR2000v4
•Specific online games
•Individual Ethernet LAN ports of the router
•A specific device by MAC address
To specify prioritization of traffic, you need to create a policy for the type of traffic and add the policy to the QoS Policy table in the QoS Setup screen. For convenience, the QoS Policy table lists many common applications and online games that can benefit from QoS handling.
By default, QoS is disabled for Internet traffic, the default QoS rules and any custom QoS rules that you created are not activated, and no traffic is prioritized.
To enable QoS for Internet traffic and activate the QoS rules:
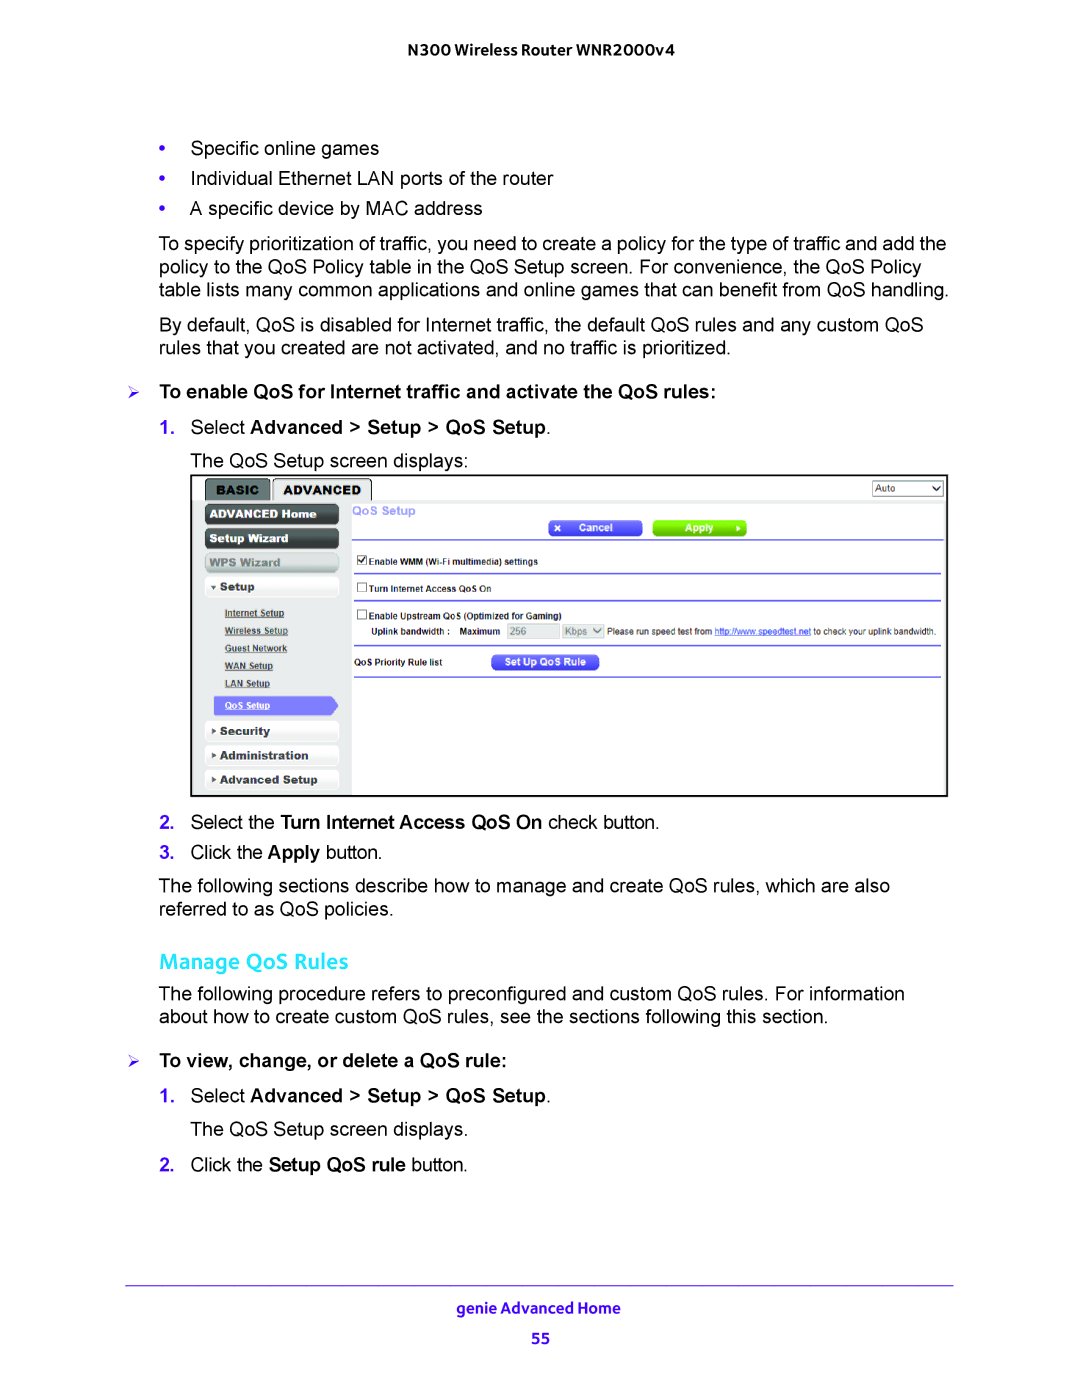
1.Select Advanced > Setup > QoS Setup. The QoS Setup screen displays:
2.Select the Turn Internet Access QoS On check button.
3.Click the Apply button.
The following sections describe how to manage and create QoS rules, which are also referred to as QoS policies.
Manage QoS Rules
The following procedure refers to preconfigured and custom QoS rules. For information about how to create custom QoS rules, see the sections following this section.
To view, change, or delete a QoS rule:
1.Select Advanced > Setup > QoS Setup. The QoS Setup screen displays.
2.Click the Setup QoS rule button.
genie Advanced Home
55