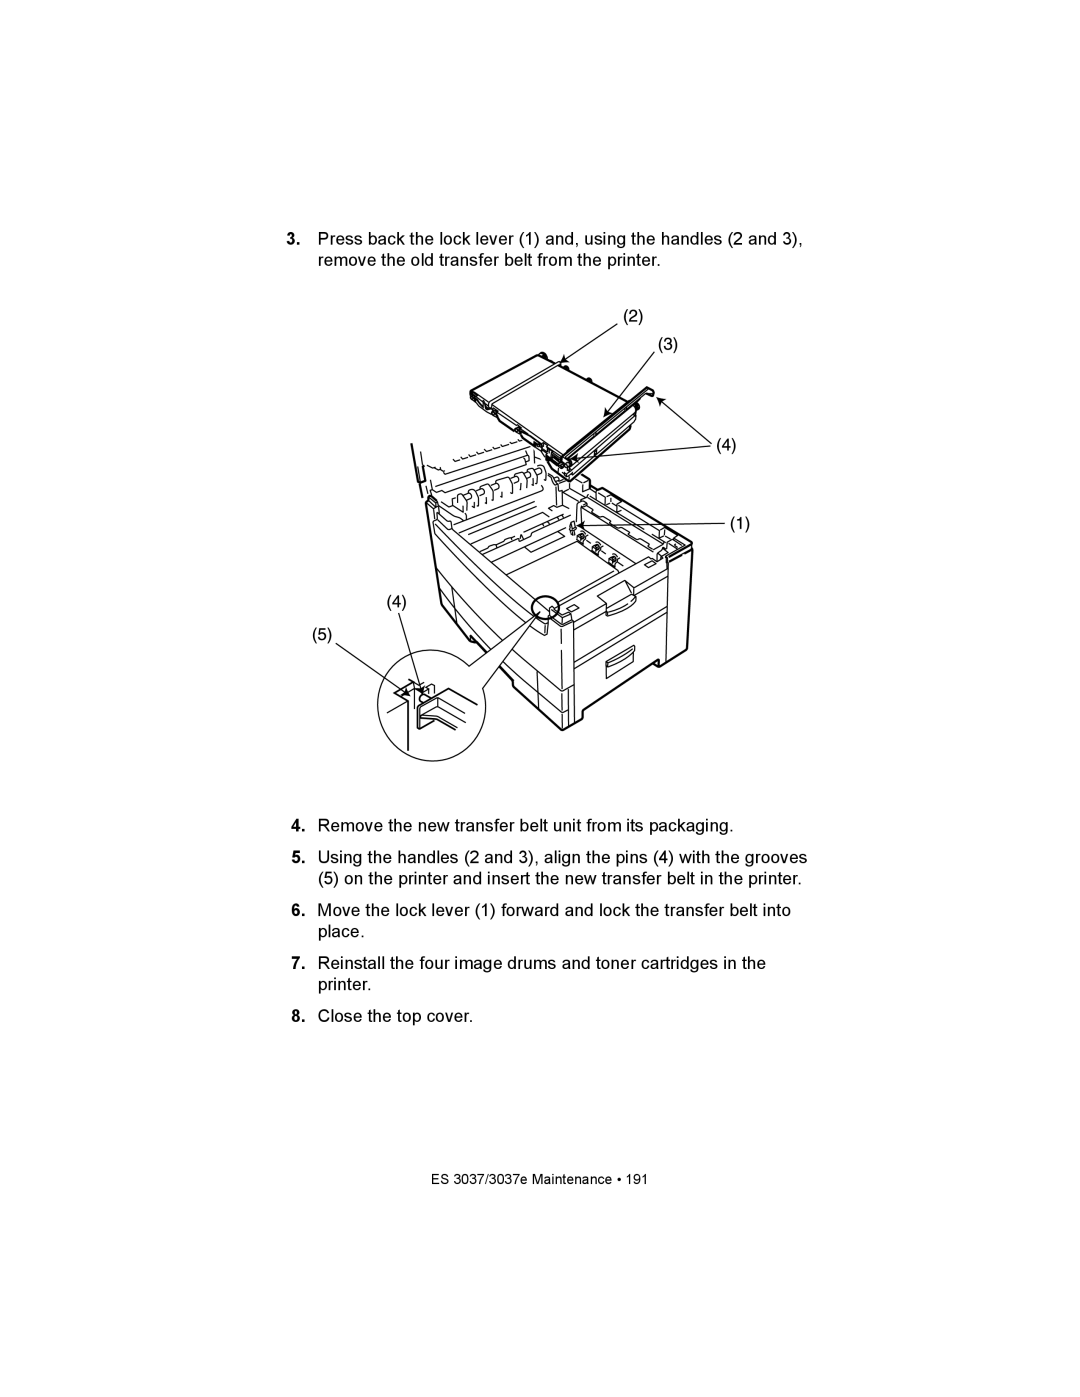
3.Press back the lock lever (1) and, using the handles (2 and 3), remove the old transfer belt from the printer.
4.Remove the new transfer belt unit from its packaging.
5.Using the handles (2 and 3), align the pins (4) with the grooves
(5) on the printer and insert the new transfer belt in the printer.
6.Move the lock lever (1) forward and lock the transfer belt into place.
7.Reinstall the four image drums and toner cartridges in the printer.