TROUBLESHOOTING
MISFEED IN THE MACHINE
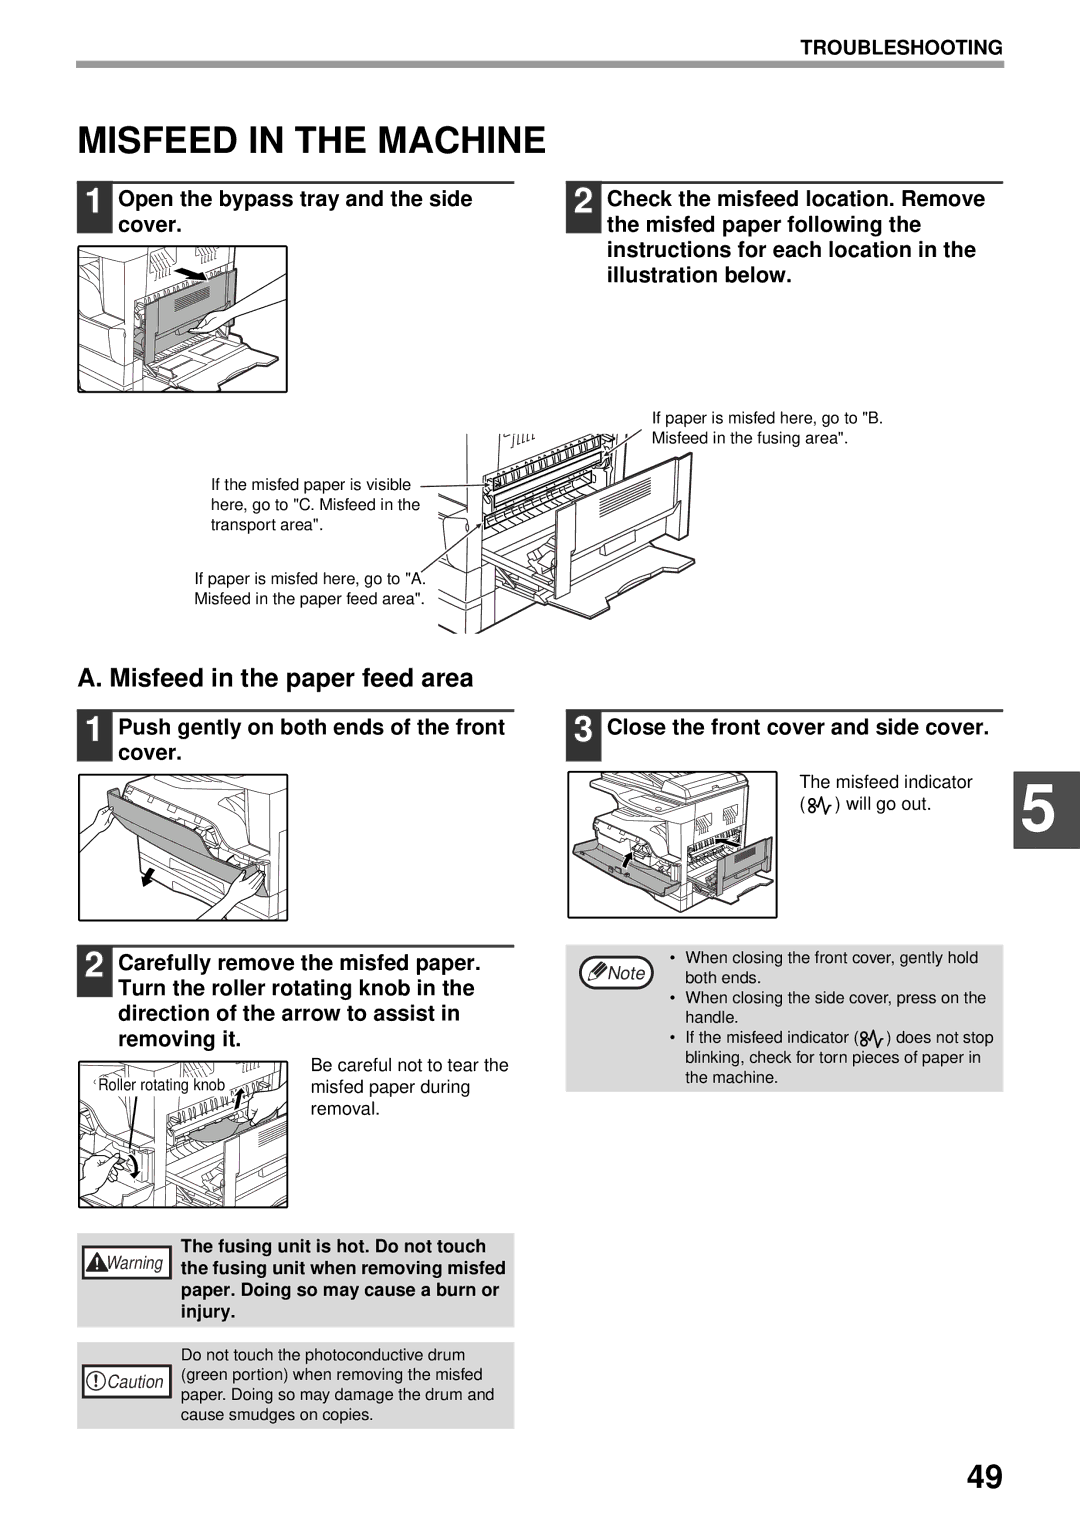
1 Open the bypass tray and the side cover.
2 Check the misfeed location. Remove the misfed paper following the instructions for each location in the illustration below.
If paper is misfed here, go to "B. ![]()
![]()
![]() Misfeed in the fusing area".
Misfeed in the fusing area".
If the misfed paper is visible ![]()
![]()
![]() here, go to "C. Misfeed in the transport area".
here, go to "C. Misfeed in the transport area".![]()
If paper is misfed here, go to "A.
Misfeed in the paper feed area".
A. Misfeed in the paper feed area
1 | Push gently on both ends of the front | 3 Close the front cover and side cover. |
| cover. |
|
The misfeed indicator | 5 |
| |
( ) will go out. |
|
|
|
2 Carefully remove the misfed paper. | Note | both ends. | |
|
| • | When closing the front cover, gently hold |
Turn the roller rotating knob in the | • | When closing the side cover, press on the | |
direction of the arrow to assist in |
| handle. | |
removing it. |
| • | If the misfeed indicator ( ) does not stop |
| Be careful not to tear the |
| blinking, check for torn pieces of paper in |
Roller rotating knob |
| the machine. | |
misfed paper during |
| ||
|
| ||
removal.
Warning |
The fusing unit is hot. Do not touch the fusing unit when removing misfed paper. Doing so may cause a burn or injury.
Caution |
Do not touch the photoconductive drum (green portion) when removing the misfed paper. Doing so may damage the drum and cause smudges on copies.
49
