STEP 1 Connection
Other connections
Leave “Yellow” unconnected.
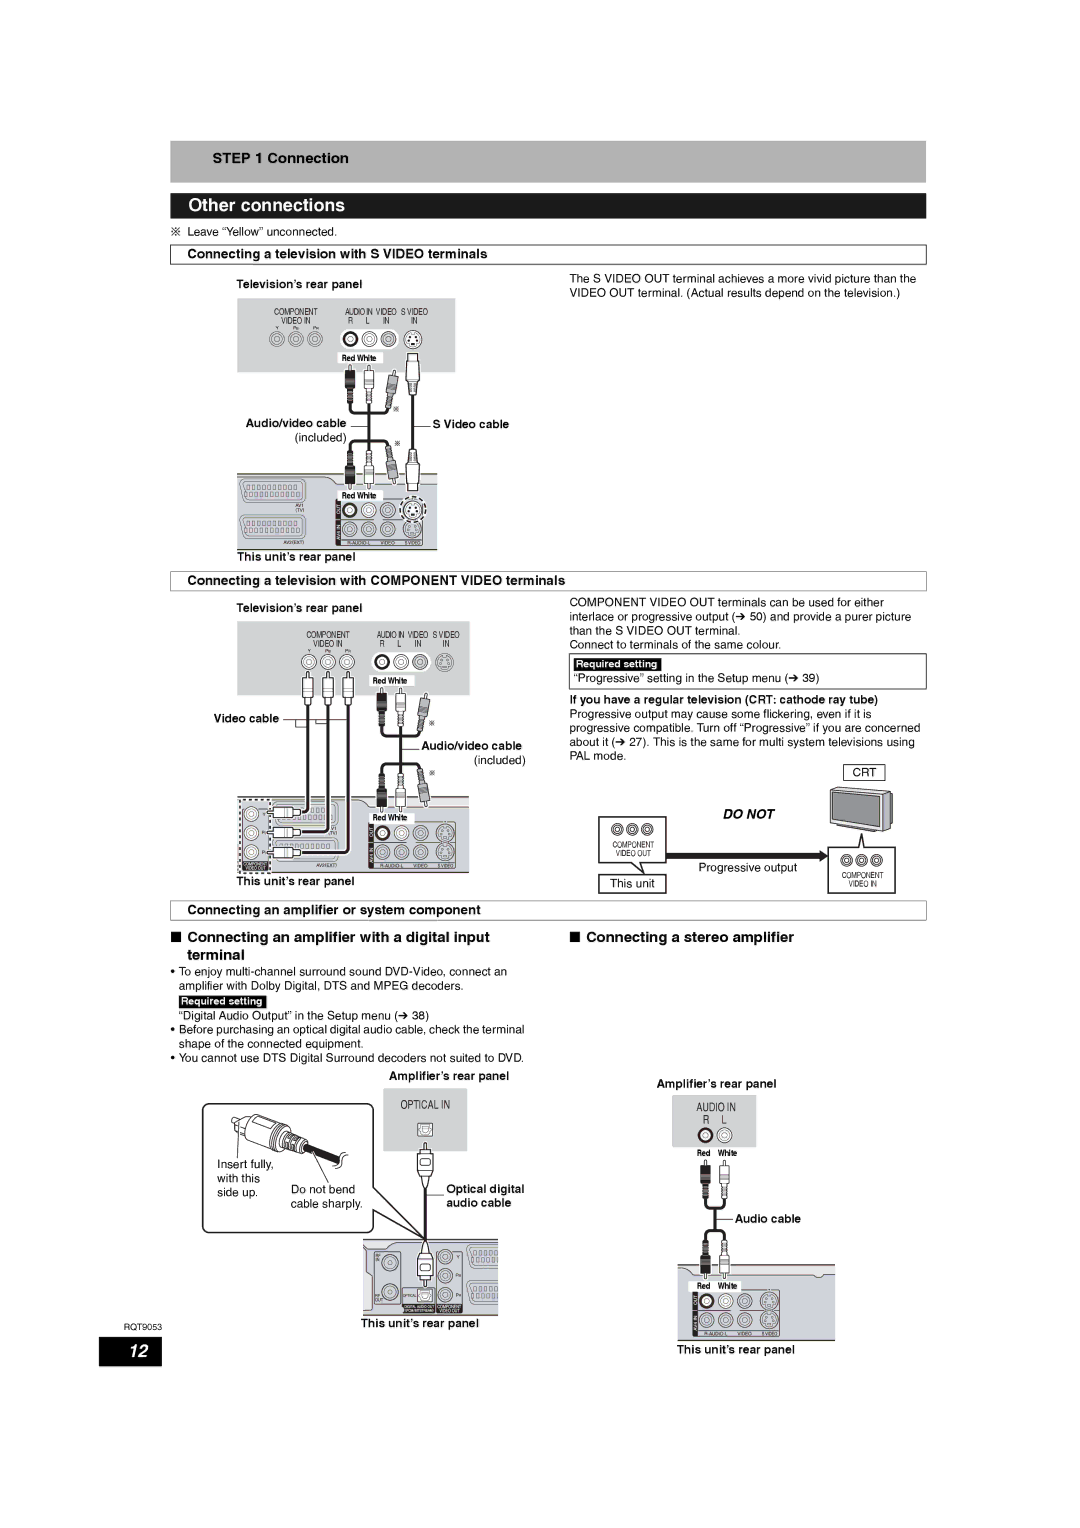
Connecting a television with S VIDEO terminals
Television’s rear panel | The S VIDEO OUT terminal achieves a more vivid picture than the | ||
VIDEO OUT terminal. (Actual results depend on the television.) | |||
|
| ||
COMPONENT | AUDIO IN VIDEO S VIDEO |
| |
VIDEO IN | R L IN IN |
| |
Red White
Audio/video cable
(included)
S Video cable
Red White
This unit’s rear panel
Connecting a television with COMPONENT VIDEO terminals
Television’s rear panel
COMPONENT | AUDIO IN VIDEO S VIDEO | |
VIDEO IN | R L IN | IN |
Red White
Video cable
Audio/video cable
(included)
Red White
This unit’s rear panel
COMPONENT VIDEO OUT terminals can be used for either interlace or progressive output (Ô 50) and provide a purer picture than the S VIDEO OUT terminal.
Connect to terminals of the same colour.
Required setting
“Progressive” setting in the Setup menu (Ô 39)
If you have a regular television (CRT: cathode ray tube) Progressive output may cause some flickering, even if it is progressive compatible. Turn off “Progressive” if you are concerned about it (Ô 27). This is the same for multi system televisions using PAL mode.
CRT
| DO NOT |
|
COMPONENT |
|
|
VIDEO OUT |
|
|
| Progressive output | COMPONENT |
This unit |
| |
| VIDEO IN |
Connecting an amplifier or system component
nConnecting an amplifier with a digital input
terminal
•To enjoy
Required setting
“Digital Audio Output” in the Setup menu (Ô 38)
•Before purchasing an optical digital audio cable, check the terminal shape of the connected equipment.
•You cannot use DTS Digital Surround decoders not suited to DVD.
|
| Amplifier’s rear panel |
|
| OPTICAL IN |
Insert fully, |
|
|
with this | Do not bend | Optical digital |
side up. | ||
| cable sharply. | audio cable |
RQT9053 | This unit’s rear panel |
nConnecting a stereo amplifier
Amplifier’s rear panel
AUDIO IN
R L
Red White
Audio cable
Red White
12 | This unit’s rear panel |
|
|
