Example
Operating Instructions
For Middle East and South Africa
How to replace the fuse
Before use
This Unit is Intended for USE in Tropical Climates
Table of contents
Remote control information
Included accessories
Batteries
Use
Unit care
Disc handling
Discs you can use for recording and play
Disc information
Recording format
DVD Video Recording format RAM
Discs that cannot be played
Play-only discs
Types of disc for the type of connected TV
Disc information
Control reference guide
Remote control
Bm Start recording Ô
Bq Channel select Ô
Unit’s display
Main unit
Reference guide
Control
Connection
Connecting a television
Other connections Ô
Connection
Connecting a television and VCR
Connecting a stereo amplifier
Connecting an amplifier with a digital input Terminal
Other connections
Connection
Connection/ Channel reception and TV aspect settings
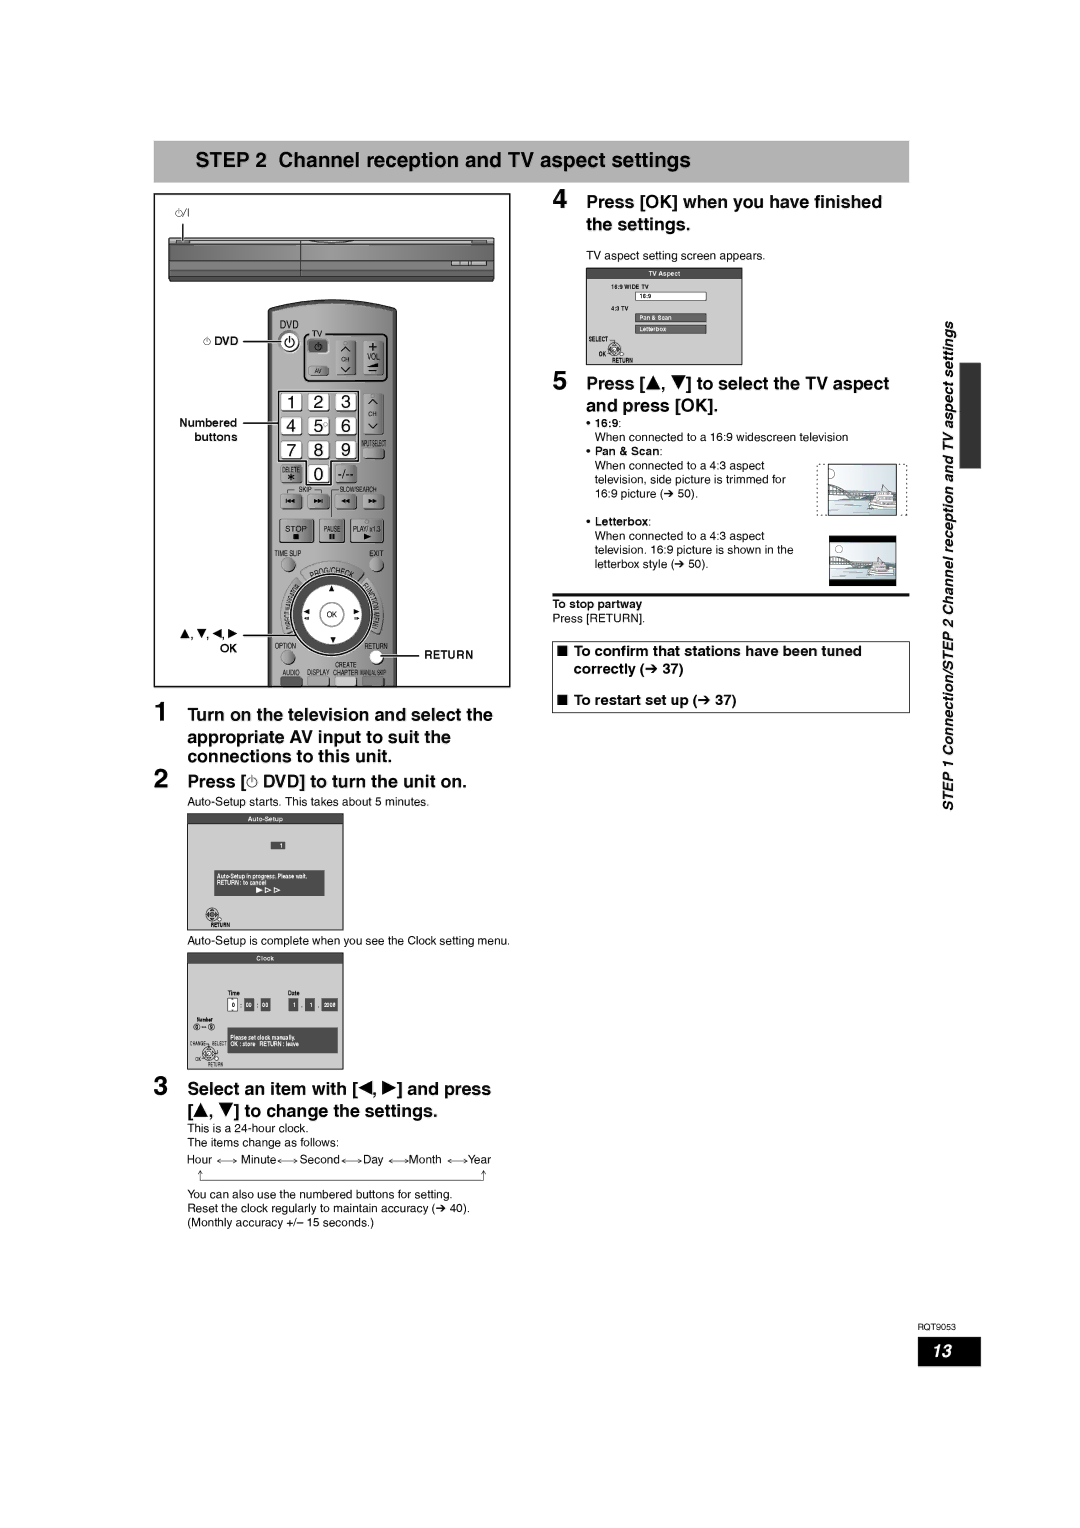
Channel reception and TV aspect settings
Press e, r to select the TV aspect and press OK
Return
Important notes for recording
When recording a
Bilingual
Programme
When opening the tray without disc finalisation RQT9053
When finalising the disc
Recording modes and approximate recording times
Disc Insertion/Ejection
Press 1 2 CH to select the channel
Recording television programmes
Press * REC to start recording
Flexible Recording
To specify a time to stop recording -One Touch Recording
Playing while you are recording
Manually programming timer recordings
Timer recording
Press g
To cancel recording when recording has already begun
Press w , q to select Stop Recording and press OK
To release the programme from recording standby
Insert a disc Ô Press q Play
Playing discs
Changing audio during play
Press Audio
Playing discs
Operations during play
Playing DivX, MP3 and still pictures Jpeg
Playing DivX video contents
Showing the menu screen
Playing still pictures
Playing MP3 files
Rotate
Useful functions during still picture play
Zoom
Zoom out
Regarding MP3, DivX and still pictures
Regarding DivX VOD content
Display the unit’s registration code
MP3
Using on-screen menus
Using on-screen menus/Status message
Press Display
Press e, r to select the menu
Press Status
Status message
Screen
Function Menu window
Function Menu window/Entering text
Entering text
Deleting titles
Using the Delete Navigator to delete
Deleting titles during play
Press e, r, w, q to select the chapter
Editing titles/chapters
Press OPTION, then press e, r to
Select the operation and press OK
Delete
Title operations
Properties
Enter Name
Press w, q to select the source title and press r
Creating, editing and playing playlists
Creating playlists
Press Function Menu Press e, r to select To Others Press OK
Playlist operations
Editing and playing playlists/chapters
DV automatic recording DV Auto Rec
Copying from a video cassette recorder
Manual recording
Start play on the other equipment
Setting the protection
Common procedures
DVD Management
Providing a name for a disc
Creating Top Menu Create Top Menu
Enabling discs to be played on other equipment Finalise
Press e, r to select Create Top 5 Menu and press OK
DVD Management
Tuning
Changing the unit’s settings
Manual Tuning
Press e, r to select the tab
Disc
Changing the unit’s settings
Picture
Sound
Connection
Display
Others
When the following indicator appears on the unit’s display
Television operation
Other Settings
Child Lock
Safety precautions
On the television
Messages
Messages On the unit’s display
Set up
Frequently asked questions
Asked
Troubleshooting guide
Troubleshooting guide
Troubleshooting guide
Guide
RGB
Glossary
Glossary/Specifications
Specifications
Index
If you see this symbol

