With a PC
Setup | 2 Connecting to a PC |
|
≥Connect this unit to the PC after the software applications are installed.
≥Remove the supplied
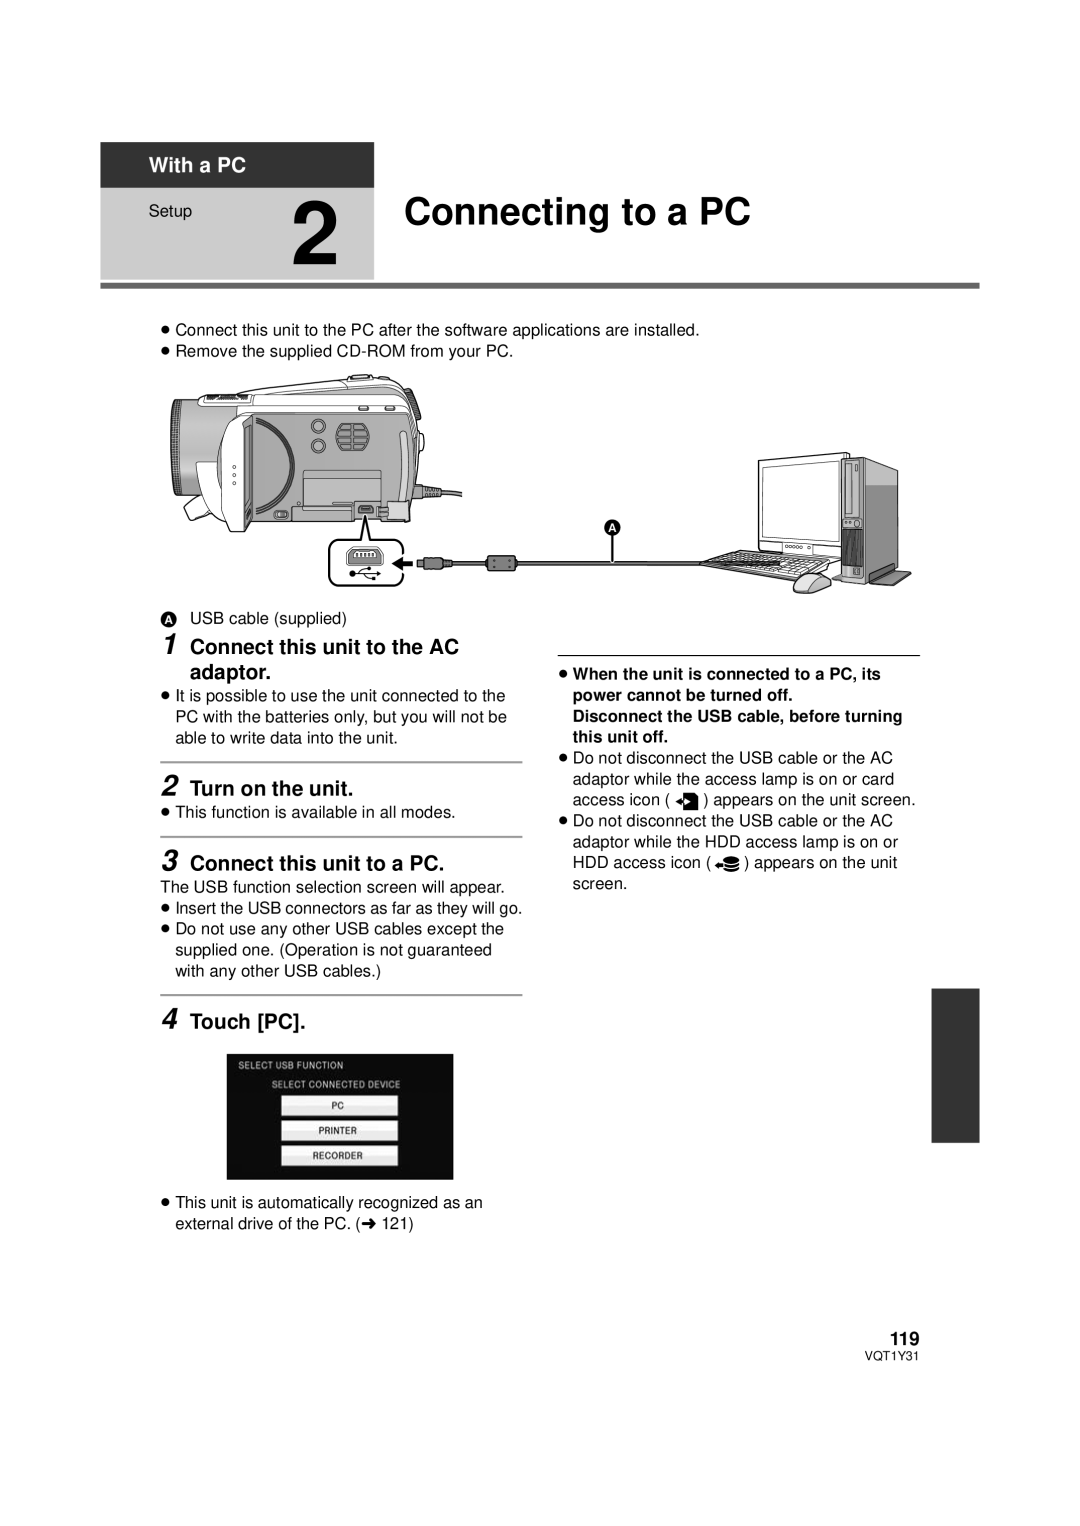
AUSB cable (supplied)
1 Connect this unit to the AC adaptor.
≥It is possible to use the unit connected to the PC with the batteries only, but you will not be able to write data into the unit.
2 Turn on the unit.
≥This function is available in all modes.
3 Connect this unit to a PC.
The USB function selection screen will appear.
≥Insert the USB connectors as far as they will go.
≥Do not use any other USB cables except the supplied one. (Operation is not guaranteed with any other USB cables.)
≥When the unit is connected to a PC, its power cannot be turned off.
Disconnect the USB cable, before turning this unit off.
≥Do not disconnect the USB cable or the AC adaptor while the access lamp is on or card access icon ( ![]()
![]() ) appears on the unit screen.
) appears on the unit screen.
≥Do not disconnect the USB cable or the AC adaptor while the HDD access lamp is on or
HDD access icon (![]() ) appears on the unit screen.
) appears on the unit screen.
4 Touch [PC].
≥This unit is automatically recognized as an external drive of the PC. (l 121)
119