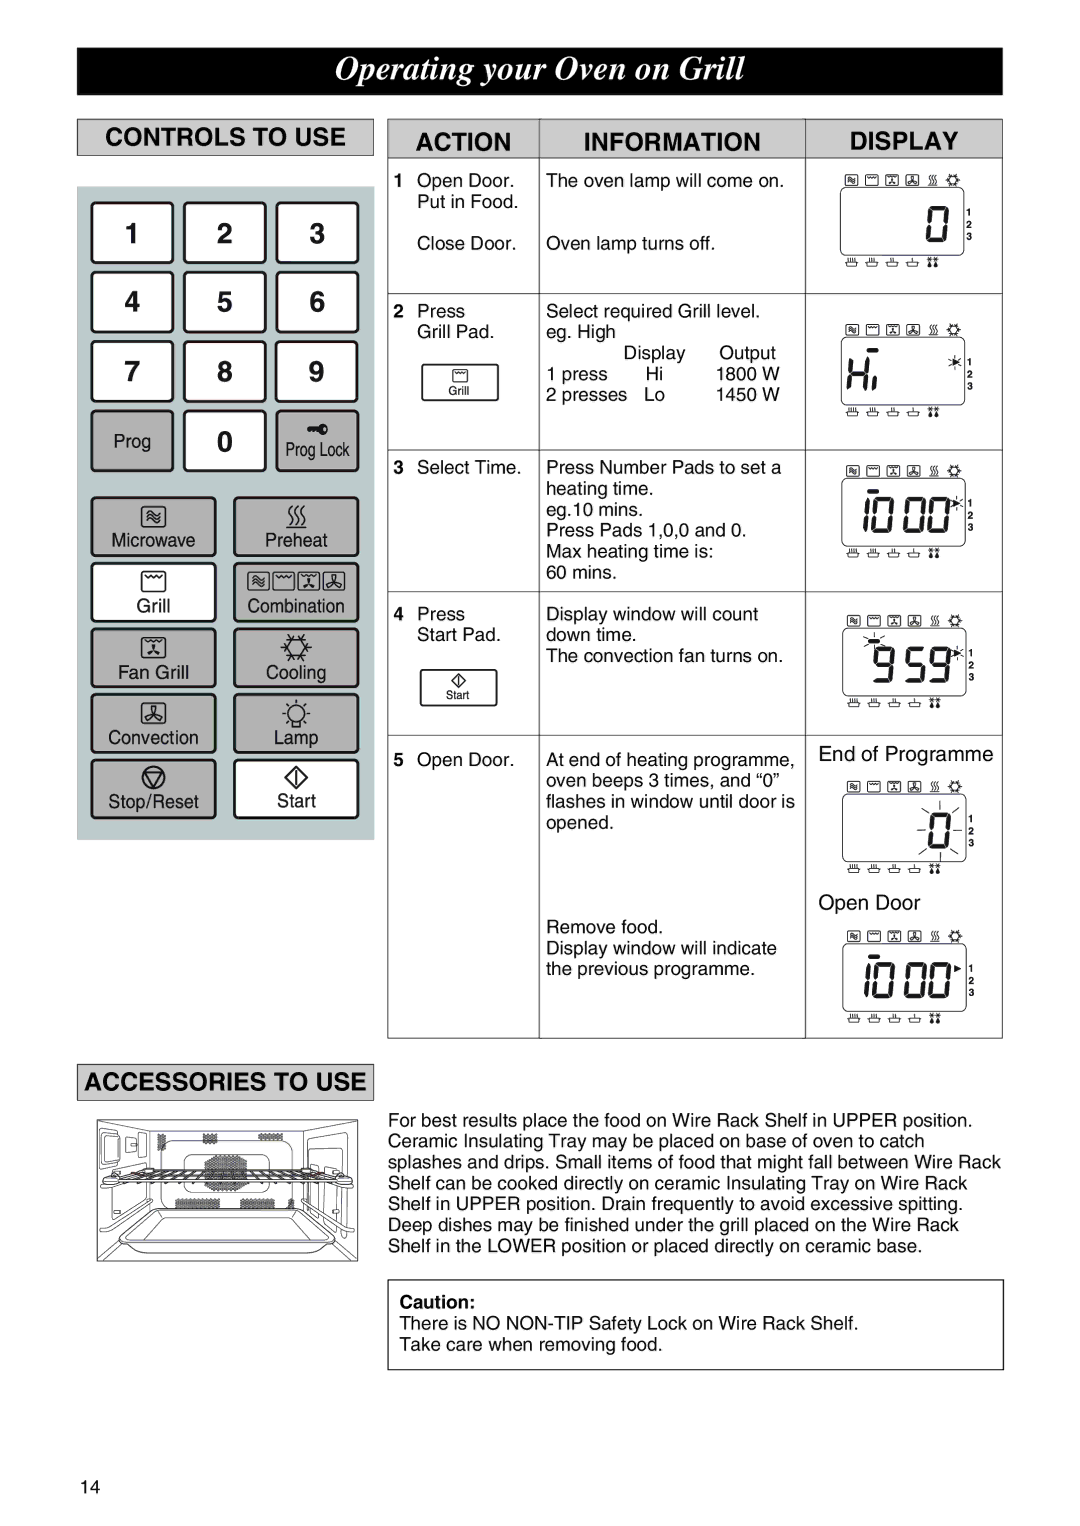
Operating your Oven on Grill
CONTROLS TO USE
| ACTION | INFORMATION | DISPLAY | ||
1 | Open Door. | The oven lamp will come on. |
| ||
| Put in Food. |
|
|
|
|
| Close Door. | Oven lamp turns off. |
| ||
2 | Press | Select required Grill level. |
| ||
| Grill Pad. | eg. High |
|
|
|
|
| Display | Output |
| |
|
| 1 press | Hi | 1800 W |
|
|
| 2 presses | Lo | 1450 W |
|
3 | Select Time. | Press Number Pads to set a |
| ||
|
| heating time. |
|
| |
|
| eg.10 mins. |
|
|
|
|
| Press Pads 1,0,0 and 0. |
| ||
|
| Max heating time is: |
|
| |
|
| 60 mins. |
|
|
|
4 | Press | Display window will count |
| ||
| Start Pad. | down time. |
|
|
|
|
| The convection fan turns on. |
| ||
5 Open Door. At end of heating programme, End of Programme oven beeps 3 times, and “0” ![]()
![]()
![]()
![]()
![]()
![]() flashes in window until door is
flashes in window until door is
opened.
Open Door
Remove food.
Display window will indicate the previous programme.
ACCESSORIES TO USE
For best results place the food on Wire Rack Shelf in UPPER position. Ceramic Insulating Tray may be placed on base of oven to catch splashes and drips. Small items of food that might fall between Wire Rack Shelf can be cooked directly on ceramic Insulating Tray on Wire Rack Shelf in UPPER position. Drain frequently to avoid excessive spitting. Deep dishes may be finished under the grill placed on the Wire Rack Shelf in the LOWER position or placed directly on ceramic base.
Caution:
There is NO
Take care when removing food.
14
