Care of your Oven and Cleaning
8. Accessories
The accessories should be cleaned regularly to maximise efficiency of the oven.
Ceramic Tray - Clean Ceramic Tray after every use but DO NOT PLACE HOT CERAMIC INSULATING TRAY directly under a COLD tap - the tray may shatter. You can wash the ceramic tray in the dishwasher or by hand in hot, soapy water.
Wire Rack Shelf - This should be cleaned after every session. Take care not to use harsh abrasive.
9. Air Filter
Clean the Air Filters occasionally according to the following instructions. Problems may occur with the oven if the filters become clogged with dirt or grease. If the Air Filter becomes blocked this will cause an overheat problem on the oven.
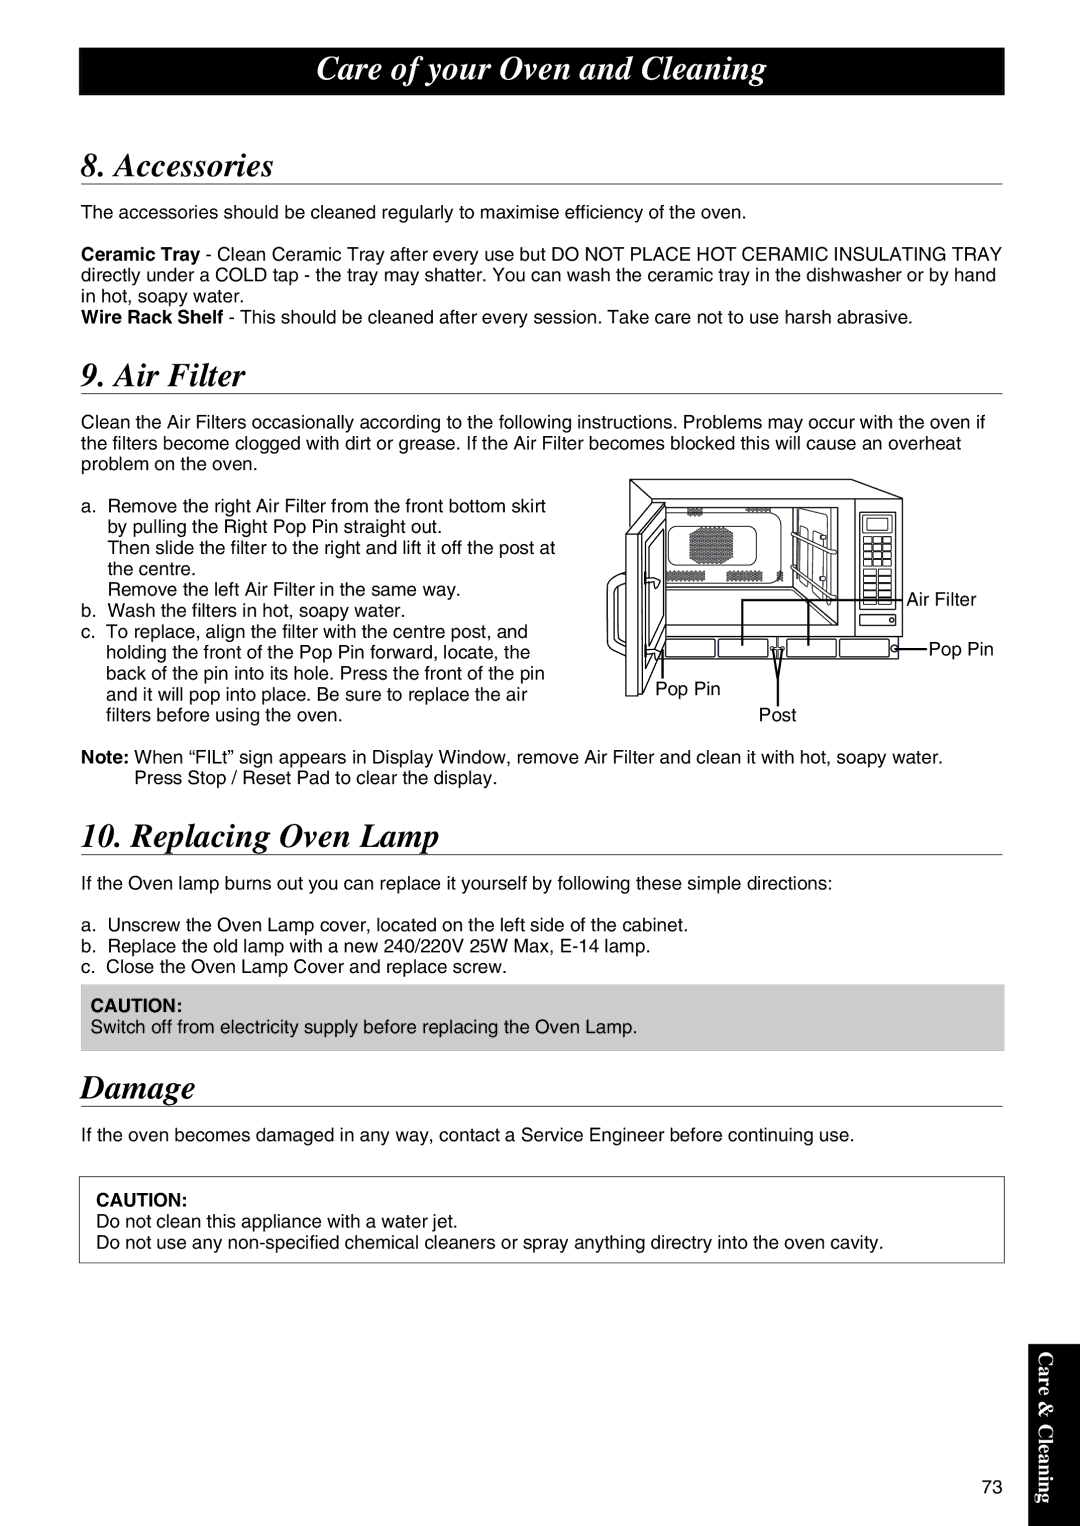
a. Remove the right Air Filter from the front bottom skirt by pulling the Right Pop Pin straight out.
Then slide the filter to the right and lift it off the post at the centre.
Remove the left Air Filter in the same way.
b.Wash the filters in hot, soapy water.
c.To replace, align the filter with the centre post, and
holding the front of the Pop Pin forward, locate, the |
|
|
|
|
|
| |
back of the pin into its hole. Press the front of the pin |
|
|
|
and it will pop into place. Be sure to replace the air | Pop Pin |
| |
filters before using the oven. |
| Post | |
Air Filter
Pop Pin
Note: When “FILt” sign appears in Display Window, remove Air Filter and clean it with hot, soapy water. Press Stop / Reset Pad to clear the display.
10. Replacing Oven Lamp
If the Oven lamp burns out you can replace it yourself by following these simple directions:
a.Unscrew the Oven Lamp cover, located on the left side of the cabinet.
b.Replace the old lamp with a new 240/220V 25W Max,
c.Close the Oven Lamp Cover and replace screw.
CAUTION:
Switch off from electricity supply before replacing the Oven Lamp.
Damage
If the oven becomes damaged in any way, contact a Service Engineer before continuing use.
CAUTION:
Do not clean this appliance with a water jet.
Do not use any
73
iCare & Cleaning
