Digital Video Cassette Recorder
NV-DV2000EC
Dear Customer
For Your Safety
Contents
Keep the VCR away from high temperatures
Avoid sudden changes in temperature
Cleaning the VCR
Avoid humidity and dust
Before Use
How to Replace the Fuse
For your safety please read the following text carefully
Edit cable 1 pc DV cable 1 pc Batteries for the Editing
Check List
Front
Controls and Connection Sockets
Infra-red receiver window Cassette compartment
Mixing Edit button R42
Rear
Editing Controller
SET UP button
Edit Menu button
Jog Dial/Shuttle Ring R15,39-51Jog Dial inner dial
31 VCR1/2/3 switch
Counter Reset button R18
Infra-red Transmitter window
Counter Zero Stop button R18
Installing the Batteries
Editing Controller Setup
Power Source for the Editing Controller
Precautions for Battery Replacement
Setting Up
Connections Using a 21-Pin Scart Cable
Connections Using an S-Video Cable
Connection to a Stereo Amplifier
Connection to a Stereo Amplifier/ Connection to a Decoder
Connection to a Decoder
Hint
Playback
Playback
1 2 4,5
One-Touch Recording OTR
Recording
To Display the Remaining Tape Time
To Select the Desired Tape Speed
Other Playback and Recording Functions
3D DNR Functions
To Ensure a Stable and Shake-Free Recording Picture TBC
Index Search System
Search Functions
Photoshot Index Search System
To return to a specified scene zero stop function
Set Edit Terminal to EDIT, and Edit Mode to
Using the VCR with a Video Printer
Operations
Video Printer
Using the VCR with a Computer
Clock Setting/Shipping Condition
To set the clock
To Initialise VCR Functions and Edit Functions
Audio Data Indicator Audio Output Mode Indicator
Settings for VCR Functions
Index/Photoshot Index Search Indicator
Tape running display
Setting for TBC Function
To Set the Colour mode
VCR display
Comb filter
To Set the Remote mode
Settings for 3D DNR REC DNR/PB DNR Function
For Recording
For Playback
Preparations for Editing
Editing Functions
Audio Dubbing
Audio Mixing
Assemble Editing
Creating the Tapes for Editing
AV1 Rear Recording Unit Playback Unit
Connecting with a Panasonic Digital Video Camera
Playback Unit Digital Video Camera
Set Edit Mode to Recorder Set Edit Terminal to Edit
Recording Unit NV-DV2000
Turn on the VCR
Front
Recording VCR Playback VCR
Recording VCR
Playback VCR
Controlling the Recording VCR through the Playback VCR
Recording VCR
Playback Unit AV2 Rear AV1 Rear Recording Unit
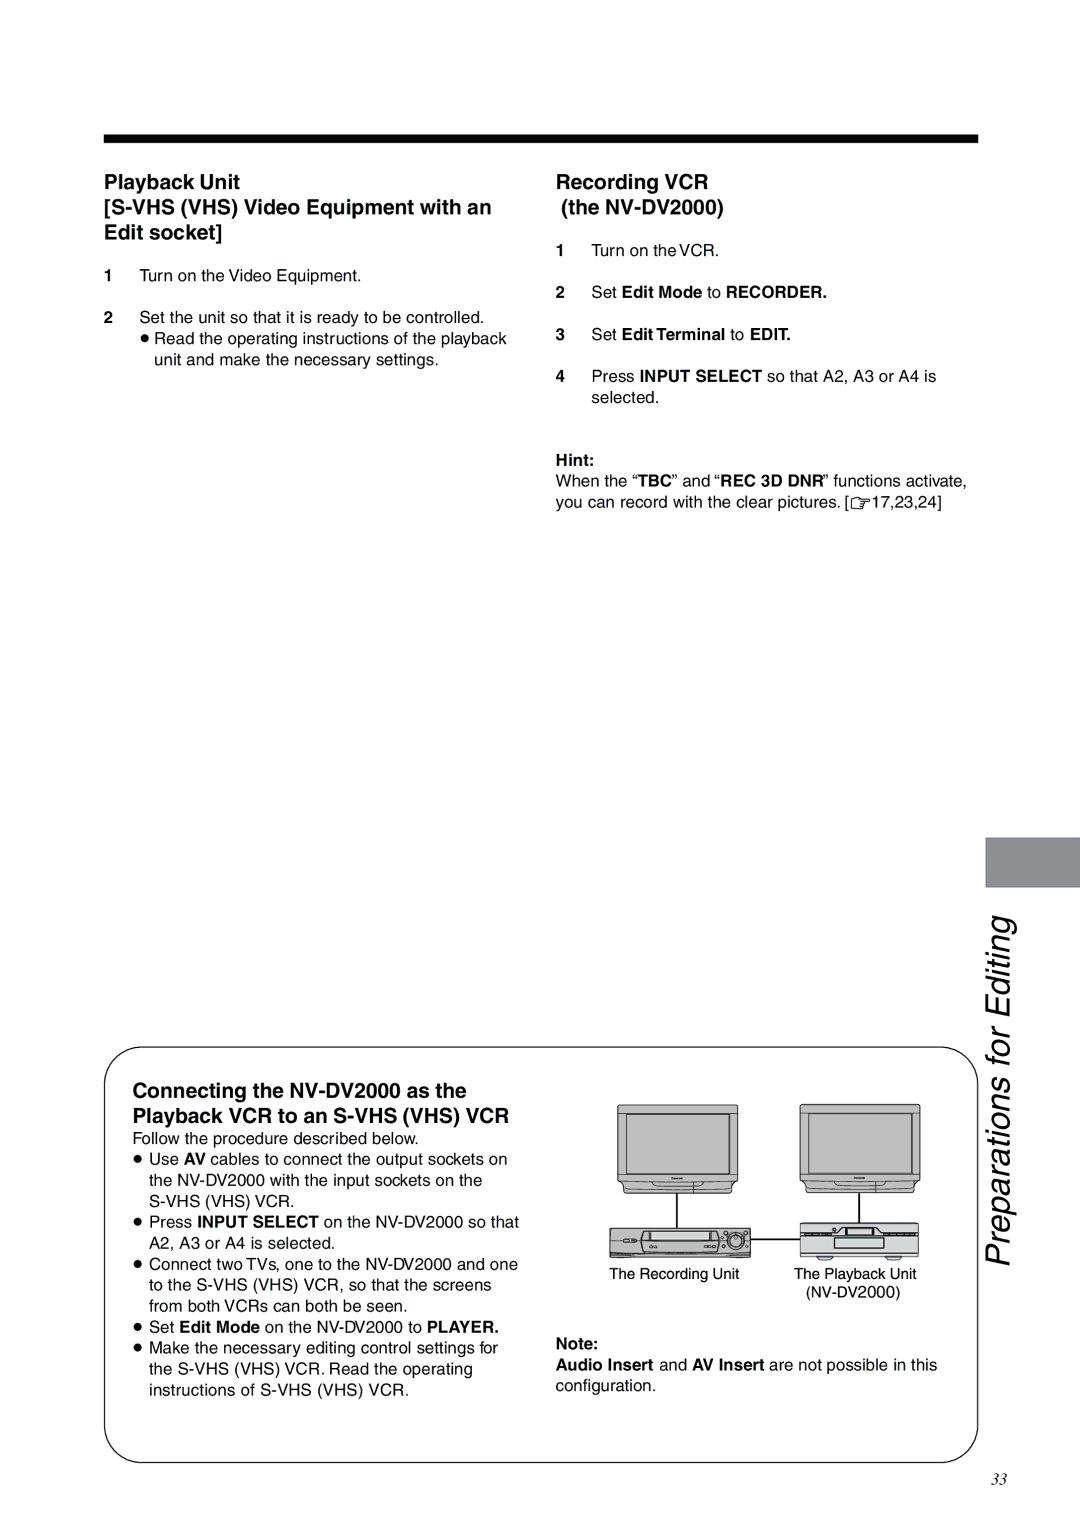
Connecting an S-VHS VHS Video Equipment with an Edit Socket
Playback Unit VHS VHS Video Equipment with an Edit socket
Recording VCR NV-DV2000
Press Input Select so that A2, A3 or A4 is selected
Connecting a Video Equipment with a Lanc Socket
Set Edit Terminal to 8mm
Playback Unit Video Equipment with a Lanc socket
Settings for Editing
Audio mode
Search with Sound
Setting for Album Function
Setting for One-Touch-Edit
Press 21 Cursor to select OFF or ON, and then press OK
Press 34 Cursor to select Still Album and press OK
Operations Press Still Album to
Album Function
Quick
Editing when Not Using an Edit Cable
One-Touch Assemble
Editing
One-Touch Insert/Audio Dubbing
For
62,4
≥ The picture from the playback unit
Press Audio DUB on the Editing Controller
Appears on the screen
Press Mixing Edit
Manual Copying
Operations Press Edit Menu
To select Start Copying. Player
Select Audio Insert
Manual Insert
Press Player and JOG/SHUTTLE
Press Recorder and JOG/SHUTTLE
To Listen to the Edited Audio after Audio Dubbing
Manual Audio Dubbing
10,11
Programme Assemble
To interrupt editing or Review
Programme
5,8
Programme Insert
Video Insert
Audio Insert
To interrupt editing, Preview or Review
Programme Audio Dubbing
To continue setting programmes Press Player and JOG/SHUTTLE
To check and change Programmes
Select Confirm/Change
Programme Editing
To interrupt editing, Preview or Review
≥ Audio Dubbing is not possible in the following
Other Editing Functions
To Cancel a Programme
To Insert a New Programme Between Existing Programmes
To Check and Change a Programme
Twice
To Cancel All Editing Programmes
To select Erase all
Programmes , and then
To select Timing Adjust
Edit Timing Adjustment
Adjust the timing for
Edit start point by setting
Helpful Hints
Tape Trade Editing
Glossary of Terms
Marked with an index signal
This function improves the horizontal shaking
Subtle distortion in the vertical lines which tend to take
Copying, Assemble, Video Insert, and Audio Insert
DV Terminal
Messages of On Screen Display for Editing Operations
On Screen Display Messages
VCR does not operate correctly
Before Requesting Service
Playback does not operate correctly
Recording does not operate correctly
Editing Controller does not work correctly
SET UP On Screen Displays
Flow Chart for On Screen Displays
Edit Menu On Screen Display Manual Editing
Programme Editing
R64
Programme Editing
Programme Editing On Screen Displays
Confirm/Change
Specifications
Page
F0600Gy0 1500A