Various projection methods (cont.)
4-screen multi style
Connect up to four computers to one projector, and then divide the projector screen into four parts, and simultaneously display the screens for the four computers on the projector screen.
1Press the
display (the status when no index window is displayed).
If you press the
2Check the status indication on the launcher to make sure that transmission is possible (check that the green lamp is lit).
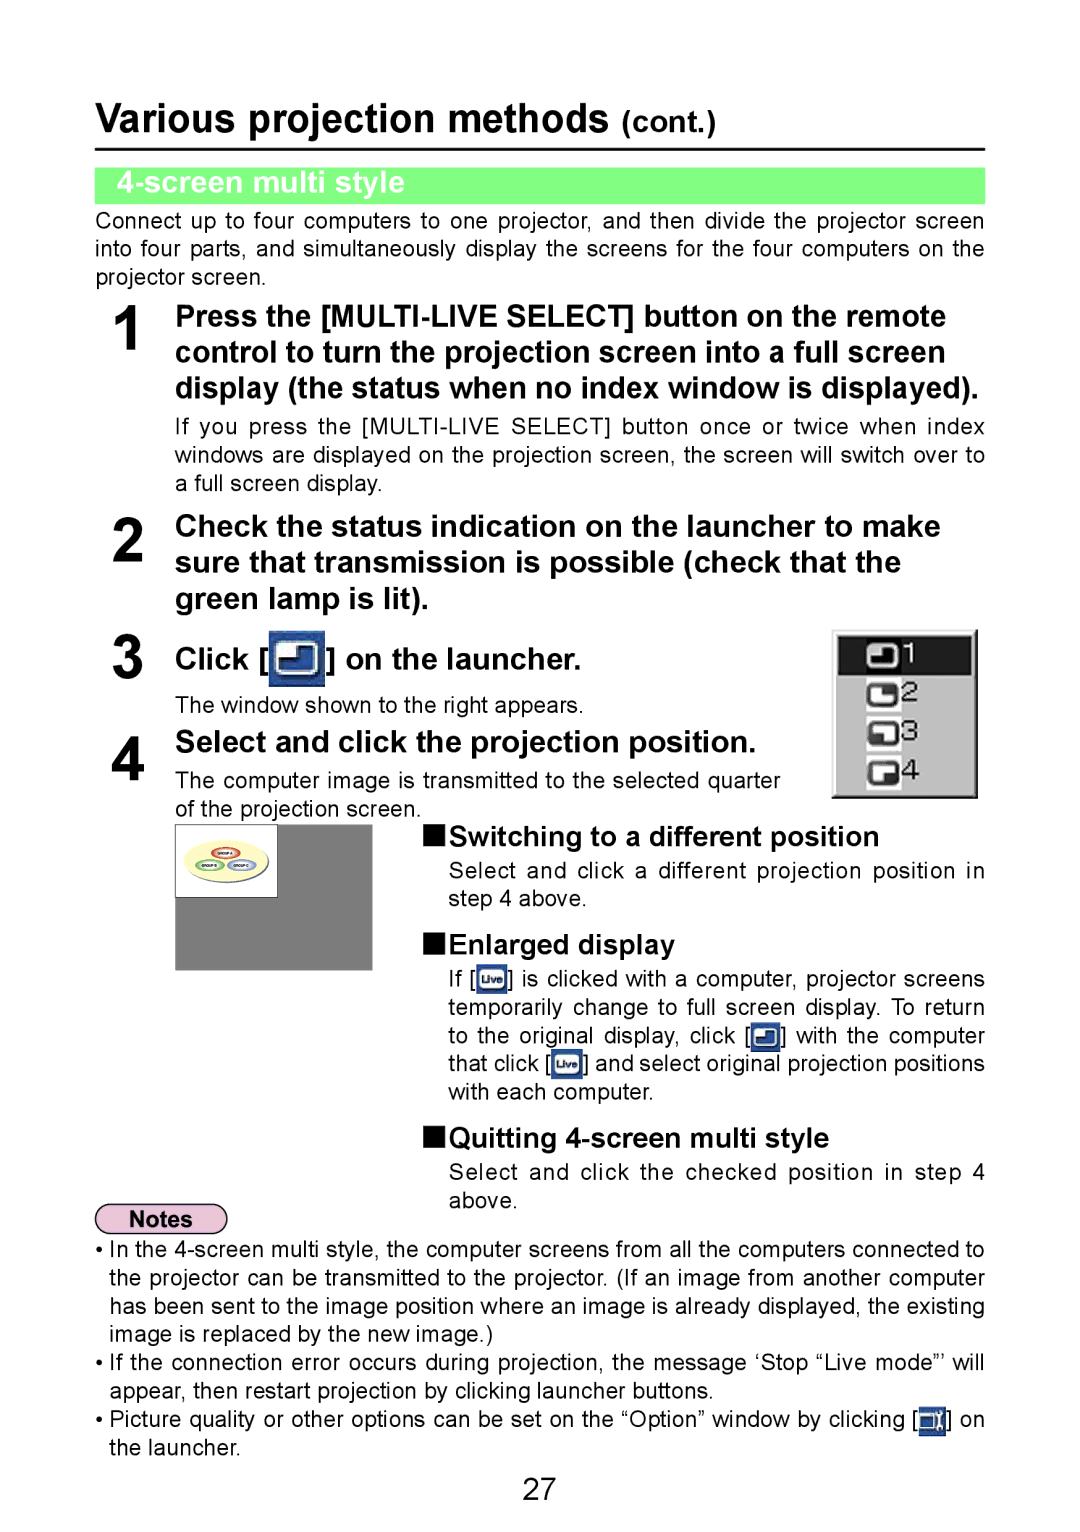
3Click [ ] on the launcher.
4 | Select and click the projection position. |
The computer image is transmitted to the selected quarter | |
| of the projection screen. |
 Switching to a different position
Select and click a different projection position in step 4 above.
 Enlarged display
If [ ] is clicked with a computer, projector screens temporarily change to full screen display. To return to the original display, click [ ] with the computer that click [ ] and select original projection positions with each computer.
 Quitting
 4-screen multi style
Select and click the checked position in step 4 above.
•In the
•If the connection error occurs during projection, the message ‘Stop “Live mode”’ will appear, then restart projection by clicking launcher buttons.
• Picture quality or other options can be set on the “Option” window by clicking [ ] on the launcher.
27