Simple Recording
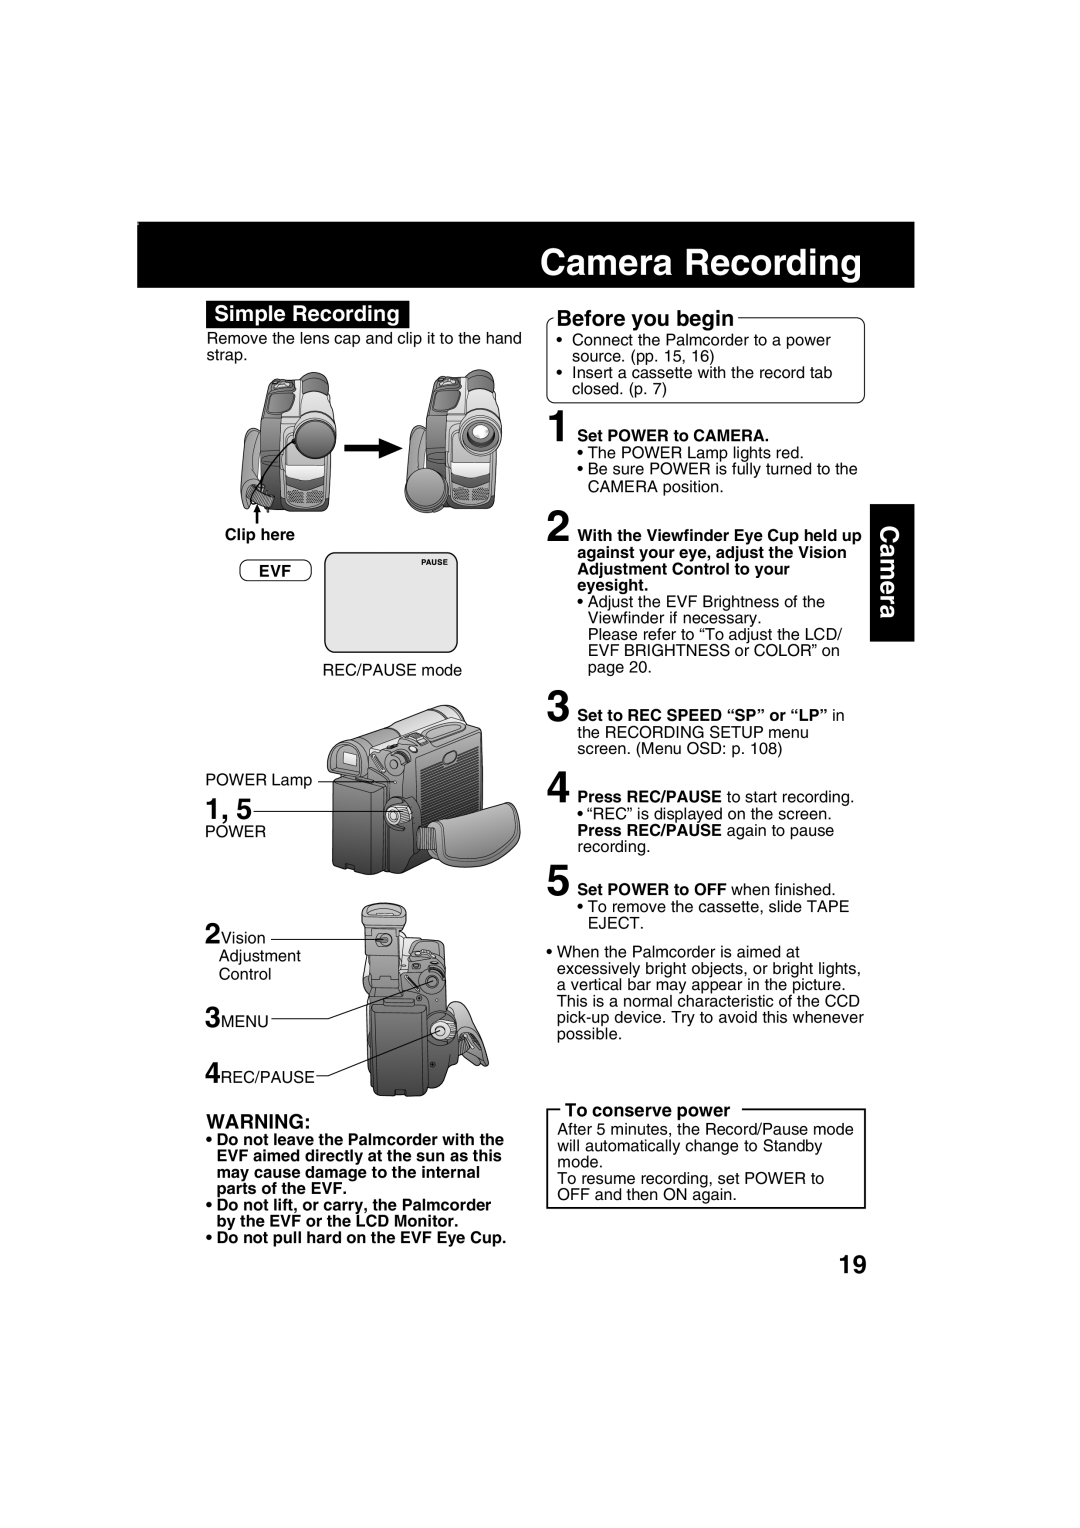
Remove the lens cap and clip it to the hand strap.
Clip here
EVF
REC/PAUSE mode
POWER Lamp ![]()
1, 5
POWER
Camera Recording
Before you begin
•Connect the Palmcorder to a power source. (pp. 15, 16)
•Insert a cassette with the record tab closed. (p. 7)
1 Set POWER to CAMERA.
•The POWER Lamp lights red.
•Be sure POWER is fully turned to the CAMERA position.
2 With the Viewfinder Eye Cup held up against your eye, adjust the Vision Adjustment Control to your eyesight.
•Adjust the EVF Brightness of the Viewfinder if necessary.
Please refer to “To adjust the LCD/ EVF BRIGHTNESS or COLOR” on page 20.
3 Set to REC SPEED “SP” or “LP” in the RECORDING SETUP menu screen. (Menu OSD: p. 108)
4 Press REC/PAUSE to start recording.
•“REC” is displayed on the screen. Press REC/PAUSE again to pause recording.
5
Camera
2Vision Adjustment Control
3MENU
4REC/PAUSE
•When the Palmcorder is aimed at excessively bright objects, or bright lights, a vertical bar may appear in the picture. This is a normal characteristic of the CCD
WARNING:
•Do not leave the Palmcorder with the EVF aimed directly at the sun as this may cause damage to the internal parts of the EVF.
•Do not lift, or carry, the Palmcorder by the EVF or the LCD Monitor.
•Do not pull hard on the EVF Eye Cup.
To conserve power
After 5 minutes, the Record/Pause mode will automatically change to Standby mode.
To resume recording, set POWER to OFF and then ON again.
19