Audio Dubbing using the Built-in Microphone
The original sound can be replaced with new sound using the
![]()
![]()
![]()
![]()
![]()
![]()
![]()
![]()
![]()
![]()
![]()
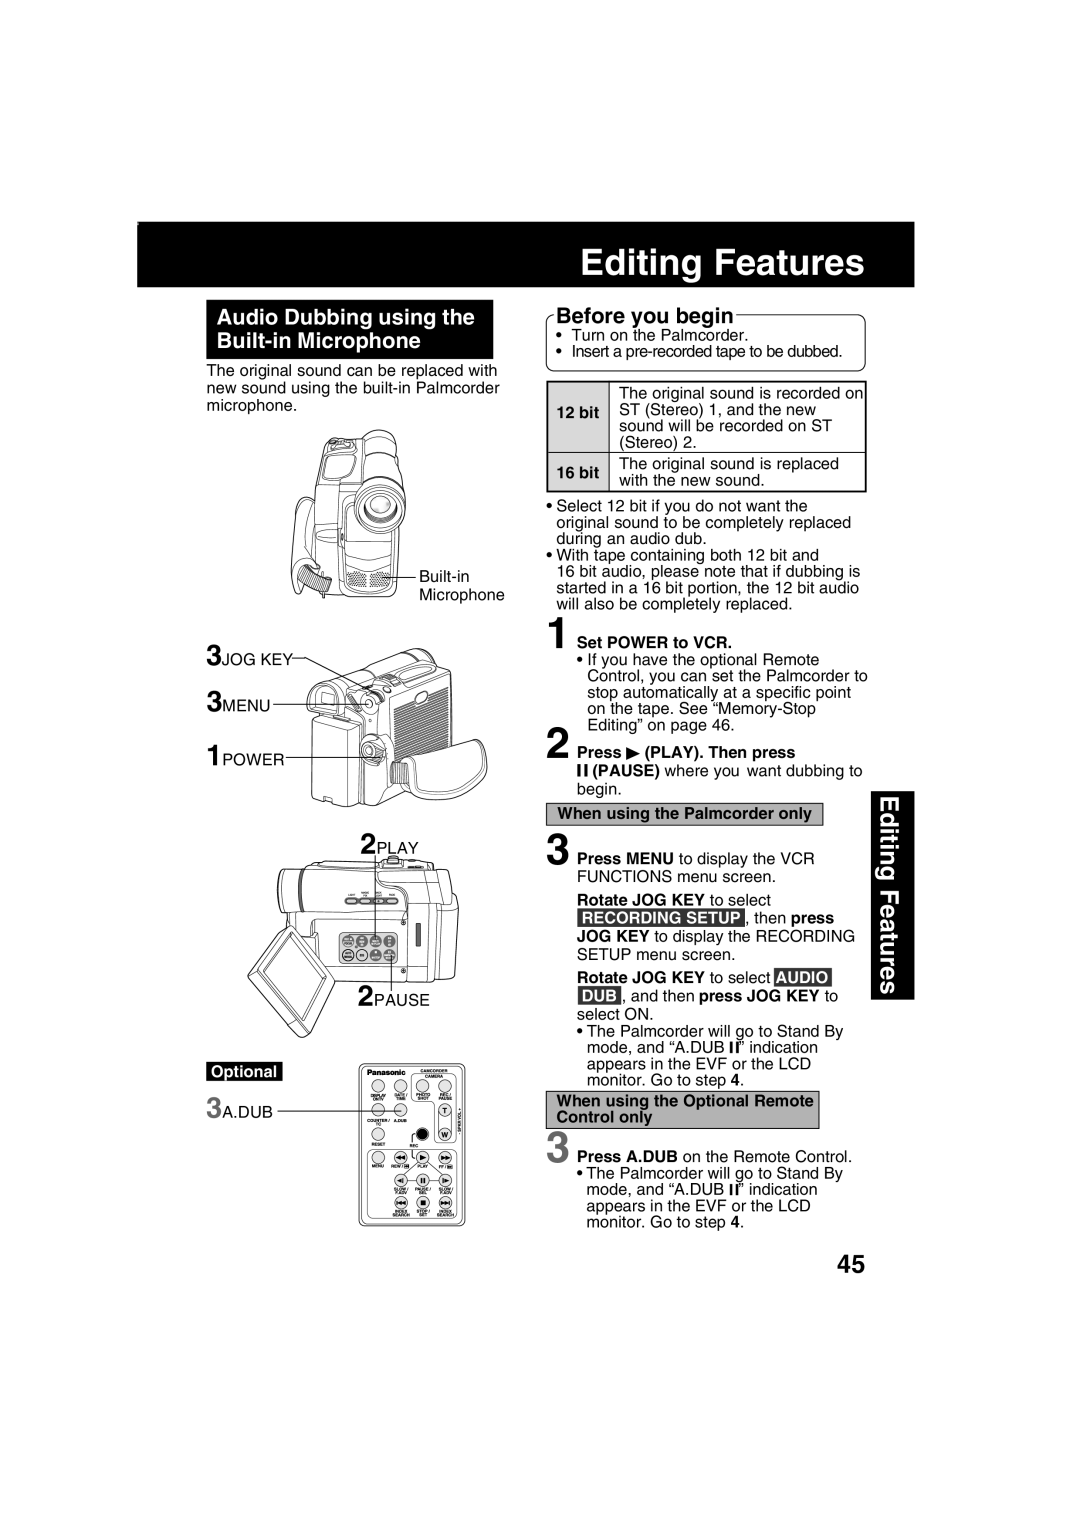
Microphone
3JOG KEY
3MENU
1POWER
2PLAY
2PAUSE
Optional
3A.DUB
Editing Features
Before you begin
•Turn on the Palmcorder.
•Insert a
| The original sound is recorded on | |
12 bit | ST (Stereo) 1, and the new | |
| sound will be recorded on ST | |
| (Stereo) 2. | |
16 bit | The original sound is replaced | |
with the new sound. | ||
|
•Select 12 bit if you do not want the original sound to be completely replaced during an audio dub.
•With tape containing both 12 bit and
16 bit audio, please note that if dubbing is started in a 16 bit portion, the 12 bit audio will also be completely replaced.
1 Set POWER to VCR.
•If you have the optional Remote Control, you can set the Palmcorder to stop automatically at a specific point on the tape. See
2 Press (PLAY). Then press |
| ||||||||
|
| (PAUSE) where you want dubbing to |
| ||||||
begin. |
| ||||||||
Editing | |||||||||
|
|
|
|
|
|
|
| ||
When using the Palmcorder only |
|
| |||||||
|
| ||||||||
3 Press MENU to display the VCR |
|
|
| ||||||
FUNCTIONS menu screen. | Features | ||||||||
Rotate JOG KEY to select | |||||||||
| |||||||||
| RECORDING SETUP | , then press |
| ||||||
| JOG KEY to display the RECORDING |
| |||||||
SETUP menu screen. |
| ||||||||
Rotate JOG KEY to select |
|
|
|
| |||||
AUDIO |
| ||||||||
| DUB | , and then press JOG |
|
|
|
| |||
| KEY to |
| |||||||
| |||||||||
| select | ON. |
| ||||||
•The Palmcorder will go to Stand By mode, and “A.DUB ![]()
![]() ” indication appears in the EVF or the LCD monitor. Go to step 4.
” indication appears in the EVF or the LCD monitor. Go to step 4.
When using the Optional Remote
Control only
3 Press A.DUB on the Remote Control.
•The Palmcorder will go to Stand By mode, and “A.DUB ![]()
![]() ” indication appears in the EVF or the LCD monitor. Go to step 4.
” indication appears in the EVF or the LCD monitor. Go to step 4.
45