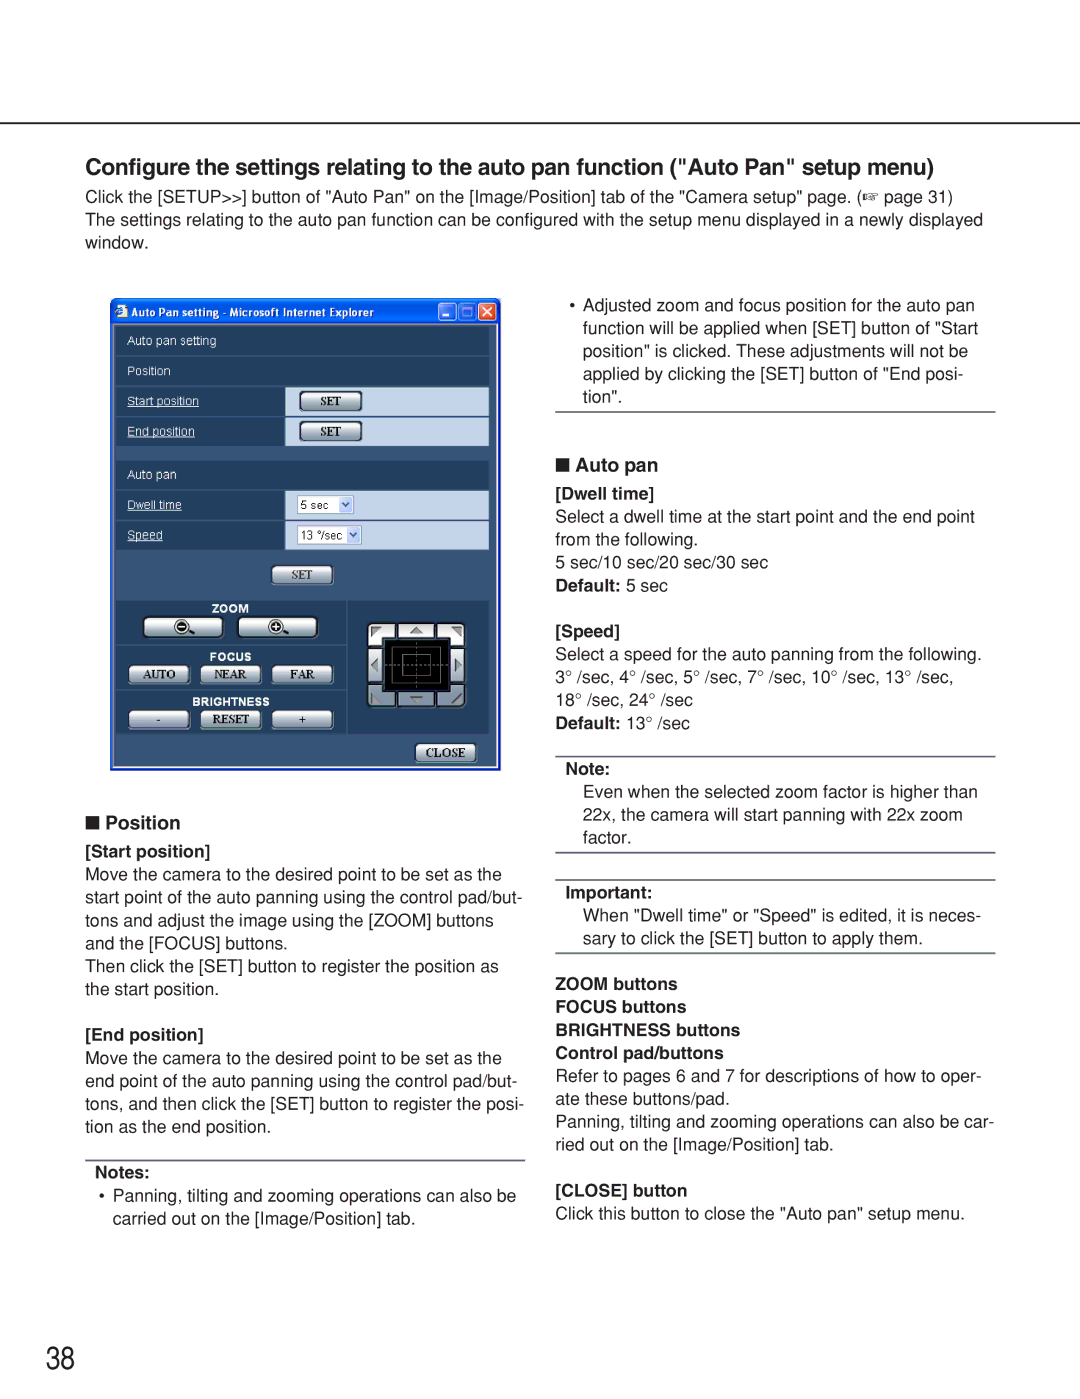
Configure the settings relating to the auto pan function ("Auto Pan" setup menu)
Click the [SETUP>>] button of "Auto Pan" on the [Image/Position] tab of the "Camera setup" page. (☞ page 31) The settings relating to the auto pan function can be configured with the setup menu displayed in a newly displayed window.
■Position
[Start position]
Move the camera to the desired point to be set as the start point of the auto panning using the control pad/but- tons and adjust the image using the [ZOOM] buttons and the [FOCUS] buttons.
Then click the [SET] button to register the position as the start position.
[End position]
Move the camera to the desired point to be set as the end point of the auto panning using the control pad/but- tons, and then click the [SET] button to register the posi- tion as the end position.
Notes:
•Panning, tilting and zooming operations can also be carried out on the [Image/Position] tab.
•Adjusted zoom and focus position for the auto pan function will be applied when [SET] button of "Start position" is clicked. These adjustments will not be applied by clicking the [SET] button of "End posi- tion".
■Auto pan
[Dwell time]
Select a dwell time at the start point and the end point from the following.
5 sec/10 sec/20 sec/30 sec Default: 5 sec
[Speed]
Select a speed for the auto panning from the following. 3° /sec, 4° /sec, 5° /sec, 7° /sec, 10° /sec, 13° /sec, 18° /sec, 24° /sec
Default: 13° /sec
Note:
Even when the selected zoom factor is higher than 22x, the camera will start panning with 22x zoom factor.
Important:
When "Dwell time" or "Speed" is edited, it is neces- sary to click the [SET] button to apply them.
ZOOM buttons
FOCUS buttons
BRIGHTNESS buttons
Control pad/buttons
Refer to pages 6 and 7 for descriptions of how to oper- ate these buttons/pad.
Panning, tilting and zooming operations can also be car- ried out on the [Image/Position] tab.
[CLOSE] button
Click this button to close the "Auto pan" setup menu.
38
