3. Using the Web Interface
IP QoS
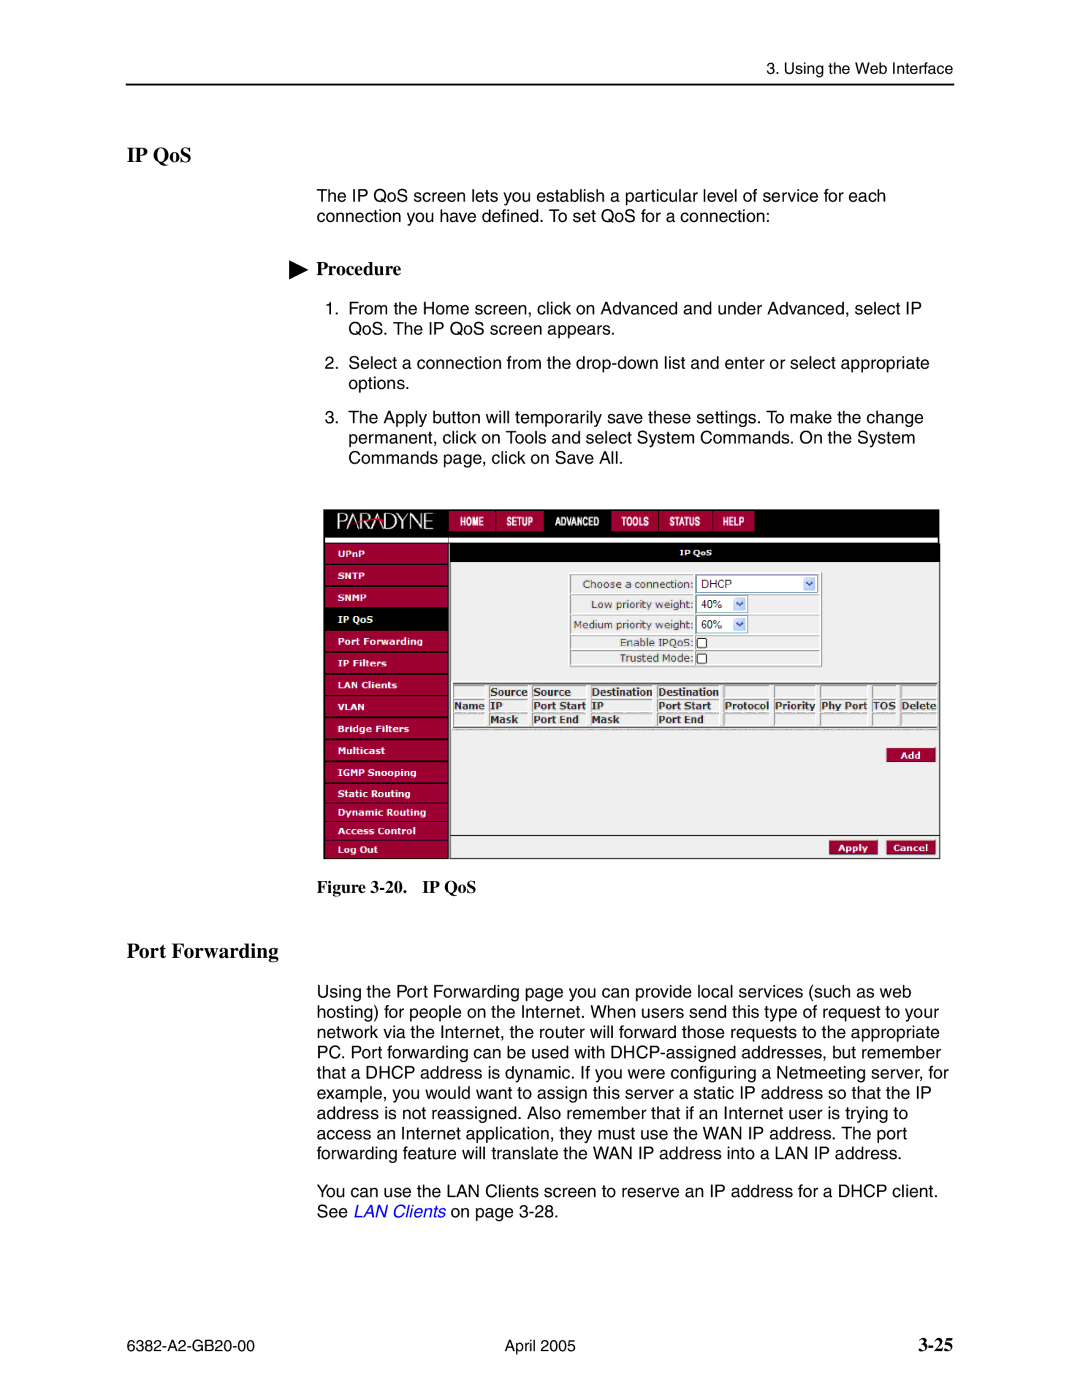
The IP QoS screen lets you establish a particular level of service for each connection you have defined. To set QoS for a connection:
 Procedure
1.From the Home screen, click on Advanced and under Advanced, select IP QoS. The IP QoS screen appears.
2.Select a connection from the
3.The Apply button will temporarily save these settings. To make the change permanent, click on Tools and select System Commands. On the System Commands page, click on Save All.
Figure 3-20. IP QoS
Port Forwarding
Using the Port Forwarding page you can provide local services (such as web hosting) for people on the Internet. When users send this type of request to your network via the Internet, the router will forward those requests to the appropriate PC. Port forwarding can be used with
You can use the LAN Clients screen to reserve an IP address for a DHCP client. See LAN Clients on page
April 2005 |
